Think of GitLab CI/CD as your personal robot helper for developing software!
When you commit code to GitLab, your robot wakes up and jumps into action.
First, Robo-Test runs to check your code for bugs. Beep boop — testing completed!
If your code looks good, Robo-Builder springs up to get your app ready to ship. Zoom Zoom — build completed!
Once built, Robo-Deployer takes over to send your code onto servers and into production. Wooosh — deployed!
All along the way, GitLab-Bot is monitoring everything, sending you status updates so you know your robot friends did their jobs.
Whenever you commit new code, this automated DevOps crew comes alive to inspect, prepare, and ship your code to users.
You just keep coding, pushing commits, and letting your personal GitLab robot army handle the heavy lifting!
So in a nutshell, think of GitLab CI/CD as an efficient software robot sidekick — your very own DevOps Autobot!
1. GitLab: GitLab is a platform that developers use to store and collaborate on their code. It’s like a virtual workspace for coding projects.
2. CI/CD: CI stands for “Continuous Integration,” and CD stands for “Continuous Deployment” or “Continuous Delivery.”
- Continuous Integration (CI): This is like a digital assembly line. Every time a developer makes changes to the code, CI tools automatically check if those changes work well with the existing code. It’s like a “test run” to catch any mistakes early on.
- Continuous Deployment/Delivery (CD): Once the code is tested and ready, CD tools help automatically release it to production. It’s like an automatic delivery system for software.
In Simple Words: GitLab CI/CD is a system that helps developers automatically check their code to catch errors and, if everything is okay, automatically release their software without manual work. It’s like having robots that test and deliver your code for you, saving time and reducing errors. 🤖🚀
GitLab: — https://gitlab.com/mudit097/terraform-ec2
1. IAM User 👤🔐
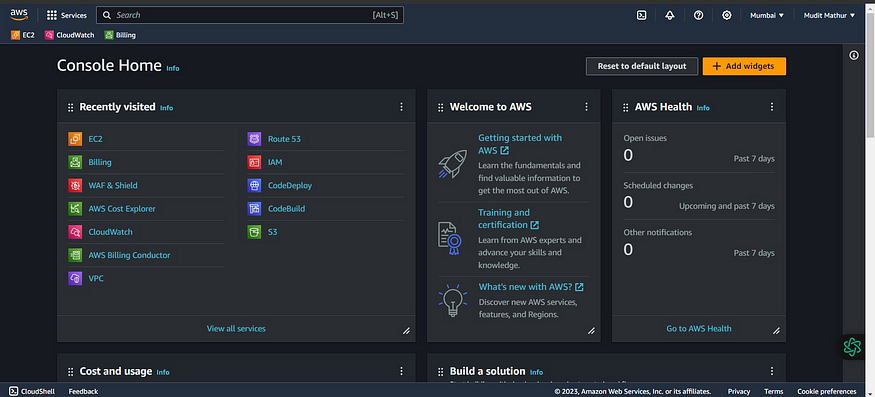
Navigate to the AWS console
Click the “Search” field.
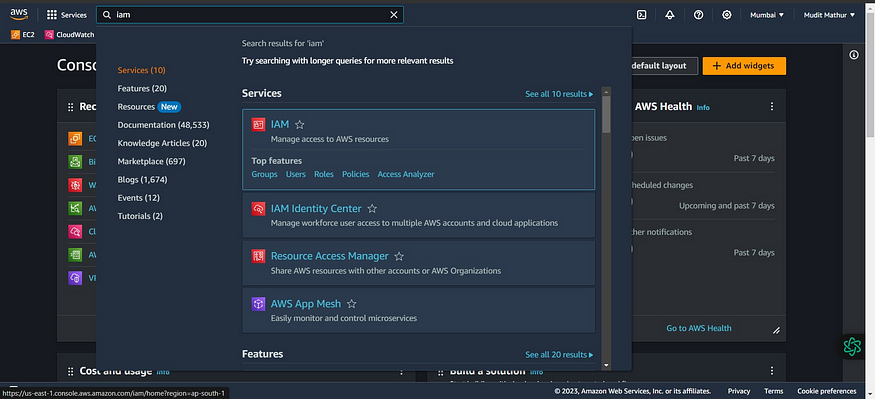
Search for IAM
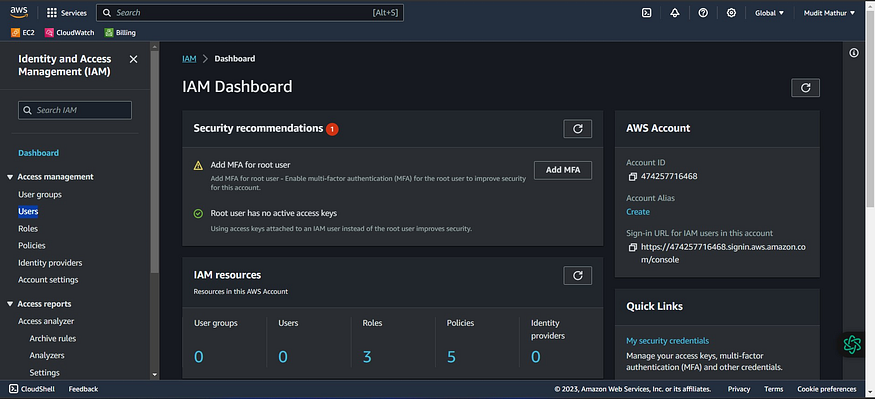
Click “Users”
Click “Create users”
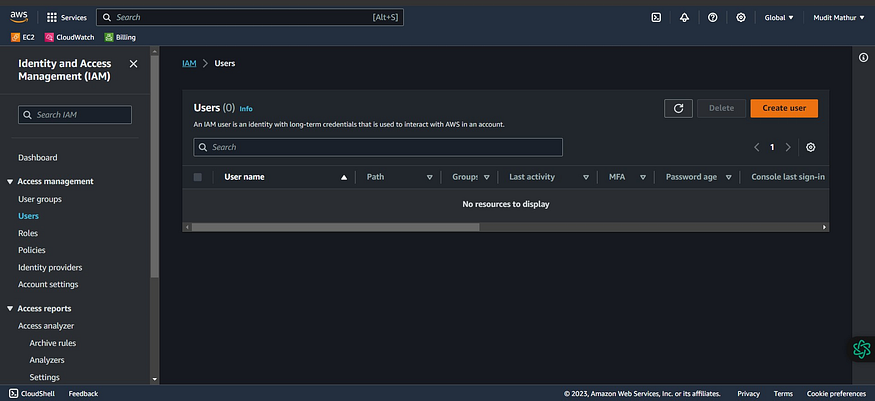
Click the “User name” field.
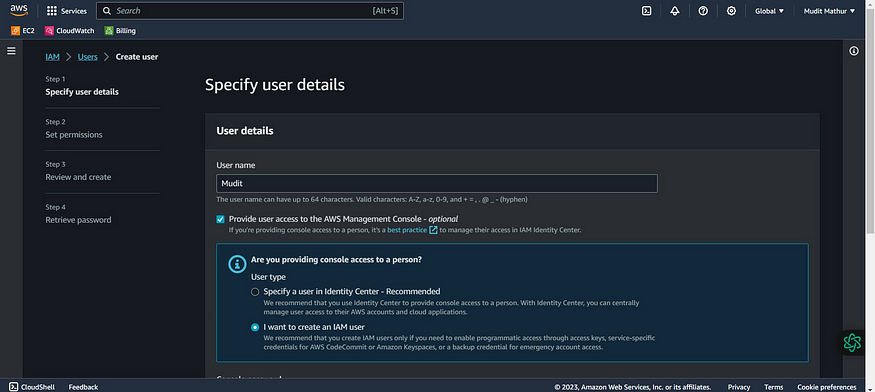
Type “Mudit” or as you wish about the name

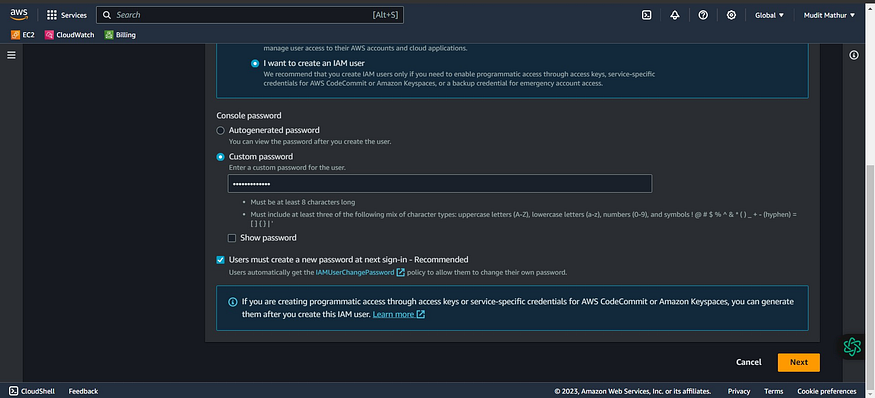
Click Next
Click “Attach policies directly”
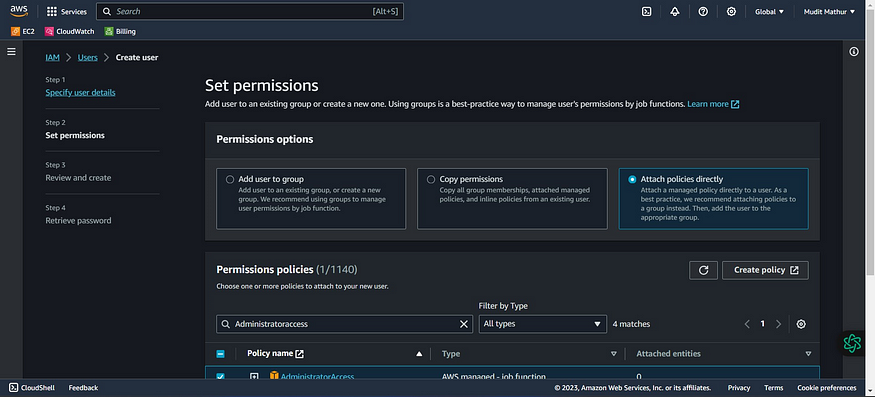
Click this checkbox with “AdministratorAccess”
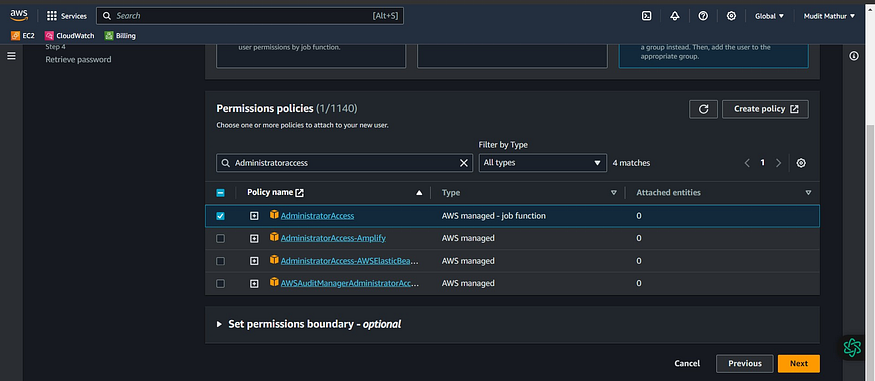
Click Next
Review and create
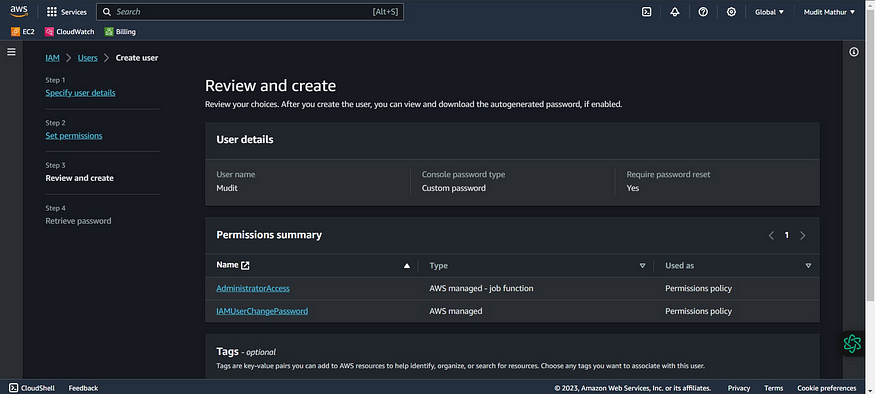
Click “Create user”

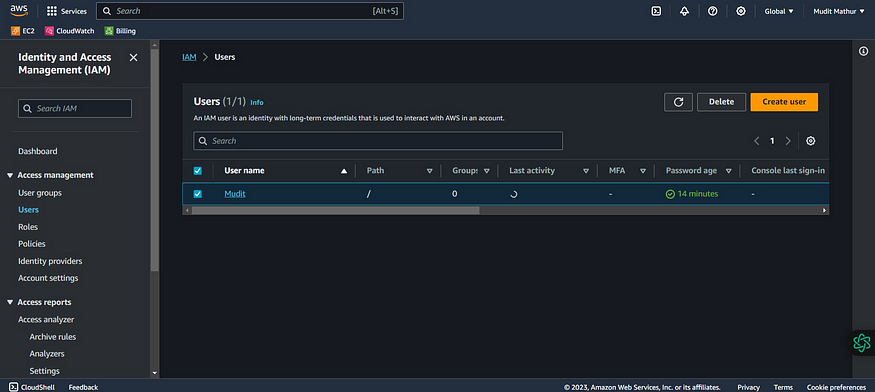
Click newly created user in my case “Mudit”
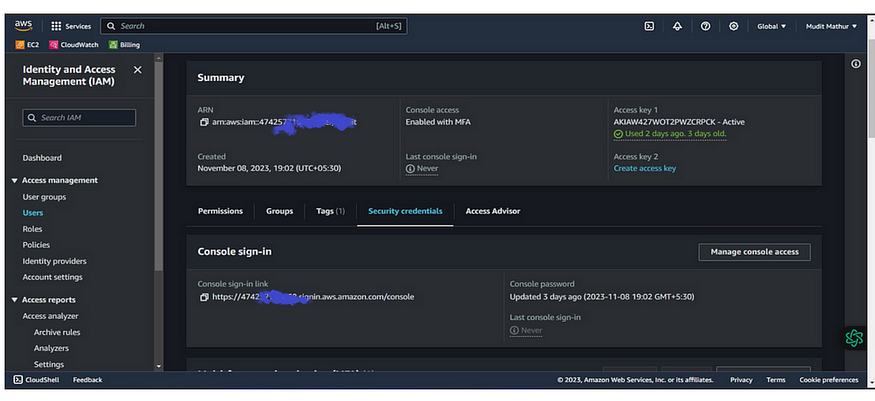
Click “Security credentials”
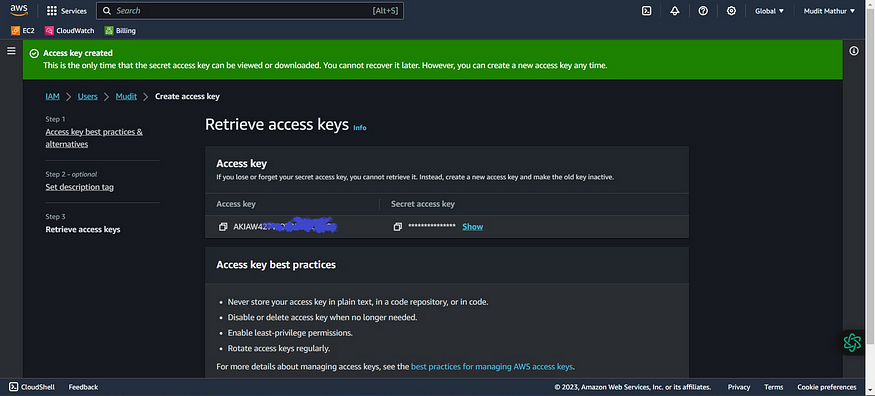
Click “Create access key”
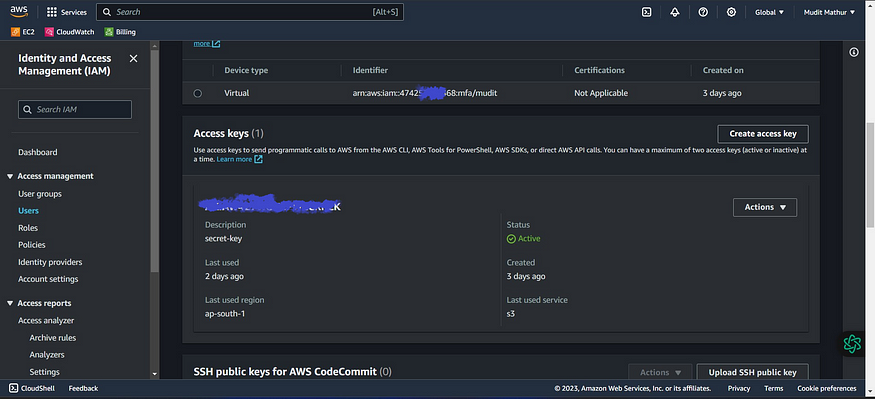
Click this radio button with the CLI
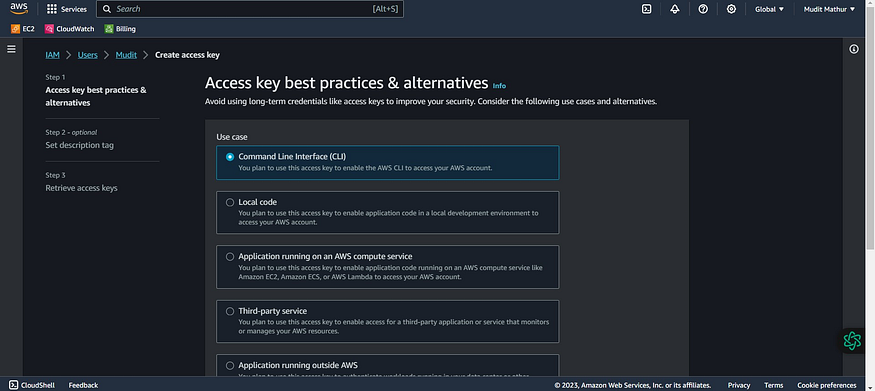
Agree to terms
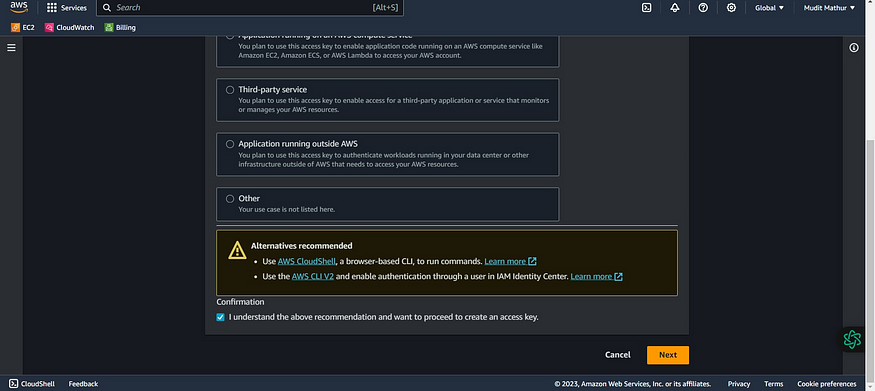
Click Next
Click “Create access key”
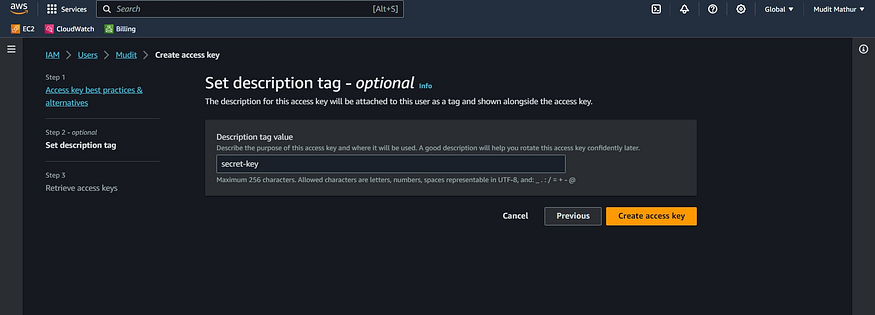
Download .csv file
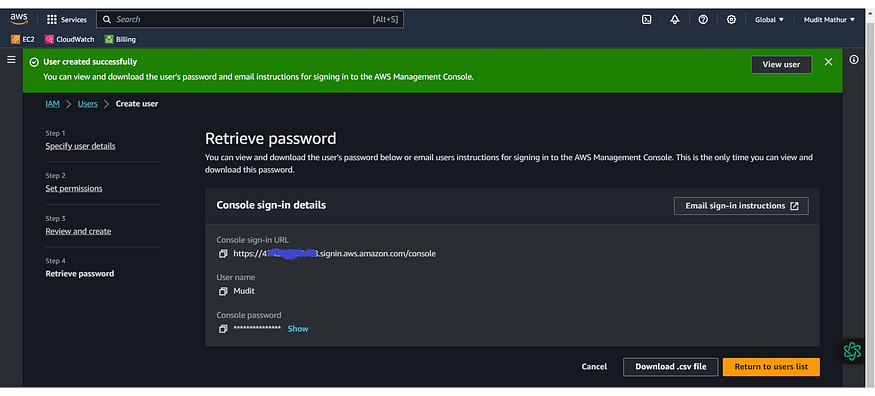
2. GitLab Setup 🌐🛠️
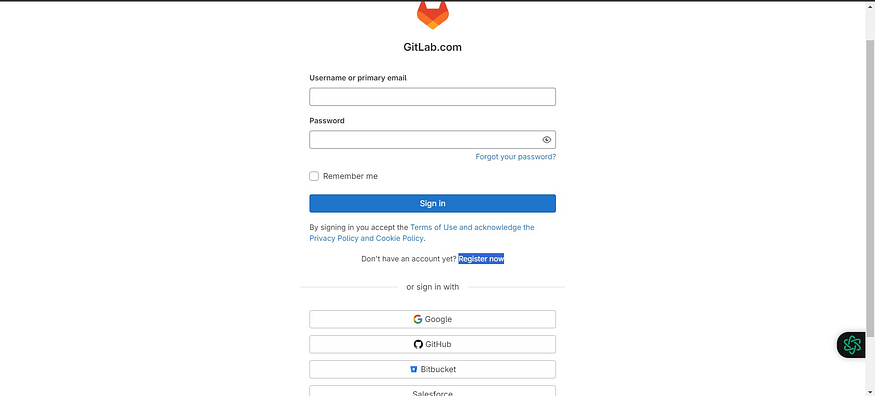
Go to https://gitlab.com/
Click on Register now (or)
The easy choice is to click on GitHub it will create an account.
3. Terraform Files 📄🏗️
Create a blank repository in Gitlab and add these files
 resource "aws_security_group" "Jenkins-sg" {
  name        = "Jenkins-Security Group"
  description = "Open 22,443,80,8080"

  # Define a single ingress rule to allow traffic on all specified ports
  ingress = [
    for port in [22, 80, 443, 8080] : {
      description      = "TLS from VPC"
      from_port        = port
      to_port          = port
      protocol         = "tcp"
      cidr_blocks      = ["0.0.0.0/0"]
      ipv6_cidr_blocks = []
      prefix_list_ids  = []
      security_groups  = []
      self             = false
    }
  ]

  egress {
    from_port   = 0
    to_port     = 0
    protocol    = "-1"
    cidr_blocks = ["0.0.0.0/0"]
  }

  tags = {
    Name = "Jenkins-sg"
  }
}


resource "aws_instance" "web" {
  ami                    = "ami-0f5ee92e2d63afc18"  #change Ami if you different region
  instance_type          = "t2.medium"
  key_name               = "Mumbai"   #change key name
  vpc_security_group_ids = [aws_security_group.Jenkins-sg.id]
  user_data              = templatefile("./install_jenkins.sh", {})

  tags = {
    Name = "Jenkins-sonar"
  }
  root_block_device {
    volume_size = 8
  }
}
terraform {
  required_providers {
    aws = {
      source  = "hashicorp/aws"
      version = "~> 5.0"
    }
  }
}

# Configure the AWS Provider
provider "aws" {
  region = "ap-south-1"     #change to desired region.
}
install_jenkins.sh
#!/bin/bash
exec > >(tee -i /var/log/user-data.log)
exec 2>&1
sudo apt update -y
sudo apt install software-properties-common
sudo add-apt-repository --yes --update ppa:ansible/ansible
sudo apt install ansible -y
sudo apt install git -y
mkdir Ansible && cd Ansible
pwd
git clone https://github.com/mudit097/ANSIBLE.git
cd ANSIBLE
ansible-playbook -i localhost Jenkins-playbook.yml
terraform {
  backend "s3" {
    bucket = "<s3-bucket>" # Replace with your actual S3 bucket name
    key    = "Gitlab/terraform.tfstate"
    region = "ap-south-1"
  }
}
4. GitLab Secrets 🔒🔑
Inside your repository
Click on Settings → ci/cd
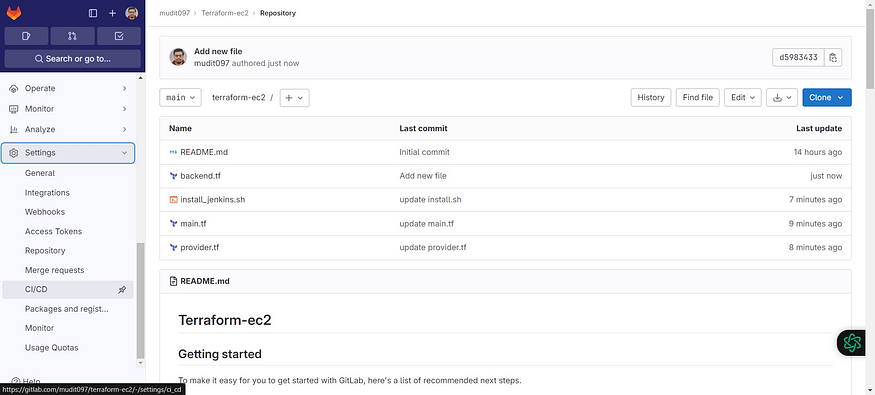
Click on Expand at variables
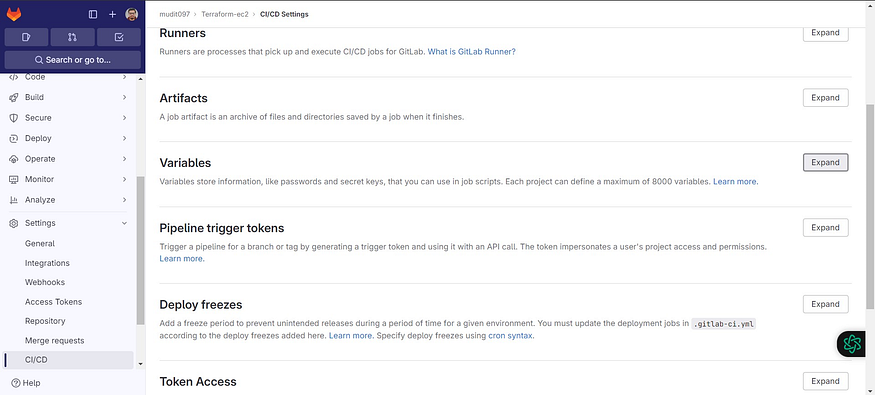
Click on Add variable
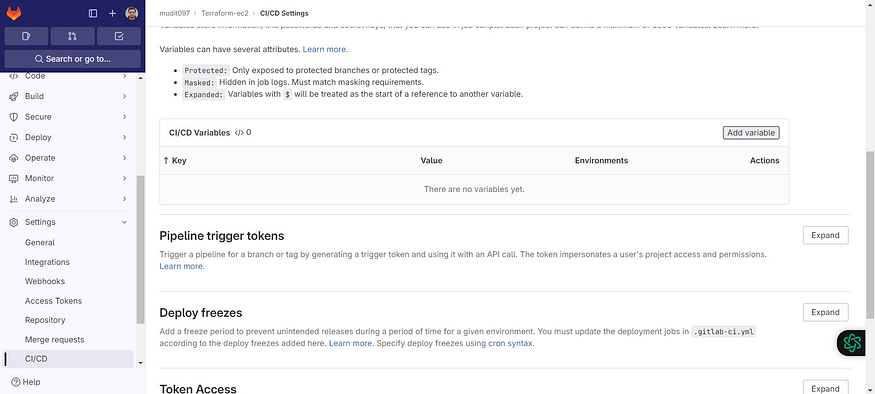
Select the Mask variable and expand variable checkboxes
For key use AWS_ACCESS_KEY_ID
For value use the AWS key that is generated for IAM user.
Add variable
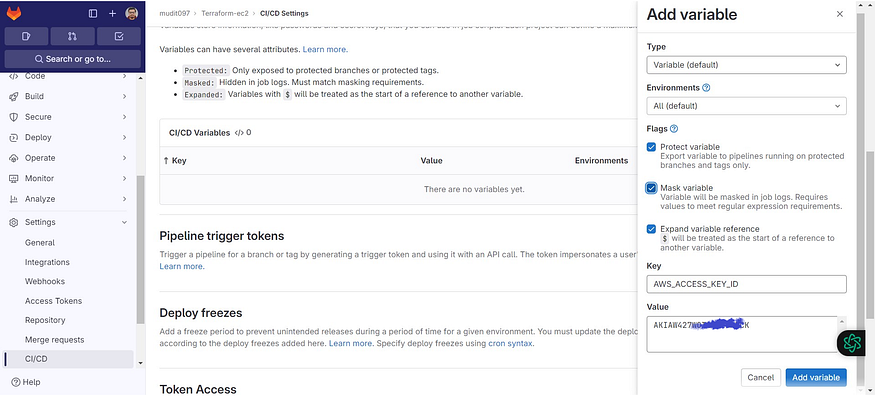
The key is added, now for the secret access key
Click on Add variable
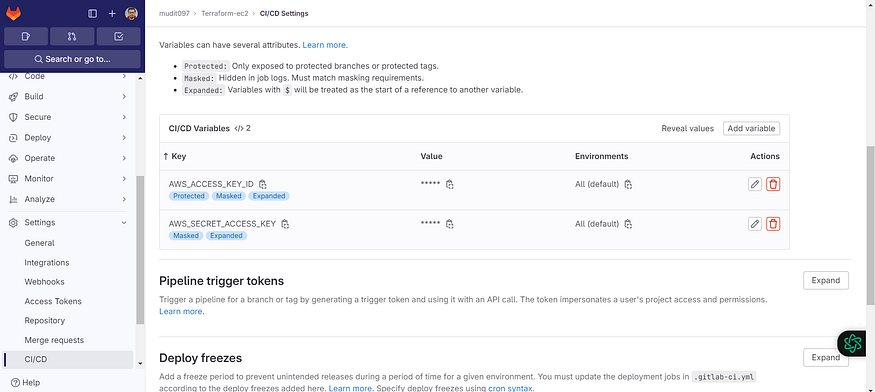
Select the Mask variable and expand variable checkboxes
For key use AWS_SECRET_ACCESS_KEY
For value use the AWS key that is generated for IAM user.
Add variable

The keys are added.

5. CI/CD Configuration 🔄🛠️
stages:
  - validate
  - plan
  - apply
  - destroy
stages:: This section defines the stages in the CI/CD pipeline. In your configuration, you have four stages: validate, plan, apply, and destroy.
image:
  name: hashicorp/terraform:light
  entrypoint:
    - '/usr/bin/env'
    - 'PATH=/usr/local/sbin:/usr/local/bin:/usr/sbin:/usr/bin:/sbin:/bin'
image:: Specifies the Docker image to use for the GitLab Runner. In this case, you're using the "hashicorp/terraform:light" image for running Terraform commands. The entrypoint lines set the environment to include commonly used paths.
before_script:
  - export AWS_ACCESS_KEY=${AWS_ACCESS_KEY_ID}
  - export AWS_SECRET_ACCESS_KEY=${AWS_SECRET_ACCESS_KEY}
  - rm -rf .terraform
  - terraform --version
  - terraform init
before_script:: This section defines commands to run before each job in the pipeline.
The first two lines export the AWS access key and secret access key as environment variables, which are used for AWS authentication in your Terraform configuration.
rm -rf .terraform: This removes any existing Terraform configuration files and state files to ensure a clean environment.terraform --version: Displays the Terraform version for debugging and version confirmation.terraform init: Initializes Terraform in the working directory, setting up the environment for Terraform operations.
validate:
  stage: validate
  script:
    - terraform validate
validate:: Defines a job named "validate" in the "validate" stage. This job validates the Terraform configuration.
script:: Specifies the commands to run as part of this job. In this case, it runsterraform validateto check the syntax and structure of your Terraform files.
plan:
  stage: plan
  script:
    - terraform plan -out=tfplan
  artifacts:
    paths:
      - tfplan
plan:: This job, in the "plan" stage, creates a Terraform plan.
script:: Runsterraform plan -out=tfplan, which generates a plan and saves it as "tfplan" in the working directory.artifacts:: Specifies the artifacts (output files) of this job. In this case, it specifies that the "tfplan" file should be preserved as an artifact.
apply:
  stage: apply
  script:
    - terraform apply -auto-approve tfplan
  dependencies:
    - plan
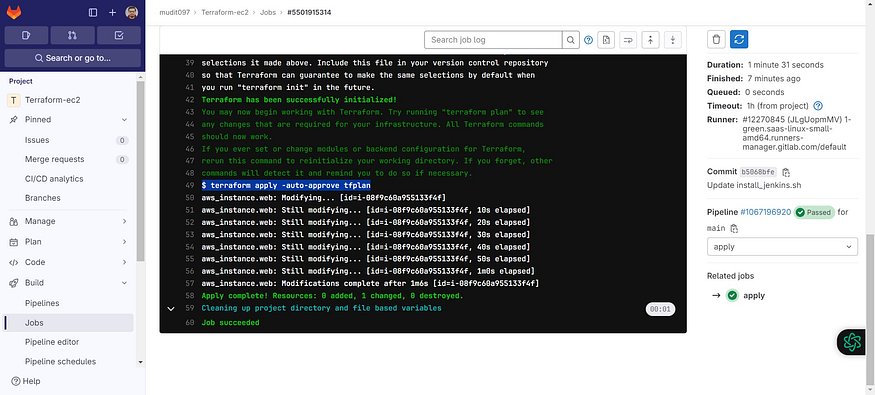
apply:: This job, in the "apply" stage, applies the Terraform plan generated in the previous stage.
script:: Runsterraform apply -auto-approve tfplan, which applies the changes specified in the "tfplan" file.dependencies:: Specifies that this job depends on the successful completion of the "plan" job.
destroy:
  stage: destroy
  script:
    - terraform init
    - terraform destroy -auto-approve
  when: manual
  dependencies:
    - apply
destroy:: This job, in the "destroy" stage, is intended for destroying the Terraform-managed resources.
script:: Runsterraform initto initialize the Terraform environment and then runsterraform destroy -auto-approveto destroy the resources. The-auto-approveflag ensures non-interactive execution.when: manual: Specifies that this job should be triggered manually by a user.dependencies:: Ensures that this job depends on the successful completion of the "apply" job, meaning you can only destroy resources that have been applied by a prior "apply" job.
6. .gitlab-ci.yml 📜⚙️
Full Gitlab CI/CD configuration file and add it to the repository
Click on +
Click on New file

stages:
  - validate
  - plan
  - apply
  - destroy

image:
  name: hashicorp/terraform:light
  entrypoint:
    - '/usr/bin/env'
    - 'PATH=/usr/local/sbin:/usr/local/bin:/usr/sbin:/usr/bin:/sbin:/bin'
before_script:
  - export AWS_ACCESS_KEY=${AWS_ACCESS_KEY_ID}
  - export AWS_SECRET_ACCESS_KEY=${AWS_SECRET_ACCESS_KEY}
  - rm -rf .terraform
  - terraform --version
  - terraform init

validate:
  stage: validate
  script:
    - terraform validate

plan:
  stage: plan
  script:
    - terraform plan -out=tfplan
  artifacts:
    paths:
      - tfplan

apply:
  stage: apply
  script:
    - terraform apply -auto-approve tfplan
  dependencies:
    - plan

destroy:
  stage: destroy
  script:
    - terraform init
    - terraform destroy -auto-approve
  when: manual
  dependencies:
    - apply
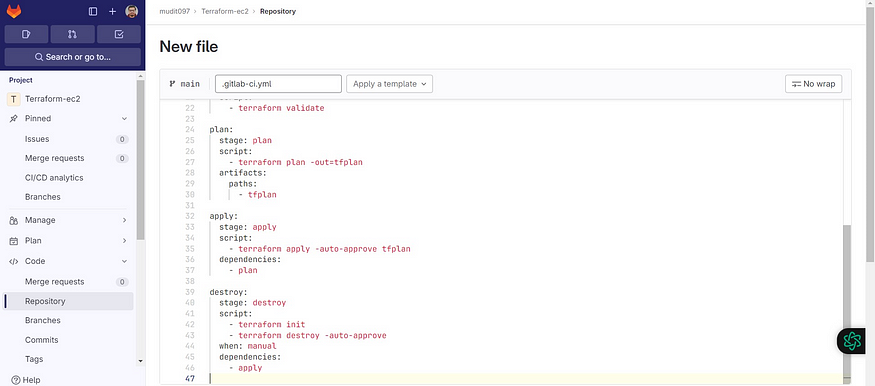
Click commit.
It will automatically start the build.
Now click on Build → Pipelines
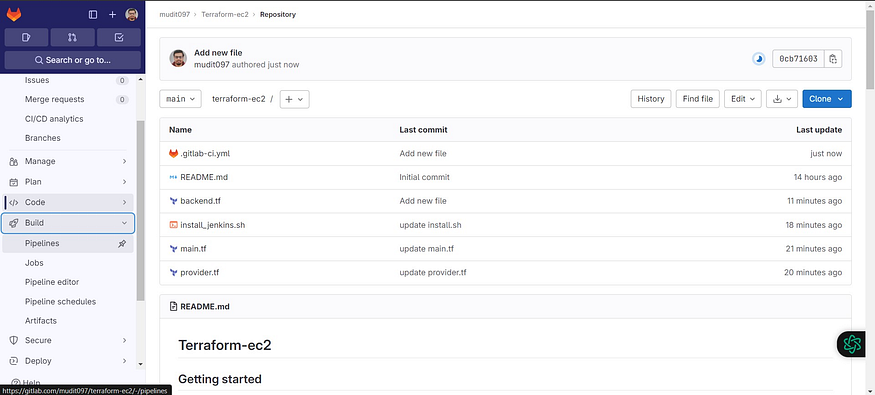
Build started.
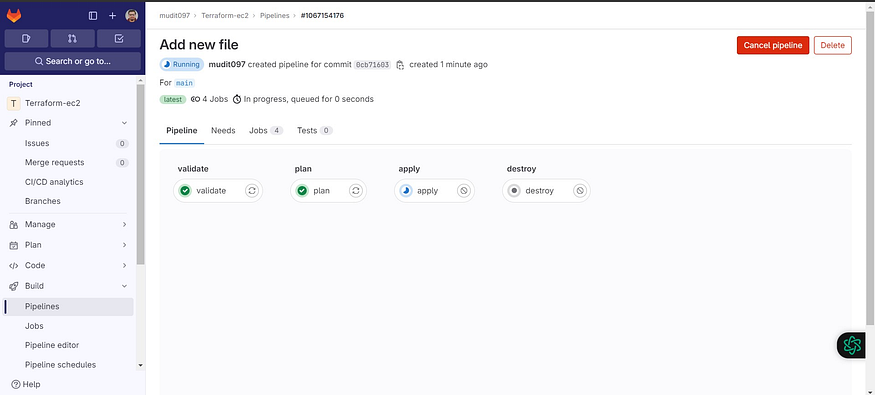
Click on Running or stages
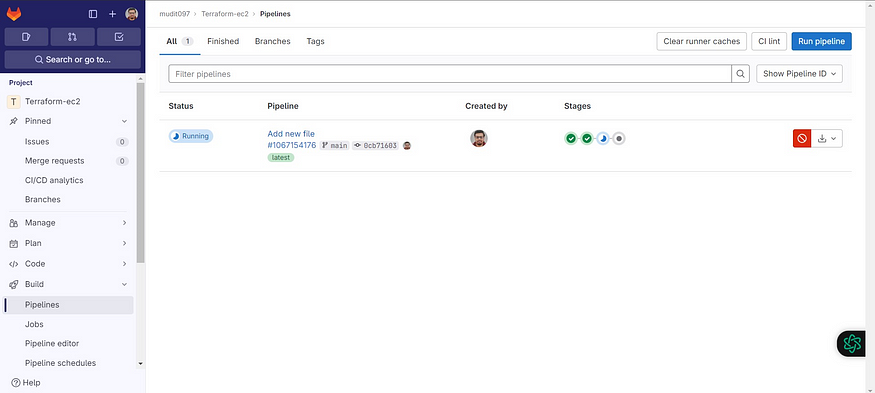
It will open like this
Click on validate to see the build output.
Initialized and validated terraform code.
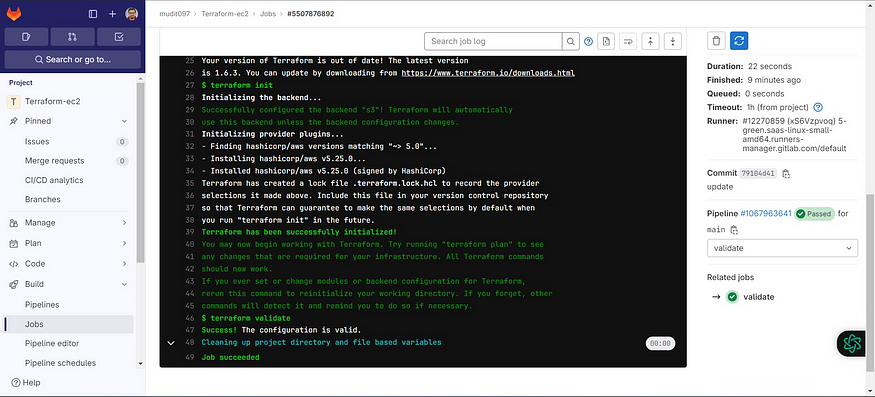
Click on Jobs to come back.
See plan output
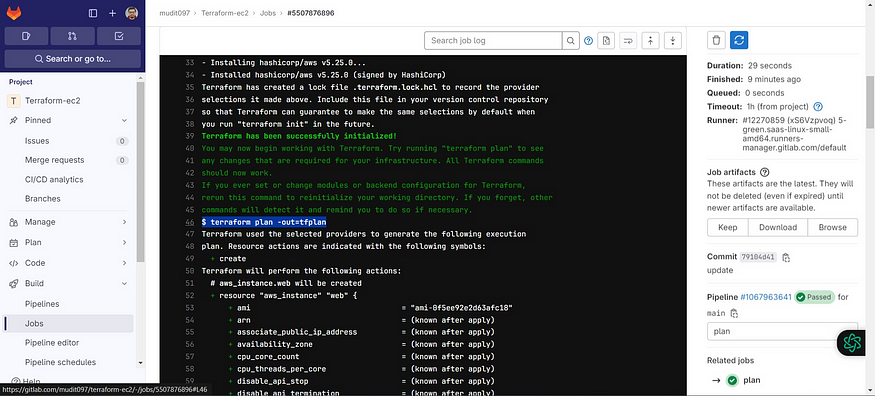
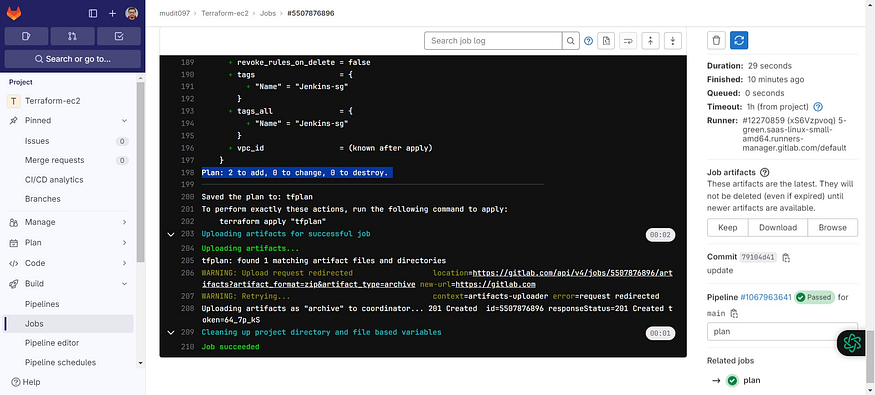
Now come back and see apply output also.
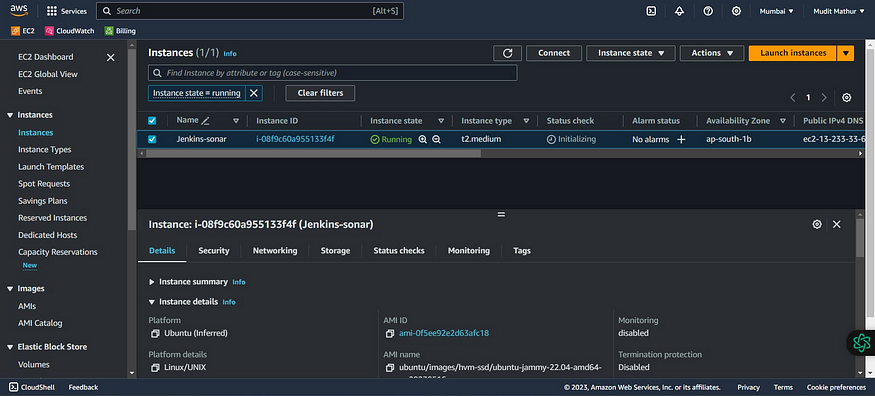
Go to the AWS console and see whether it’s provisioned Ec2 or not.
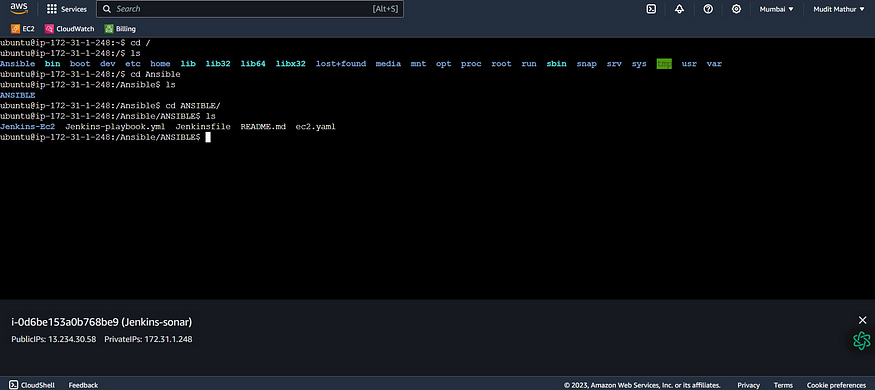
Connect the instance to Putty or Mobaxtreme.
Use the below commands
cd /
cd Ansible  #mkdir used in shell script
cd ANSIBLE  #cloned repo
ls  #to see ansible playbook
Now come back to
cd /home/ubuntu
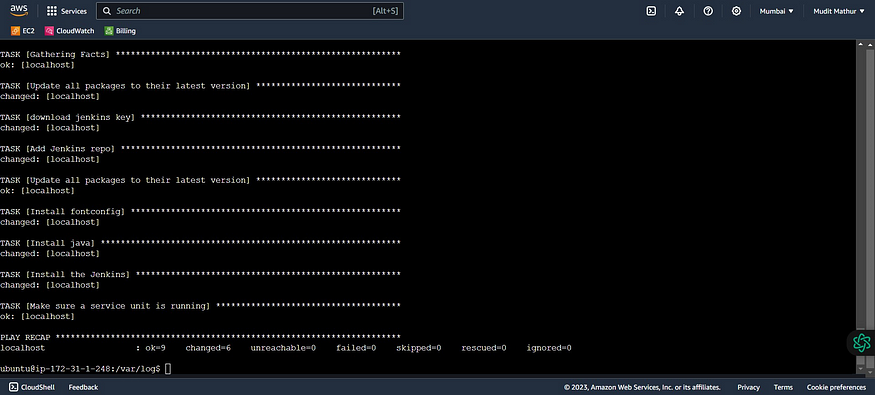
cd /var/log/
ls
cat user-data.log
It’s completed running the Ansible playbook to install Jenkins.

Copy the public IP of the ec2 instance
<Ec2-public-ip:8080>
sudo cat /var/lib/jenkins/secrets/initialAdminPassword
Copy the password and sign in.

7. Destroy ☠️🔥
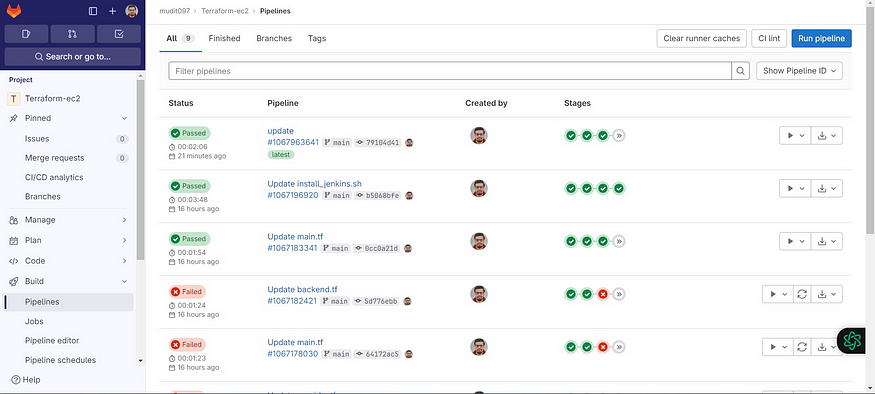
Go back to Gitlab
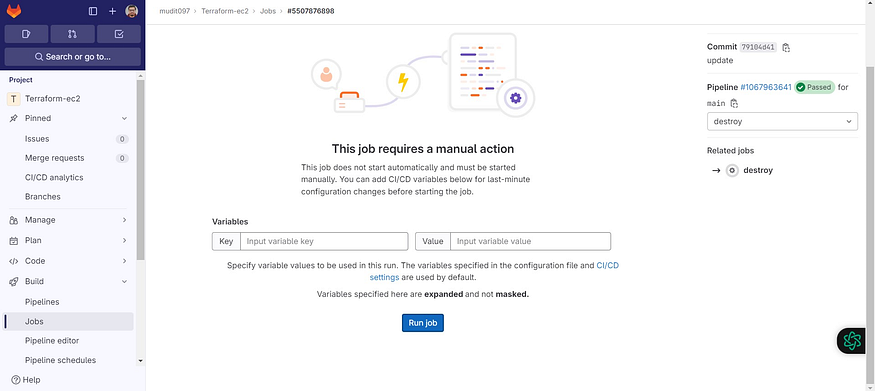
We need to manually provide destroy to delete resources.
Click on >> in stages
Now select destroy and the Run job
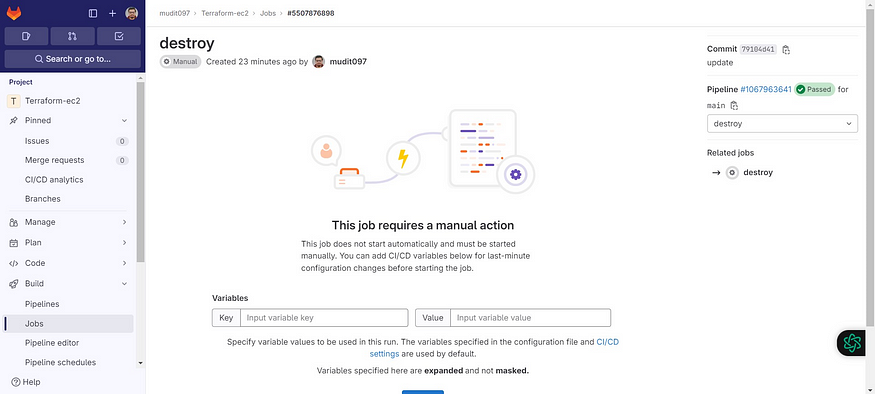
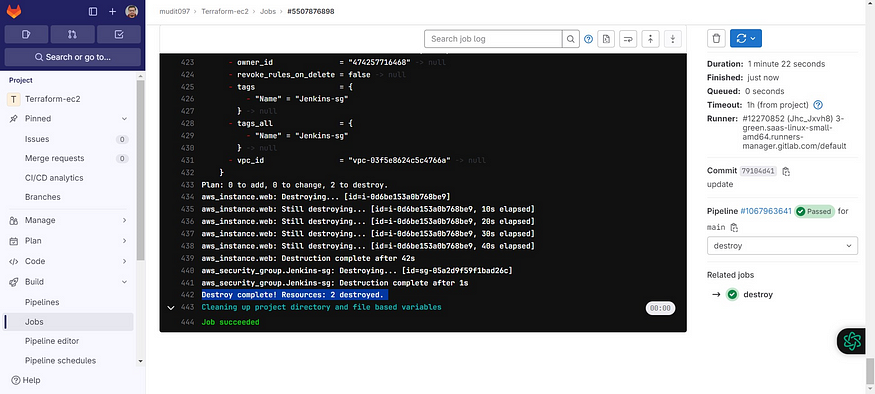
Destroy completed.
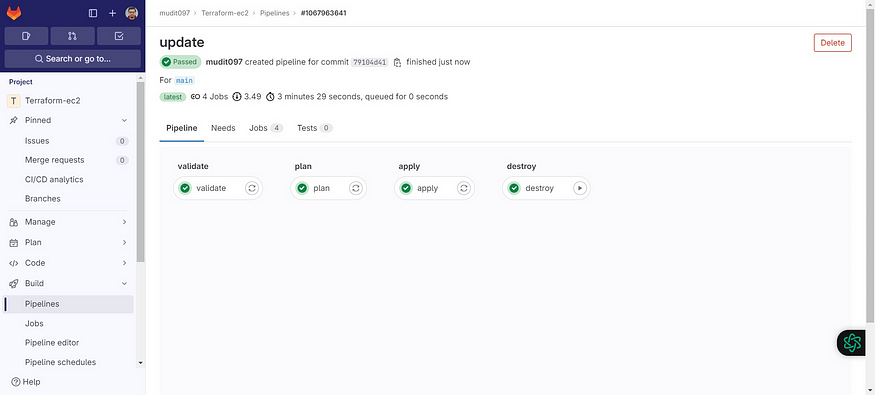
CI/CD look
In the rapidly evolving realm of cutting-edge technology and dynamic software development, where adaptability, synergy, and dependability take center stage, GitLab CI/CD stands out as an indispensable technological comrade. Armed with the capability to automate monotonous processes, identify glitches in their infancy, and streamline the software delivery lifecycle, GitLab CI/CD revolutionizes the modus operandi of development teams.
In summary, GitLab CI/CD not only simplifies but expedites the software development continuum. It enables developers to concentrate on their core competencies — crafting groundbreaking and valuable software — while the CI/CD pipeline manages the intricacies. As you set forth on your venture with GitLab CI/CD, bear in mind that it transcends mere automation; it’s about delivering superior software swiftly — a shared objective for every forward-thinking development team.
Thus, be it an initial foray or a scale-up endeavor, embrace GitLab CI/CD and unleash the complete potential of your technological projects. Seize the prowess of automation, collaboration, and quality assurance, witnessing your code ascend to new pinnacles with rapidity and assurance.
Welcome to the universe of GitLab CI/CD, where your code metamorphoses into a finely tuned, error-resistant, and nimble mechanism, ready for triumph in the era of digital innovation. Happy coding!
