🚀 DevSecOps CI/CD: Deploying a Secure Hotstar Clone 🔒✨

Mudit Mathur is an experienced DevOps Engineer with expertise in AWS, CI/CD, and automation. He delivers tangible results by streamlining processes and fostering collaboration. Reach out to him at linkedin.com/in/mudit-mathur-535786146 or muditmathur121@gmail.com for efficient DevOps solutions.
In the ever-changing landscape of software development and deployment, the integration of resilient security practices into the development pipeline has become indispensable. DevSecOps, a fusion of Development, Security, and Operations, underscores the assimilation of security measures throughout the software development lifecycle, advocating a proactive stance to address potential vulnerabilities and threats.
This blog serves as a comprehensive guide to deploying a replica of Hotstar — a well-known streaming platform — utilizing the principles of DevSecOps on Amazon Web Services (AWS). The deployment process involves leveraging various tools and services, including Docker, Jenkins, Java, SonarQube, AWS CLI, Kubectl, and Terraform, to automate, fortify, and streamline the deployment pipeline.
The journey commences with configuring an AWS EC2 instance with Ubuntu, assigning it a specific IAM role to facilitate the learning process. Following that, an automated script is crafted to install essential tools and dependencies needed for the deployment pipeline, ensuring efficiency and uniformity in the setup process.
Central to this DevSecOps methodology is the orchestration through Jenkins jobs, defining stages to execute tasks such as establishing an Amazon EKS cluster, deploying the Hotstar replica application, and implementing security measures at different phases of the deployment.
The incorporation of security practices is a crucial facet of this procedure. Through the use of SonarQube, OWASP, and Docker Scout, the blog will illustrate how static code analysis, security checks, and container security scans seamlessly integrate into the pipeline. These measures strengthen the application against potential vulnerabilities, guaranteeing a resilient and secure deployment.
GITHUB: https://github.com/mudit097/Hotstar-Clone
Prerequisites
- ☑ AWS account setup
- ☑ Basic familiarity with AWS services
- ☑ Understanding of DevSecOps principles
- ☑ Knowledge of Docker, Jenkins, Java, SonarQube, AWS CLI, Kubectl, Terraform, Docker Scout
Step-by-Step Deployment Process
1. ☑ Configuring AWS EC2 Instance
— Setting up an EC2 instance with Ubuntu AMI
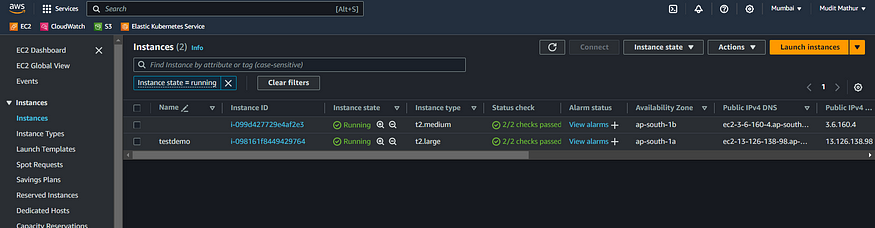
— Selecting t2.large and allocating 30 GB storage
— Associating an IAM role with Admin access for educational purposes
**2. ☑ Installing Required Tools on the Instance
**— Creating a script to automate the installation of:
— Docker
— Jenkins
— Java
— SonarQube container
— AWS CLI
— Kubectl
— Terraform
**3. ☑ Jenkins Job Configuration
**— Setting up Jenkins jobs for:
— Establishing an EKS cluster
— Deploying the Hotstar clone application
— Configuring the Jenkins job stages:
— Uploading files to SonarQube for static code analysis
— Executing npm install
— Implementing OWASP for security validations
— Installing and activating Docker Scout for container security
— Scanning files and Docker images using Docker Scout
— Building and pushing Docker images
— Deploying the application to the EKS cluster
**4. ☑ Cleanup Process
**— Deactivating the EKS cluster
— Revoking the IAM role
— Terminating the Ubuntu instance
1A. ☑ Configuring AWS EC2 Instance
**Log in to the AWS Management Console:
**— Access the AWS Management Console using your credentials.
**2. Navigate to the EC2 Dashboard:
**— Select the “Services” menu at the top of the page and choose “EC2” under the “Compute” section to access the EC2 Dashboard.
**3. Initiate Instance Launch:
**— Click on the “Instances” link in the left sidebar and then click the “Launch Instance” button.
**4. Select an Amazon Machine Image (AMI):
**— In the “Step 1: Choose an Amazon Machine Image (AMI)” section:
— Opt for “AWS Marketplace” from the left-hand sidebar.
— Search for “Ubuntu” in the search bar and pick the preferred Ubuntu AMI (e.g., Ubuntu Server 22.04 LTS).
— Select “Choose” to proceed.
**5. Choose an Instance Type:
**— In the “Step 2: Choose an Instance Type” section:
— Browse through the instance types and select “t2.large” from the list.
— Click on “Next: Configure Instance Details” at the bottom.
**6. Configure Instance Details:
**— In the “Step 3: Configure Instance Details” section, maintain most settings as default for now. However, customize settings like network, subnet, IAM role, etc., according to your requirements.
— Once done, click on “Next: Add Storage.”
**7. Add Storage:
**— In the “Step 4: Add Storage” section:
— Set the size of the root volume (usually /dev/sda1) to 30 GB by specifying the desired size in the “Size (GiB)” field.
— Customize other storage settings if needed.
— Click on “Next: Add Tags” when finished.
**8. Add Tags (Optional):
**— In the “Step 5: Add Tags” section, add tags to your instance for better identification and management. This step is optional but recommended for organizational purposes.
— Click on “Next: Configure Security Group” when done.
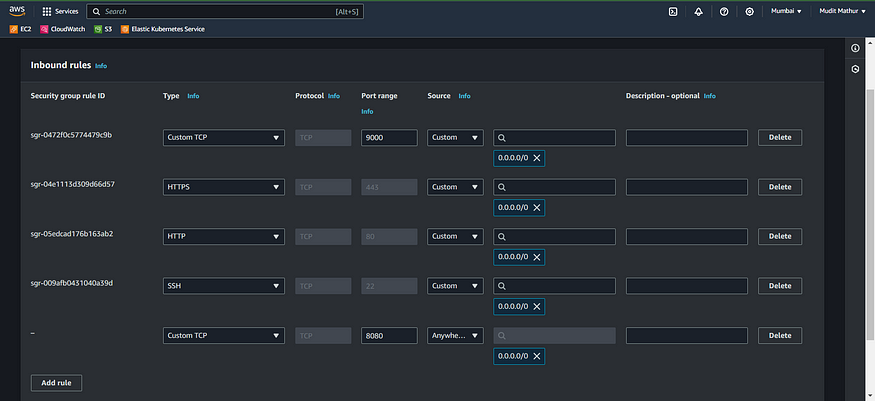
**9. Configure Security Group:
**— In the “Step 6: Configure Security Group” section:
— Create a new security group or select an existing one.
— Ensure that at least SSH (port 22) is open for inbound traffic to allow remote access.
— You might also want to open other ports as needed for your application.
— Click on “Review and Launch” when finished.
**10. Review and Launch:
**— Review the configuration details of your instance. If everything looks good:
— Click on “Launch” to proceed.
— A pop-up will prompt you to select or create a key pair. Choose an existing key pair or create a new one.
— Finally, click on “Launch Instances.”
**11. Accessing the Instance:
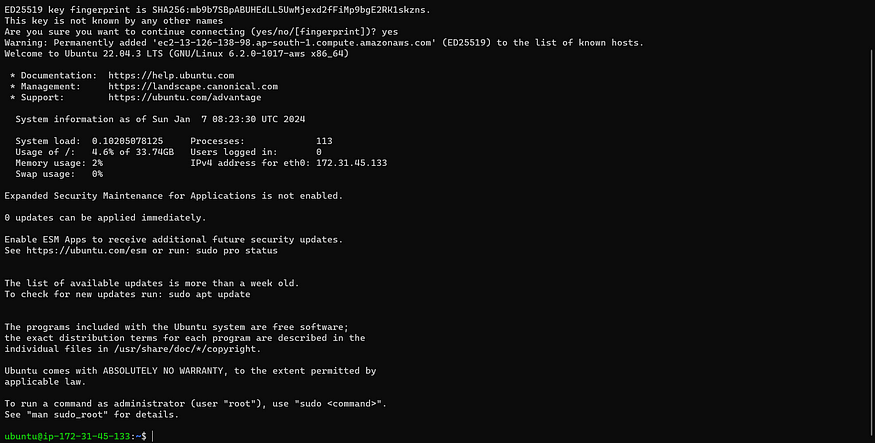
**— Once the instance is launched, connect to it using SSH. Use the private key associated with the selected key pair to connect to the instance’s public IP or DNS address.
1B.☑ IAM ROLE
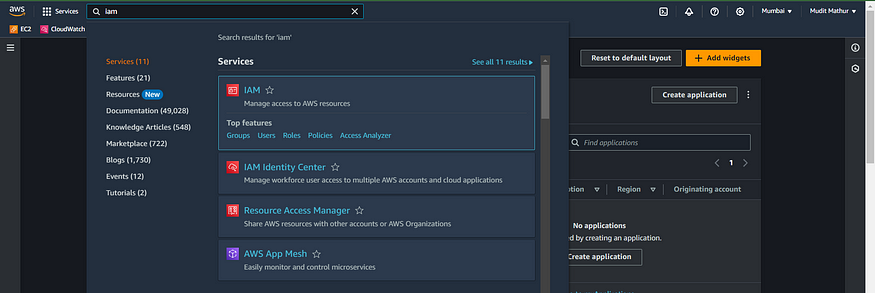
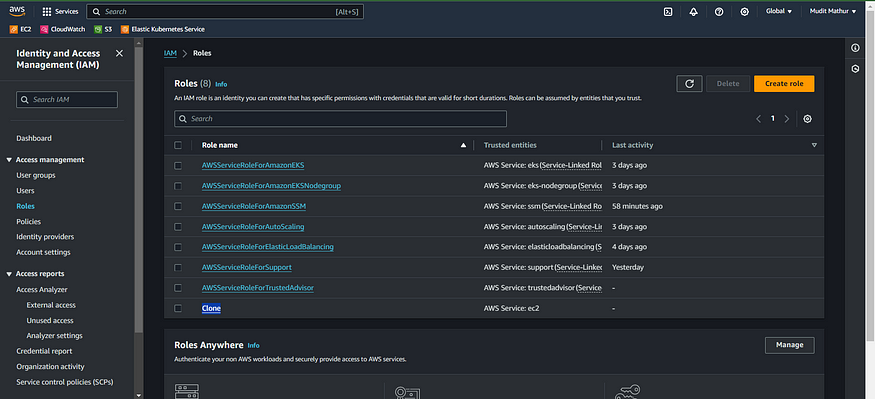
Navigate to the AWS console and enter ‘IAM’ in the search bar, then select ‘Roles’.
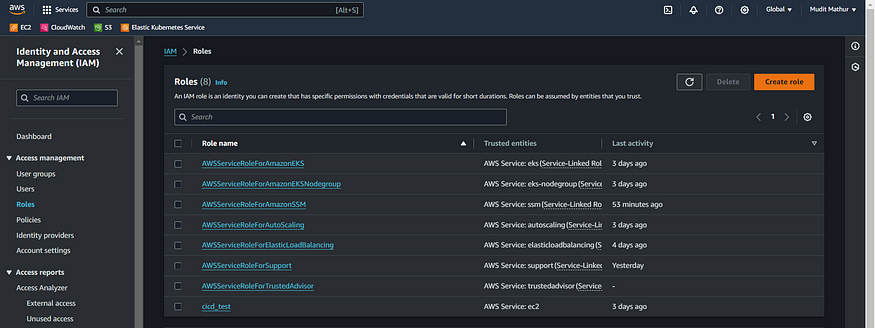
Please select ‘Create Role’ by clicking on it.
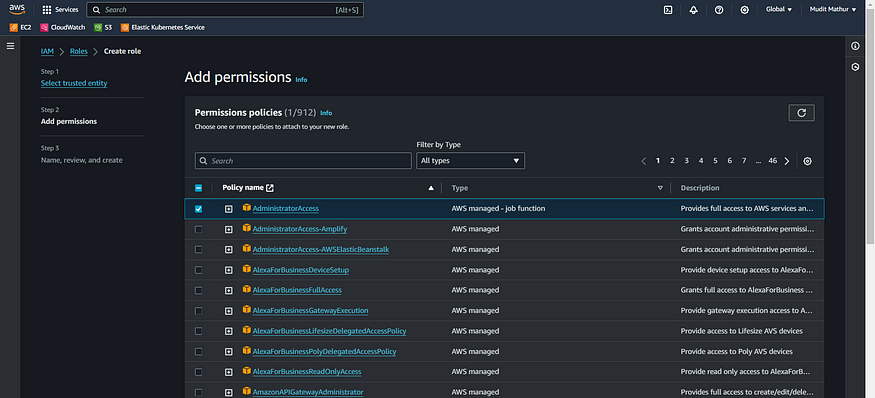
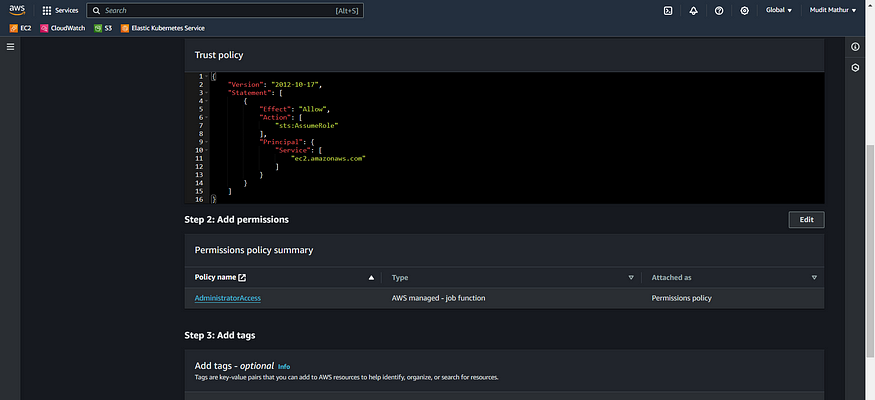
Choose the entity type as “AWS service,” specify the use case as “EC2,” and proceed by clicking on the “Next” button.

To set the permission policy, choose ‘Administrator Access’ (for learning purposes only) and then click ‘Next.’
Enter a name for the role and then click on “Create Role.”
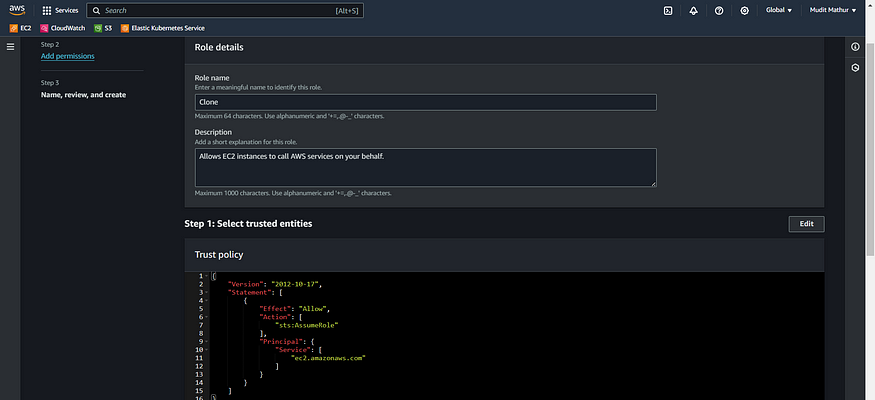
Role has been successfully created.
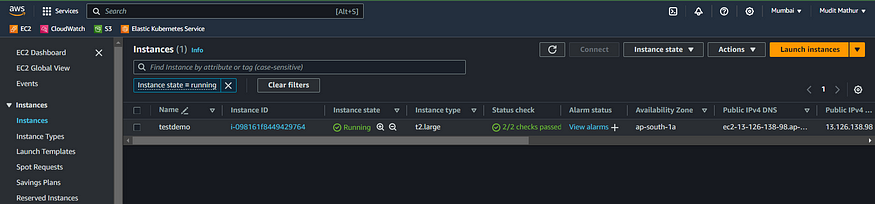
Now, associate this role with the EC2 instance we previously created to enable cluster provisioning from that instance.
Navigate to the EC2 Dashboard and choose the desired instance.
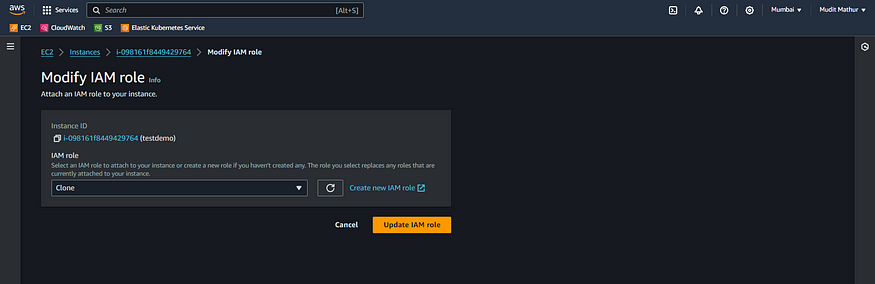
Click on ‘Actions’ -> ‘Security’ -> ‘Modify IAM role.’
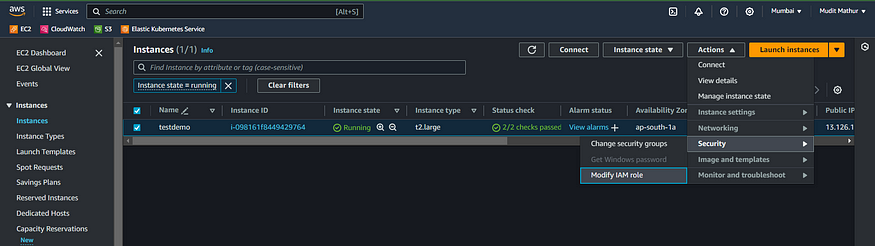
Choose the previously created role and then click on ‘Update IAM role.’
Establish a connection between the instance using either Mobaxterm, PowerShell, or Putty.
2. ☑ Installing Required Tools on the Instance
Scripts for Installing Required Tools
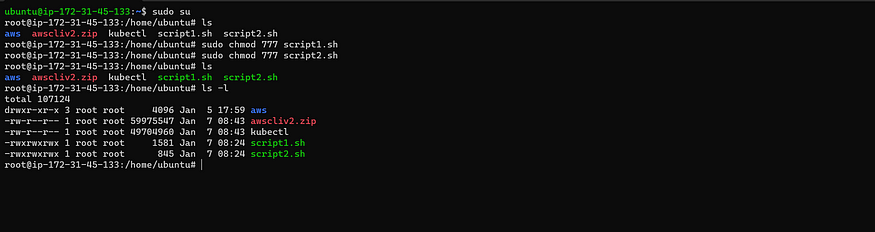
sudo su      # Enter superuser mode
vim script1.sh
Script1 for Java,Jenkins,Docker
#!/bin/bash
sudo apt update -y
wget -O - https://packages.adoptium.net/artifactory/api/gpg/key/public | tee /etc/apt/keyrings/adoptium.asc
echo "deb [signed-by=/etc/apt/keyrings/adoptium.asc] https://packages.adoptium.net/artifactory/deb $(awk -F= '/^VERSION_CODENAME/{print$2}' /etc/os-release) main" | tee /etc/apt/sources.list.d/adoptium.list
sudo apt update -y
sudo apt install temurin-17-jdk -y
/usr/bin/java --version
curl -fsSL https://pkg.jenkins.io/debian-stable/jenkins.io-2023.key | sudo tee /usr/share/keyrings/jenkins-keyring.asc > /dev/null
echo deb [signed-by=/usr/share/keyrings/jenkins-keyring.asc] https://pkg.jenkins.io/debian-stable binary/ | sudo tee /etc/apt/sources.list.d/jenkins.list > /dev/null
sudo apt-get update -y
sudo apt-get install jenkins -y
sudo systemctl start jenkins
#install docker
# Add Docker's official GPG key:
sudo apt-get update
sudo apt-get install ca-certificates curl gnupg -y
sudo install -m 0755 -d /etc/apt/keyrings
curl -fsSL https://download.docker.com/linux/ubuntu/gpg | sudo gpg --dearmor -o /etc/apt/keyrings/docker.gpg
sudo chmod a+r /etc/apt/keyrings/docker.gpg
# Add the repository to Apt sources:
echo \
  "deb [arch=$(dpkg --print-architecture) signed-by=/etc/apt/keyrings/docker.gpg] https://download.docker.com/linux/ubuntu \
  $(. /etc/os-release && echo "$VERSION_CODENAME") stable" | \
  sudo tee /etc/apt/sources.list.d/docker.list > /dev/null
sudo apt-get update
sudo apt-get install docker-ce docker-ce-cli containerd.io docker-buildx-plugin docker-compose-plugin -y
sudo usermod -aG docker ubuntu
newgrp docker
Run script by providing permissions
sudo chmod 777 script1.sh
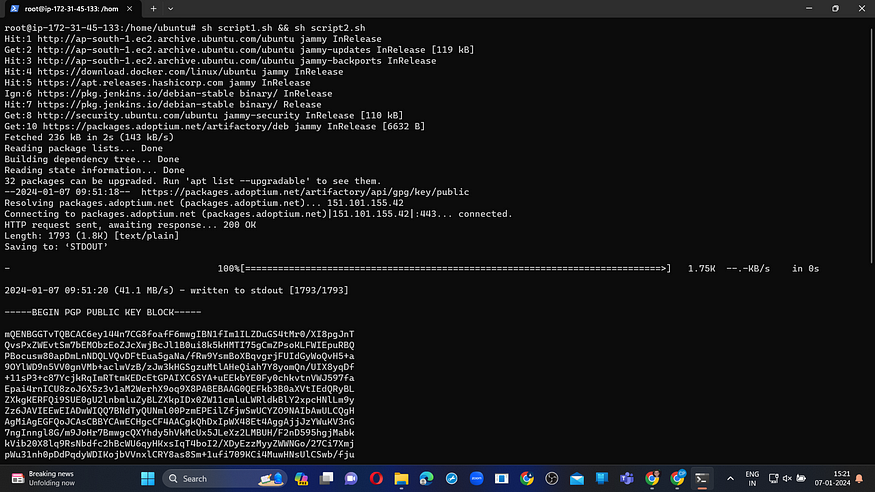
sh script1.sh
sudo su      # Enter superuser mode
vim script2.sh
#!/bin/bash
#install terraform
sudo apt install wget -y
wget -O- https://apt.releases.hashicorp.com/gpg | sudo gpg --dearmor -o /usr/share/keyrings/hashicorp-archive-keyring.gpg
echo "deb [signed-by=/usr/share/keyrings/hashicorp-archive-keyring.gpg] https://apt.releases.hashicorp.com $(lsb_release -cs) main" | sudo tee /etc/apt/sources.list.d/hashicorp.list
sudo apt update && sudo apt install terraform
#install Kubectl on Jenkins
sudo apt update
sudo apt install curl -y
curl -LO https://dl.k8s.io/release/$(curl -L -s https://dl.k8s.io/release/stable.txt)/bin/linux/amd64/kubectl
sudo install -o root -g root -m 0755 kubectl /usr/local/bin/kubectl
kubectl version --client
#install Aws cli
curl "https://awscli.amazonaws.com/awscli-exe-linux-x86_64.zip" -o "awscliv2.zip"
sudo apt-get install unzip -y
unzip awscliv2.zip
sudo ./aws/install
Run script by providing permissions
sudo chmod 777 script1.sh
sh script1.sh
# Run the second script with necessary permissions, then execute the first script
chmod +x script2.sh && ./script2.sh && chmod +x script1.sh && ./script1.sh
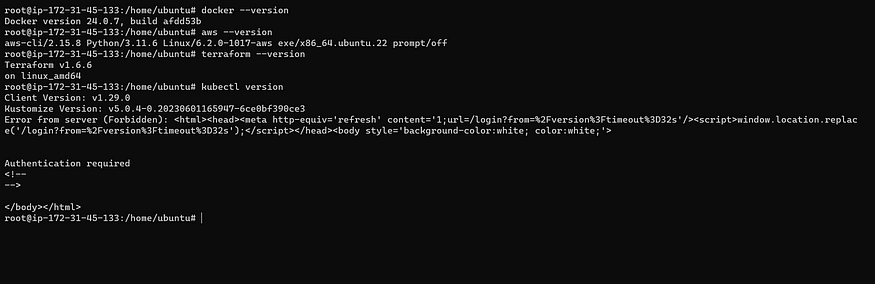
Please verify the package versions now.
docker --version
aws --version
terraform --version
kubectl version
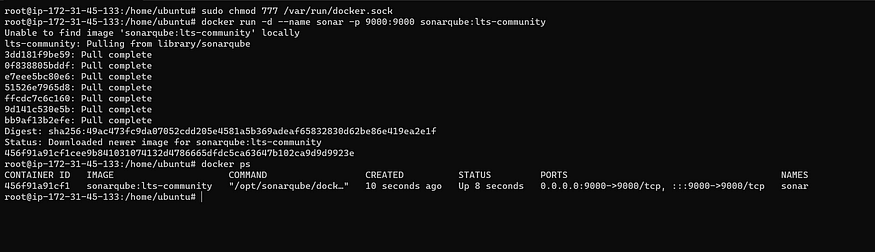
Launch the SonarQube container now.
sudo chmod 777 /var/run/docker.sock
docker run -d --name sonar -p 9000:9000 sonarqube:lts-community
docker ps
An EC2 instance is provisioned through the AWS Management Console.

Copy the public IP address of the EC2 instance and paste it into your web browser.
<Ec2-ip:8080> #you will Jenkins login page
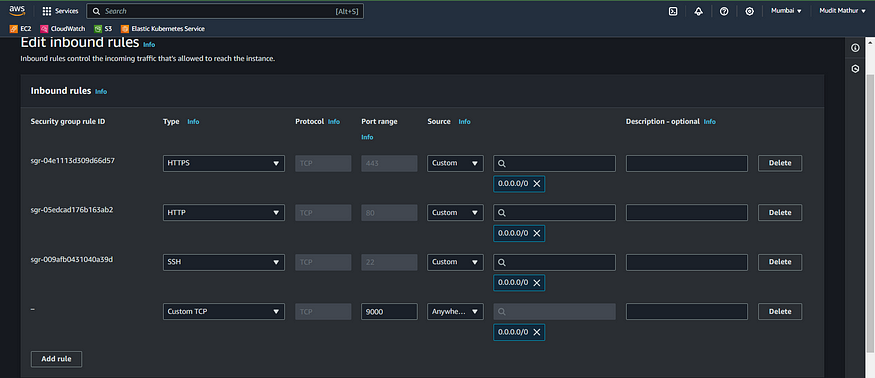
To access the Jenkins login page, please navigate to EC2-IP:8080. Ensure that either all traffic is allowed or port 8080 is open for inbound connections.
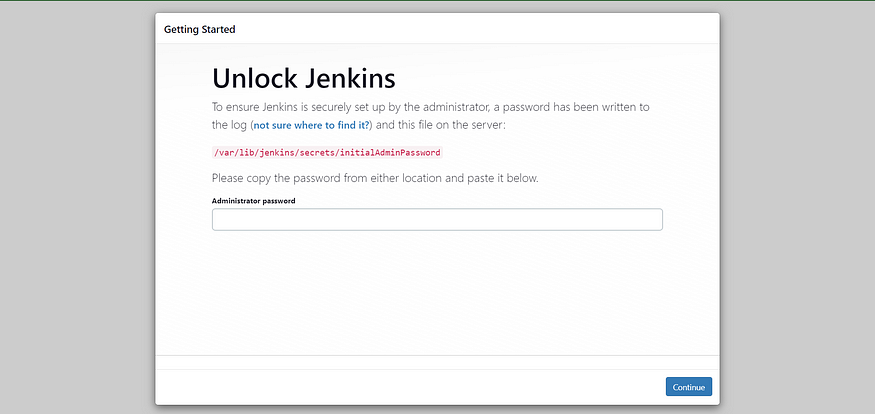
Connect your instance to PuTTY or MobaXterm, open PowerShell, and enter the following command to set the Administrator password:
sudo cat /var/lib/jenkins/secrets/initialAdminPassword

Now, proceed to install the recommended plugins.
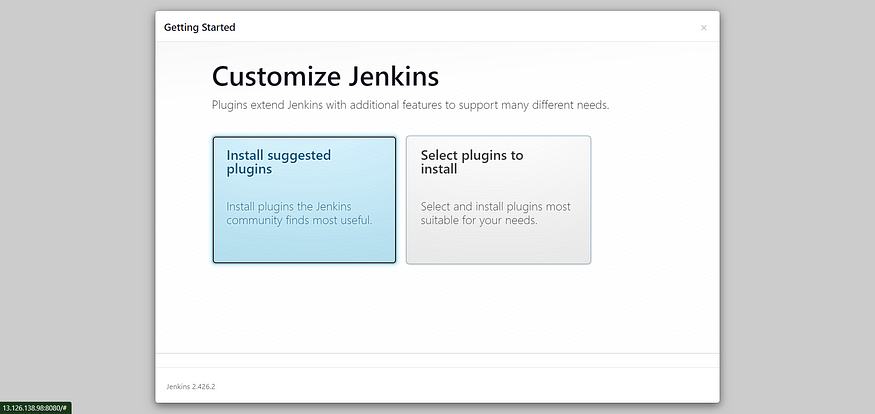
Jenkins is now being installed, and it will proceed to install all the necessary libraries. Following the installation, an admin user will be created.
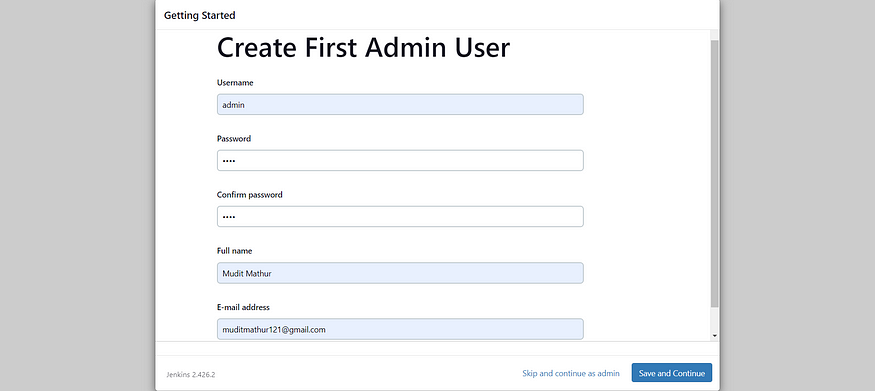
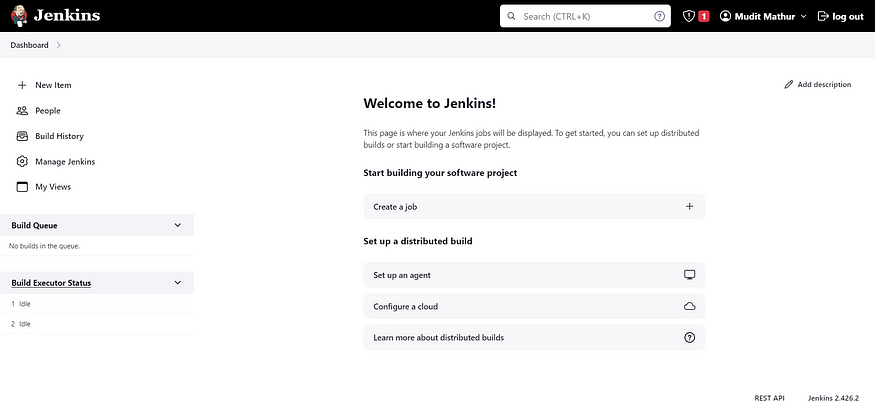
Click “Save and Continue” on the Jenkins Dashboard.
Copy the public IP address once again and paste it into a new browser tab, specifying port 9000 for inbound connections.
<ec2-ip:9000> #runs sonar container
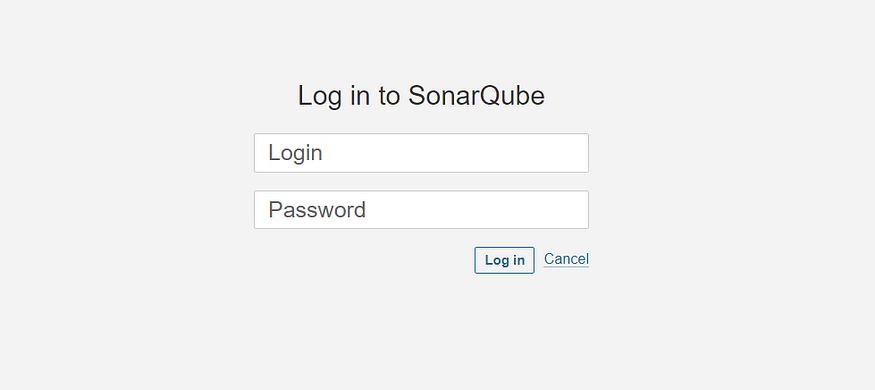
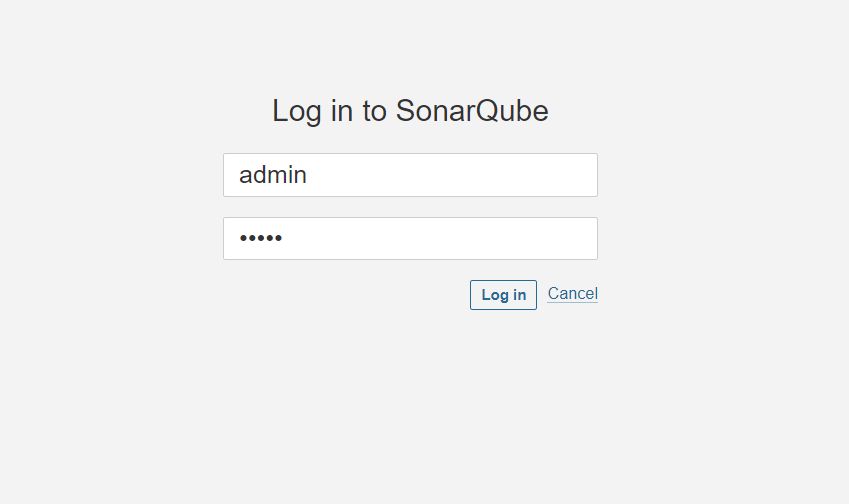
Enter username and password, click on login and change password
username admin
password admin
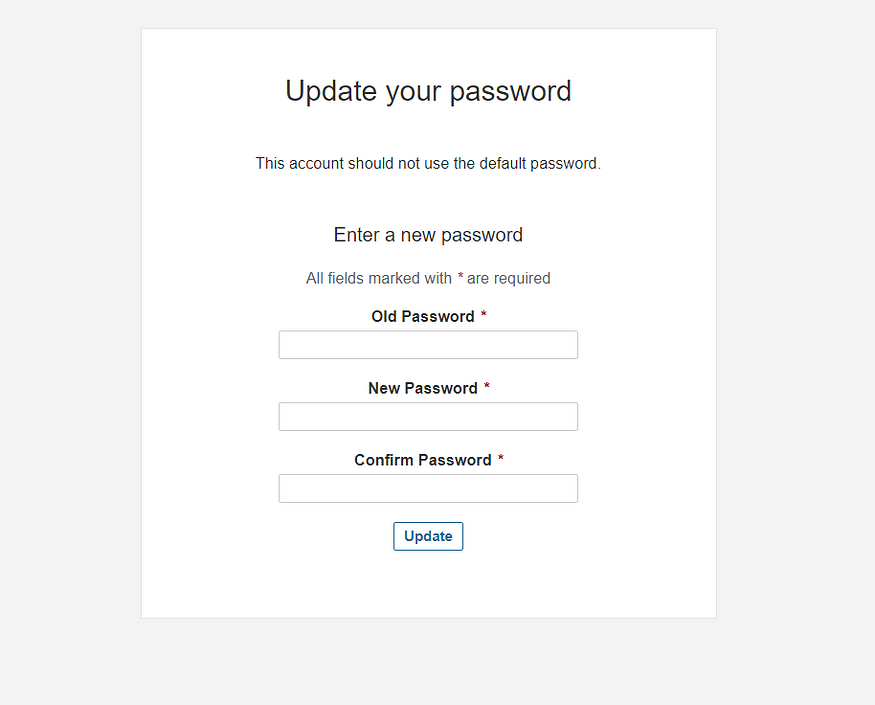
New Password Update: Access the Sonar Dashboard with the updated credentials.

3. ☑ Jenkins Job Configuration
Step 3A: Execute EKS Provisioning Task
Task completed. Proceed to Jenkins and integrate the Terraform plugin for provisioning AWS EKS within the Pipeline Job.
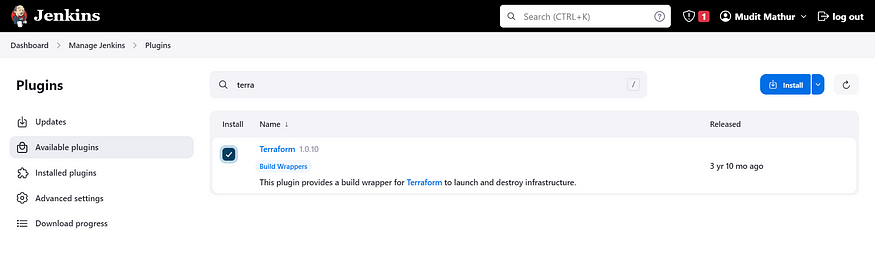
1. Navigate to the Jenkins dashboard: Manage Jenkins -> Plugins.
2. In the ‘Available Plugins’ section, search for ‘Terraform’ and proceed to install it.
Go to PuTTY PowerShell and use the below command.
Let’s find the path to our Terraform (we will use it in the tools section of Terraform).
which terraform

Now, return to ‘Manage Jenkins’ -> ‘Global Tool Configuration.’
Add Terraform to the list of tools.
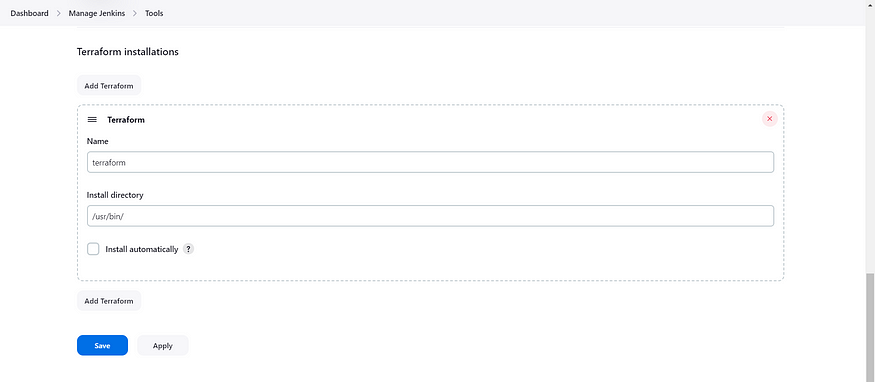
Apply and save.
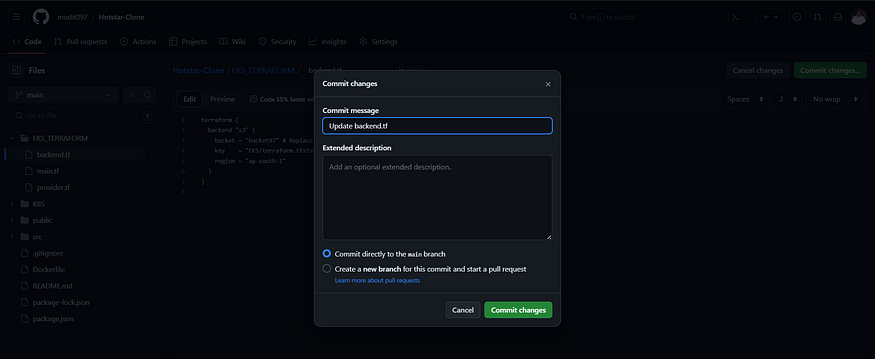
CHANGE YOUR S3 BUCKET NAME IN THE BACKEND.TF
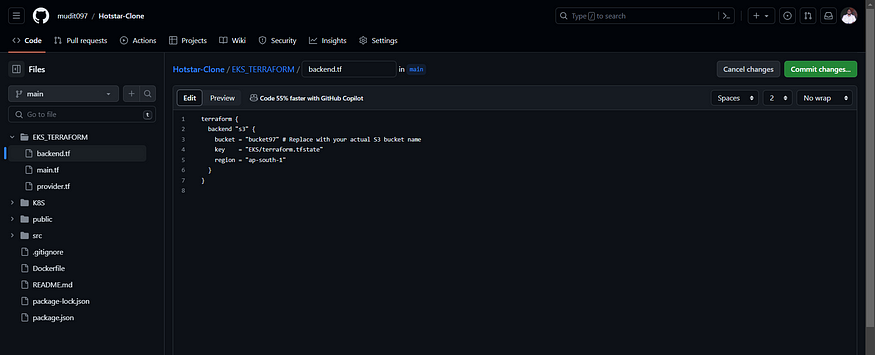
Commit it.
Now, create a new job for the EKS provision.
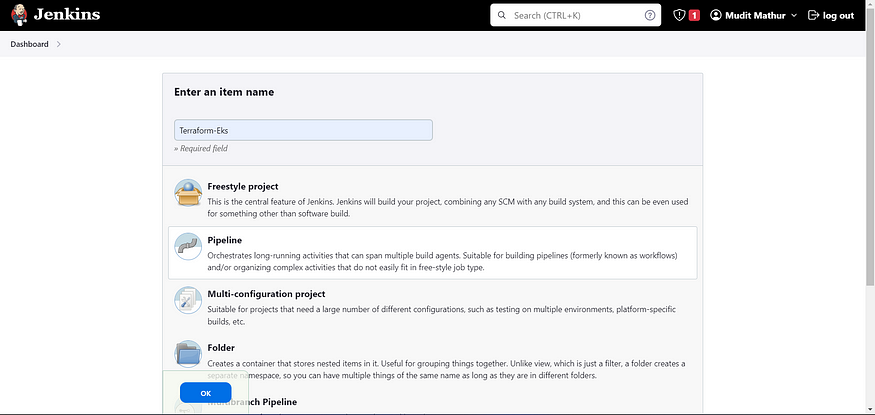
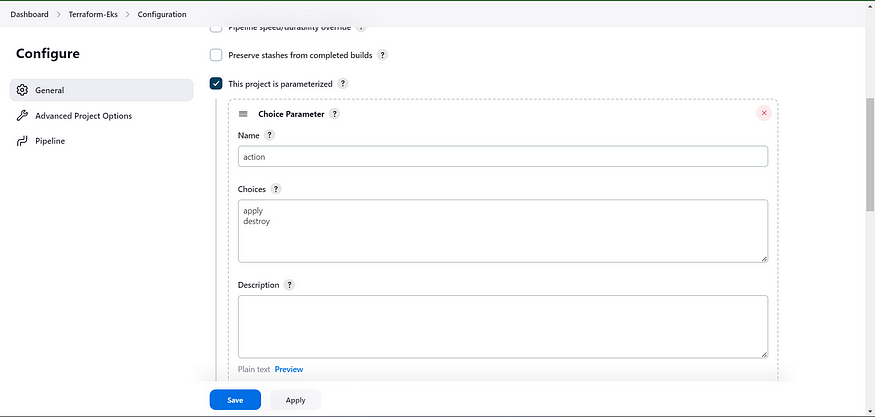
I want to achieve this by utilizing build parameters to apply and destroy during the construction process only.
You need to incorporate this into the job, as shown in the image below:

Pick “Choice Parameter”
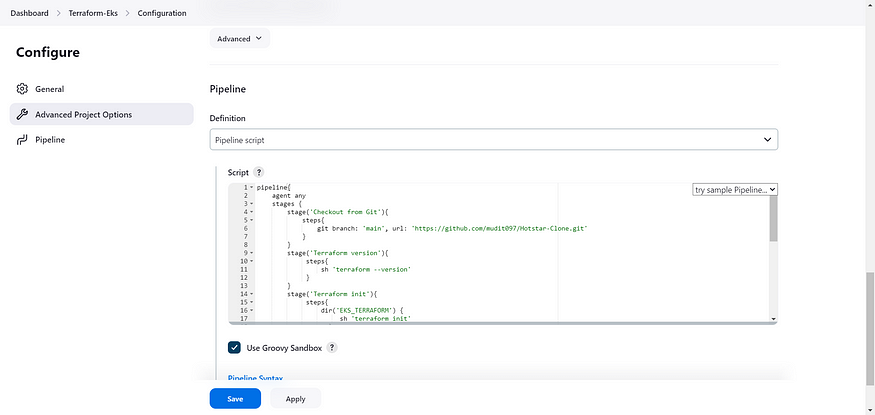
Let’s add a pipeline.
pipeline {
    agent any
    stages {
        stage('Checkout from Git') {
            steps {
                git branch: 'main', url: 'https://github.com/mudit097/Hotstar-Clone.git'
            }
        }
        stage('Terraform version') {
            steps {
                sh 'terraform --version'
            }
        }
        stage('Terraform init') {
            steps {
                dir('EKS_TERRAFORM') {
                    sh 'terraform init'
                }
            }
        }
        stage('Terraform validate') {
            steps {
                dir('EKS_TERRAFORM') {
                    sh 'terraform validate'
                }
            }
        }
        stage('Terraform plan') {
            steps {
                dir('EKS_TERRAFORM') {
                    sh 'terraform plan'
                }
            }
        }
        stage('Terraform apply/destroy') {
            steps {
                dir('EKS_TERRAFORM') {
                    sh "terraform ${params.action} --auto-approve" // Use double quotes for variable substitution
                }
            }
        }
    }
}
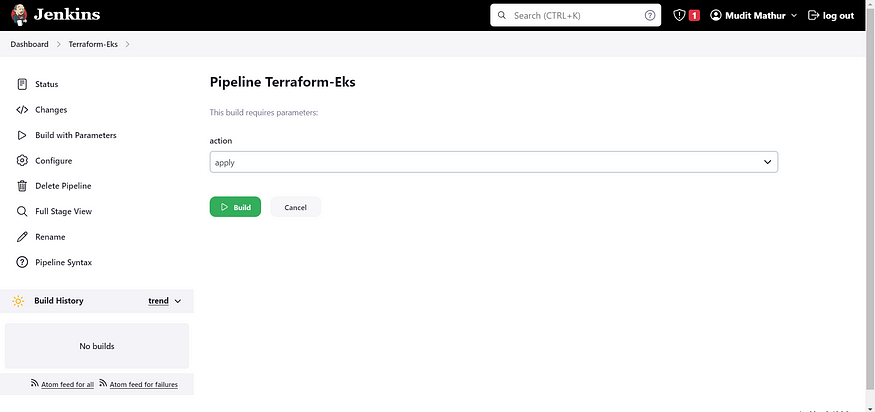
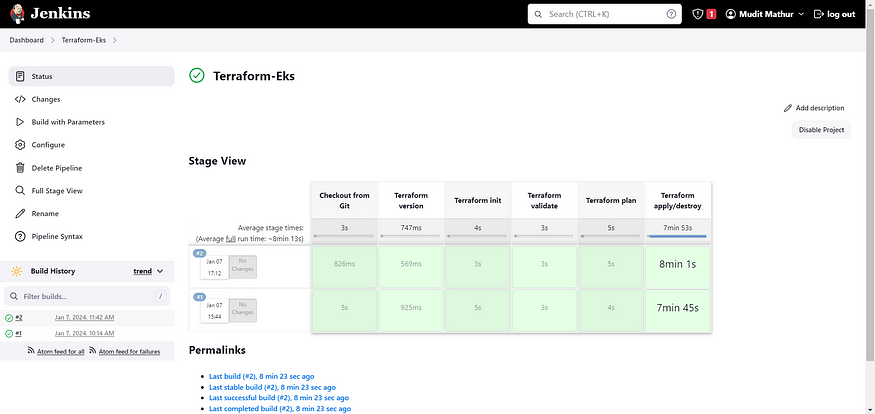
Let’s apply, save, and build with parameters. Select ‘apply’ as the action.
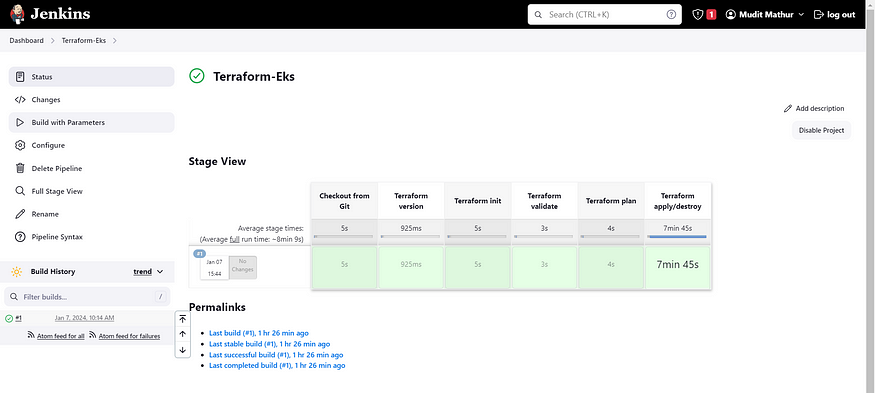
Stage view, it will take a maximum of 8–9 minutes to provision.
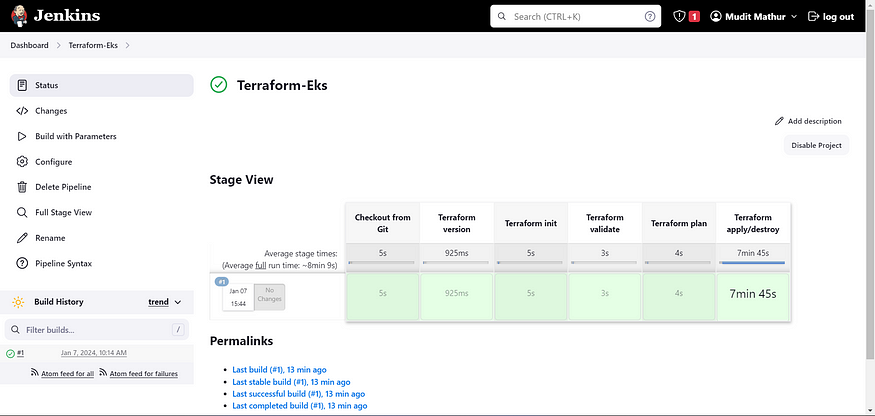
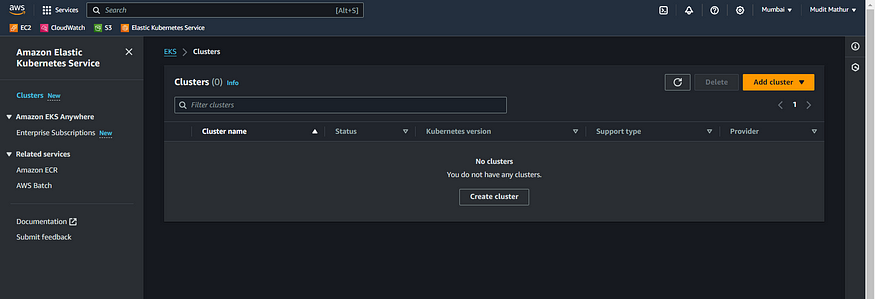
Check in your AWS console whether it has created EKS or not.

EC2 instance is created for the Node group.
Step 3B: Hotstar Job
Plugin installation & setup (Java, Sonar, Node.js, OWASP, Docker)
Go to Jenkins dashboard.
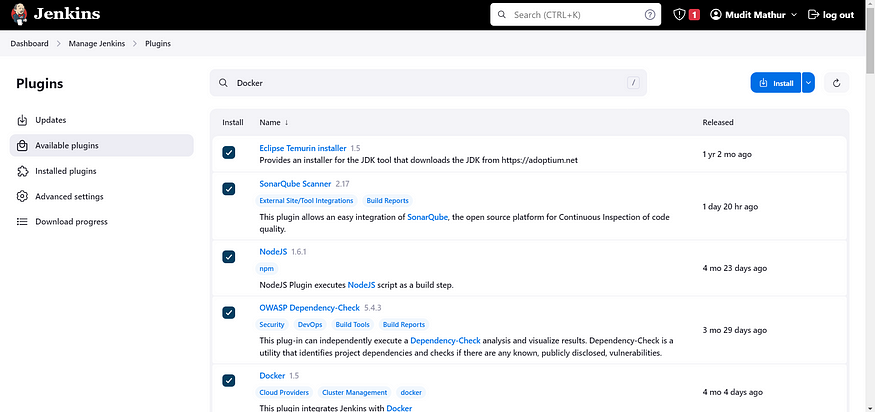
Manage Jenkins -> Plugins -> Available Plugins.
Search for the following plugins:
Eclipse Temurin Installer
SonarQube Scanner
Node.js
OWASP Dependency-Check
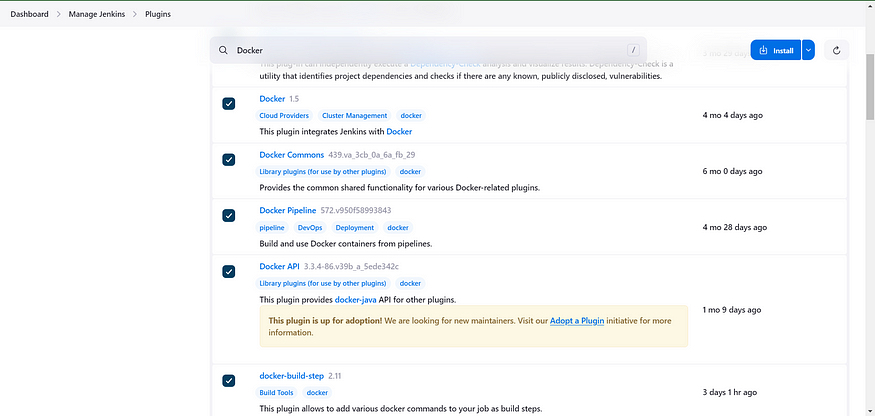
Docker
Docker Commons
Docker Pipeline
Docker API
Docker Build Step
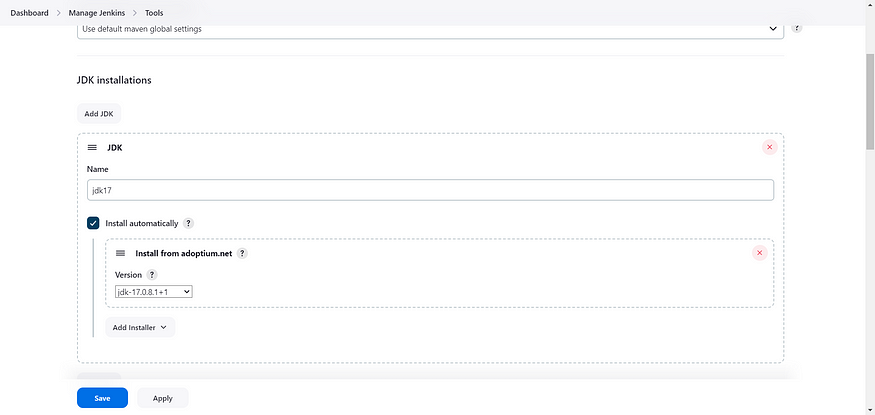
Configure in Global Tool Configuration
Go to Manage Jenkins → Tools → Install JDK 17 and Node.js 16 → Click on Apply and Save
NOTE: USE ONLY NODE.JS 16
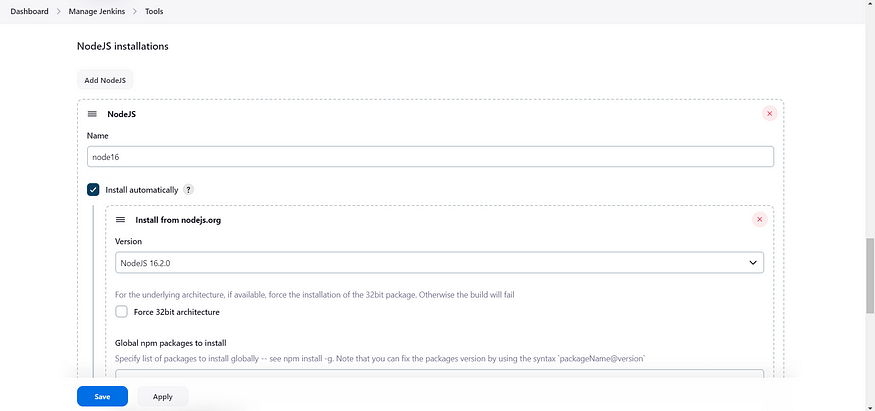
For SonarQube, use the latest version.

For OWASP, use the 9.0.8 version.
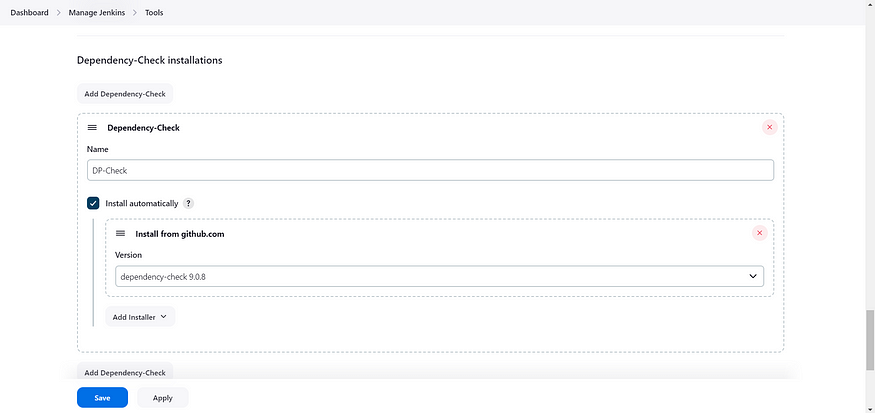
Ensure you are using the most recent version of Docker.
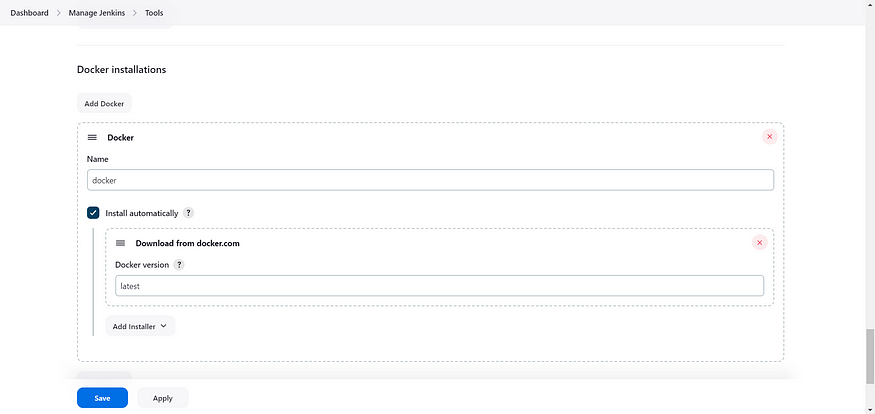
Click ‘Apply’ and then ‘Save.’
Configure Sonar Server in Manage Jenkins
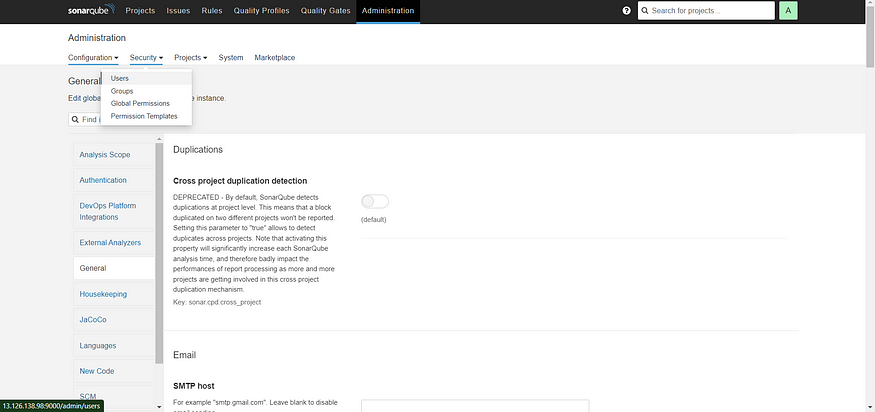
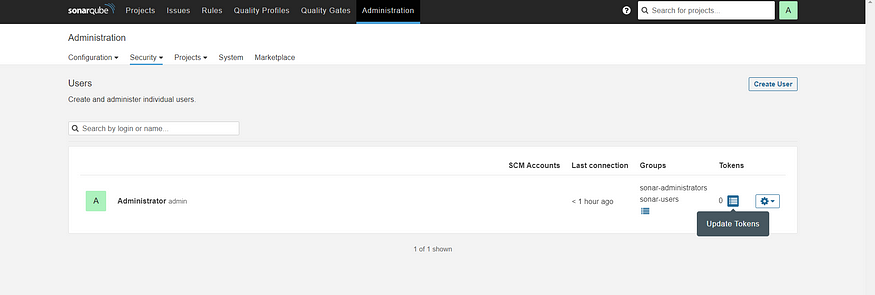
Retrieve the Public IP Address of your EC2 instance. Sonarqube operates on Port 9000, so use <Public IP>:9000. Navigate to your Sonarqube Server, click on Administration → Security → Users → select Tokens, and then click on ‘Update Token.’ Provide a name for the token, and click on ‘Generate Token.
click on update Token
Create a token with a name and generate
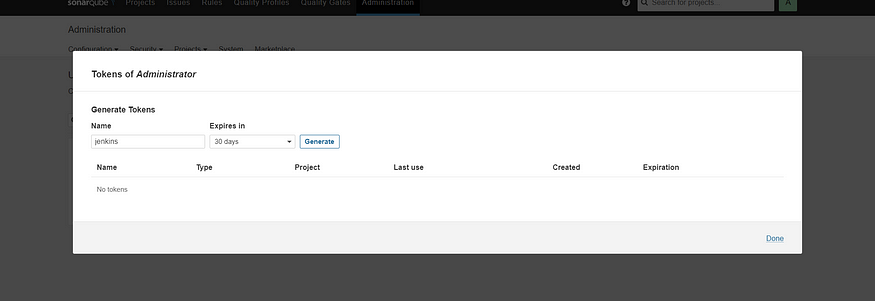

Copy Token
Go to Jenkins Dashboard → Manage Jenkins → Credentials → Add Secret Text. It should look like this
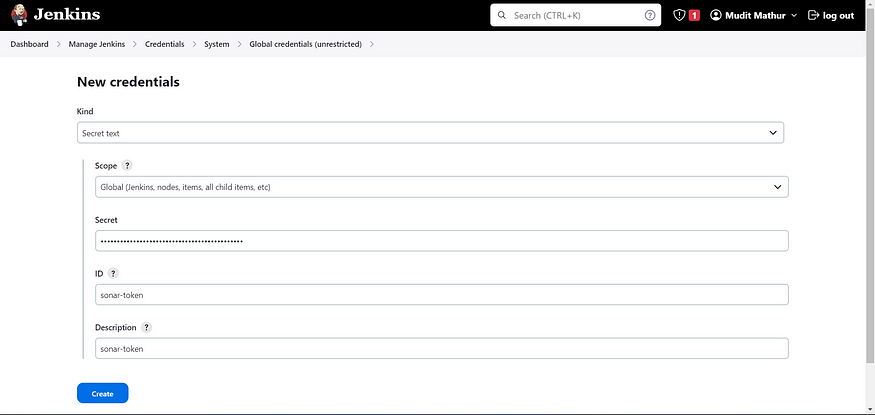
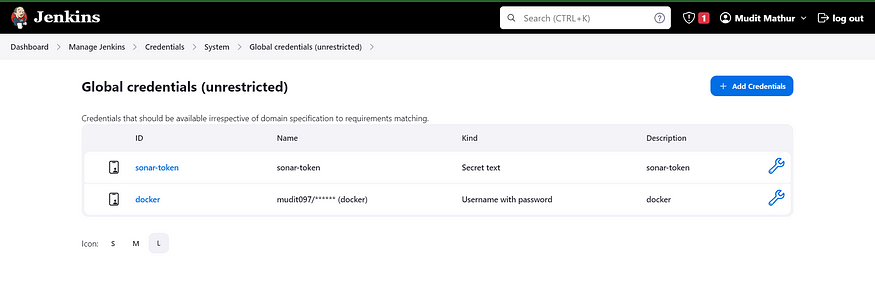
You will see this page once you click on create.
Now, go to Dashboard → Manage Jenkins → System and add settings as shown in the image below.

Click on ‘Apply’ and then ‘Save.’
In the SonarQube Dashboard, add a quality gate as well.
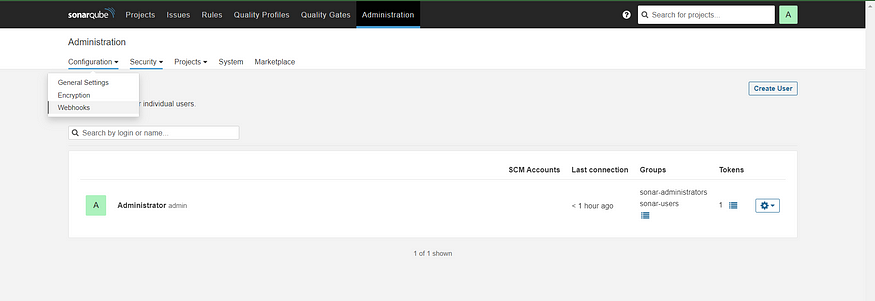
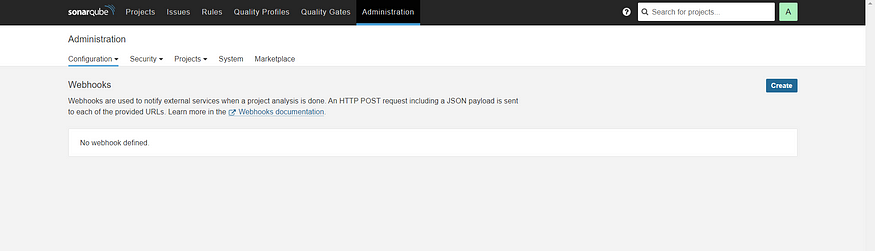
Navigate to Administration -> Configuration -> Webhooks.
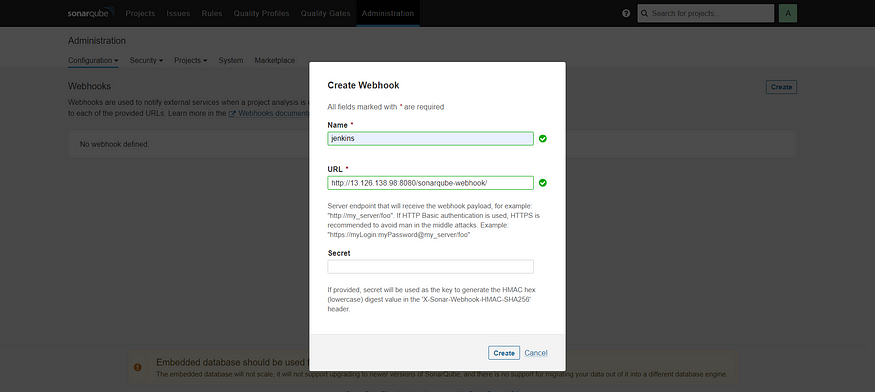
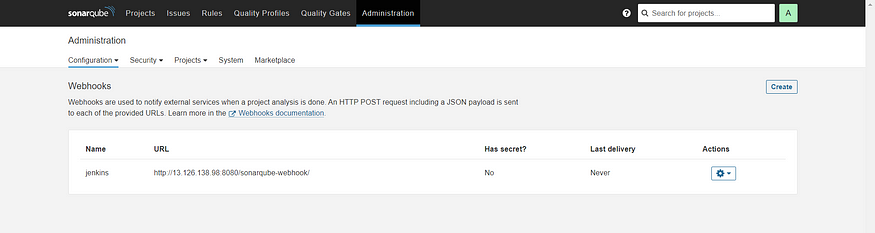
Click on Create
Put details
# In the URL section of the Quality Gate
<http://jenkins-public-ip:8080>/sonarqube-webhook/
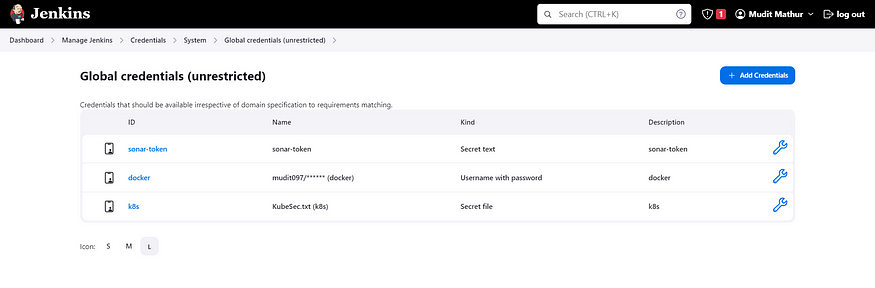
Now, add Docker credentials to Jenkins to log in and push the image:
Navigate to ‘Manage Jenkins’ → ‘Credentials’ → ‘global’ → ‘Add Credential’.
Provide DockerHub Username and Password under Global Credentials.
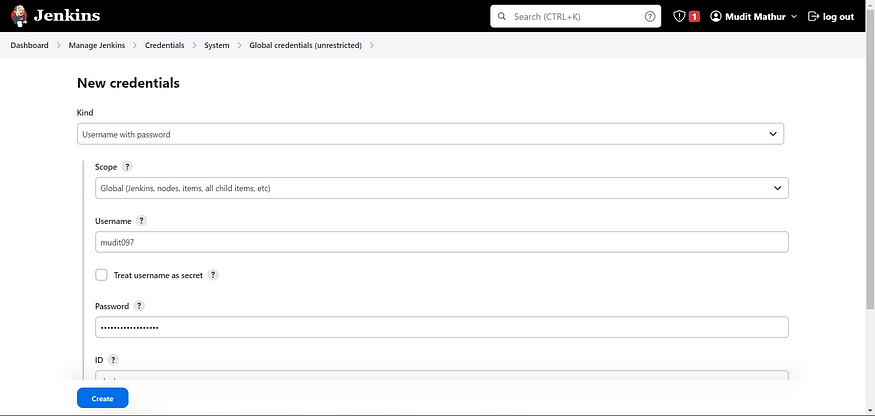
Create.
Pipeline up to Docker
Now let’s create a new job for our pipeline.
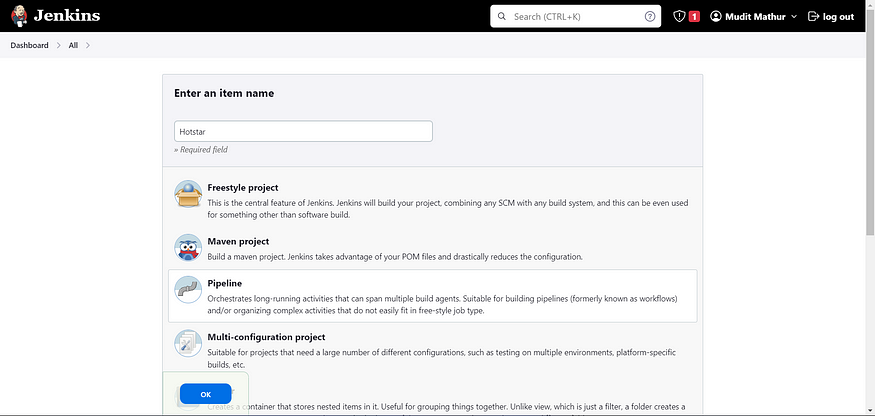
Before adding the pipeline, install Docker and Scout.
# Switch to superuser mode
sudo su

# Log in to Docker using your credentials
docker login

# Download and install scout-cli from the official GitHub repository
curl -sSfL https://raw.githubusercontent.com/docker/scout-cli/main/install.sh | sh -s -- -b /usr/local/bin

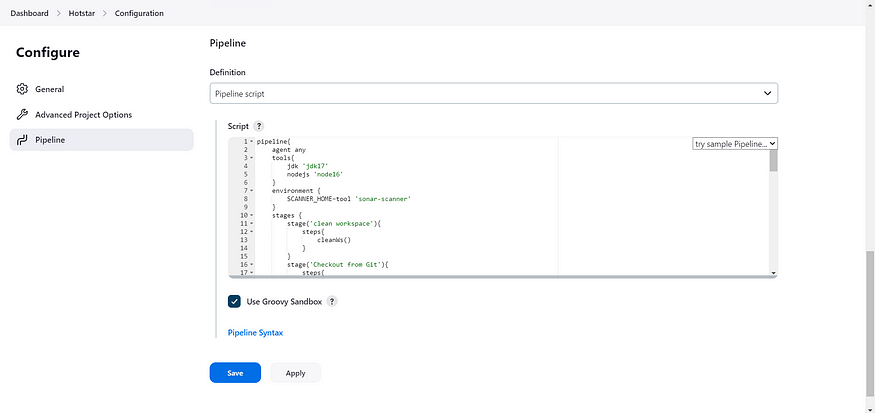
Add this to Pipeline
pipeline {
    agent any
    tools {
        jdk 'jdk17'
        nodejs 'node16'
    }
    environment {
        SCANNER_HOME = tool 'sonar-scanner'
    }
    stages {
        stage('Clean workspace') {
            steps {
                cleanWs()
            }
        }
        stage('Checkout from Git') {
            steps {
                git branch: 'main', url: 'https://github.com/mudit097/Hotstar-Clone.git'
            }
        }
        stage("Sonarqube Analysis") {
            steps {
                withSonarQubeEnv('sonar-server') {
                    sh """$SCANNER_HOME/bin/sonar-scanner \
                        -Dsonar.projectName='Hotstar' \
                        -Dsonar.projectKey='Hotstar'"""
                }
            }
        }
        stage("Quality Gate") {
            steps {
                timeout(time: 1, unit: 'HOURS') {
                    script {
                        def qg = waitForQualityGate abortPipeline: false
                        if (qg.status != 'OK') {
                            error "Pipeline aborted due to quality gate failure: ${qg.status}"
                        }
                    }
                }
            }
        }
        stage('Install Dependencies') {
            steps {
                sh "npm install"
            }
        }
        stage('OWASP FS SCAN') {
            steps {
                script {
                    dependencyCheck additionalArguments: '--scan ./ --disableYarnAudit --disableNodeAudit', odcInstallation: 'DP-Check'
                    dependencyCheckPublisher pattern: '**/dependency-check-report.xml'
                }
            }
        }
        stage('Docker Scout FS') {
            steps {
                script {
                    withDockerRegistry(credentialsId: 'docker', toolName: 'docker') {
                        sh 'docker-scout quickview fs://.'
                        sh 'docker-scout cves fs://.'
                    }
                }
            }
        }
        stage("Docker Build & Push") {
            steps {
                script {
                    withDockerRegistry(credentialsId: 'docker', toolName: 'docker') {
                        sh "docker build -t hotstar ."
                        sh "docker tag hotstar mudit097/hotstar:latest"
                        sh "docker push mudit097/hotstar:latest"
                    }
                }
            }
        }
        stage('Docker Scout Image') {
            steps {
                script {
                    withDockerRegistry(credentialsId: 'docker', toolName: 'docker') {
                        sh 'docker-scout quickview mudit097/hotstar:latest'
                        sh 'docker-scout cves mudit097/hotstar:latest'
                        sh 'docker-scout recommendations mudit097/hotstar:latest'
                    }
                }
            }
        }
        stage("Deploy Docker") {
            steps {
                sh "docker run -d --name hotstar -p 3000:3000 mudit097/hotstar:latest"
            }
        }
    }
}
Click on Apply and Save.
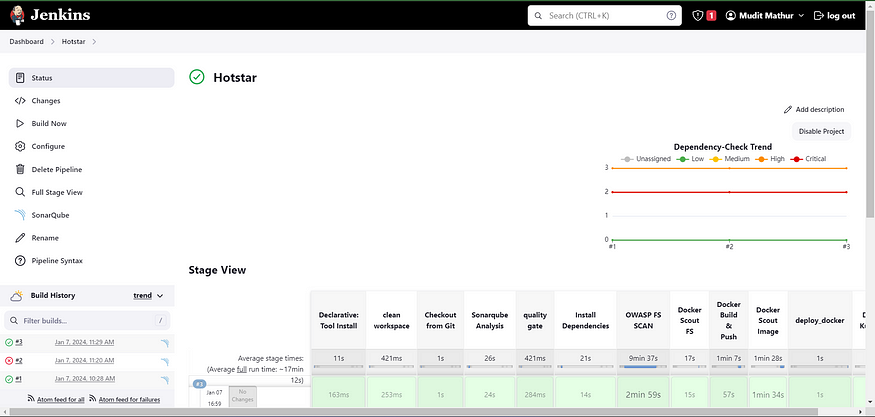
Build Now
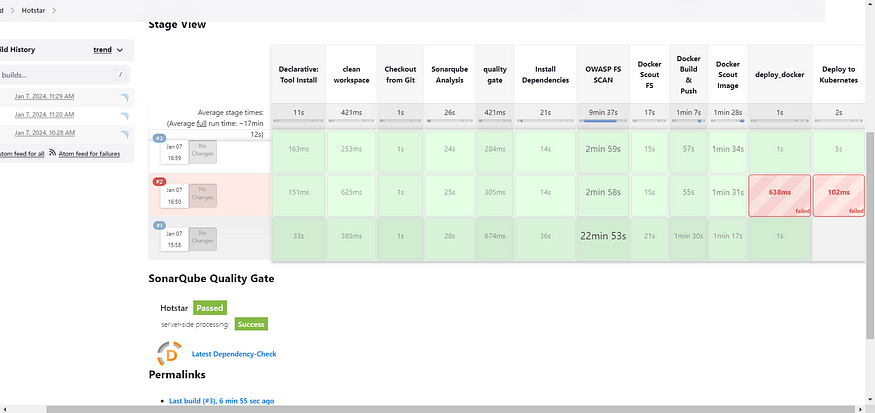
Stage View
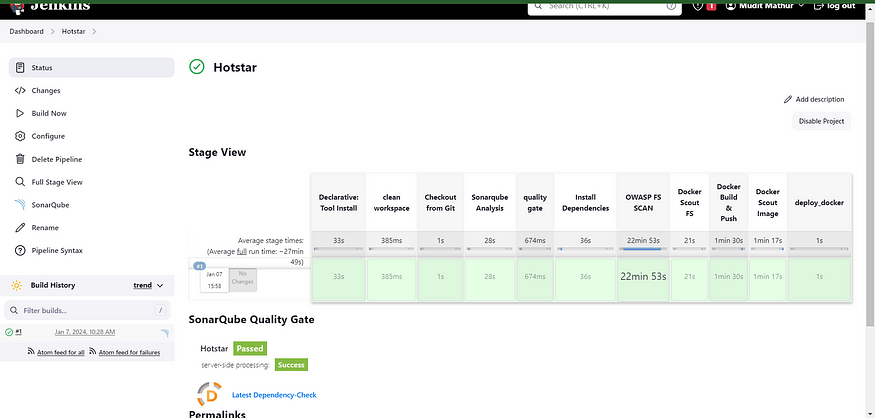
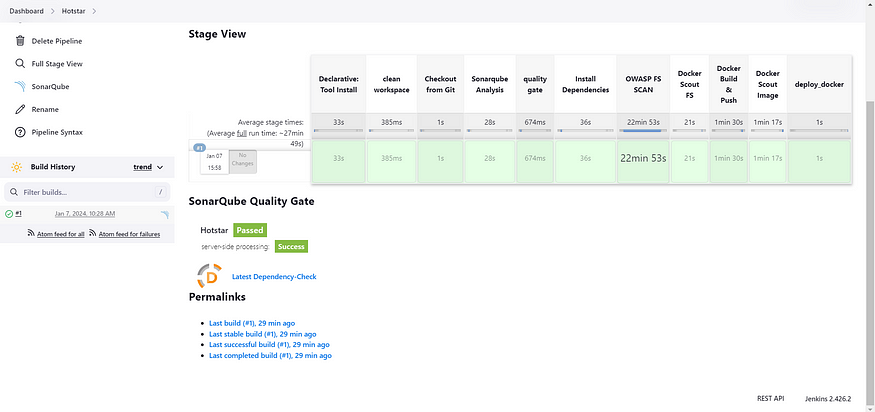
To view the report, you can navigate to the SonarQube Server and access the Projects section.
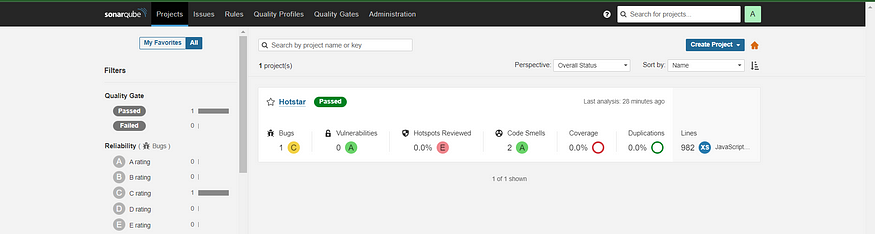
You can observe that the report has been generated, and the status indicates ‘passed.’ There are 982 lines that it scanned. To access a comprehensive report, navigate to the ‘Issues’ section.
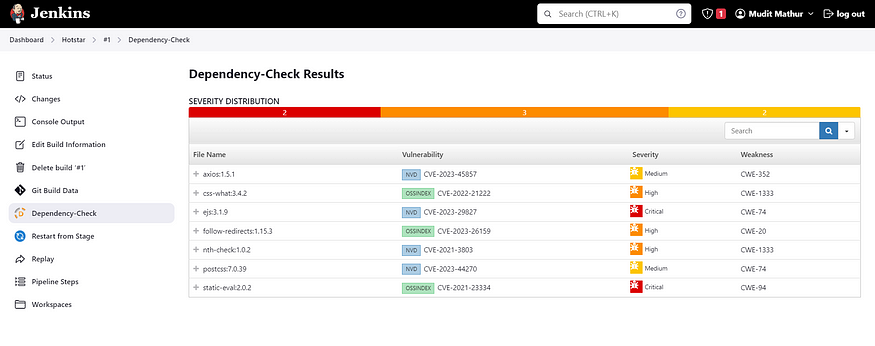
In OWASP, you will notice that a graph depicting the status will also be generated along with information on vulnerabilities.
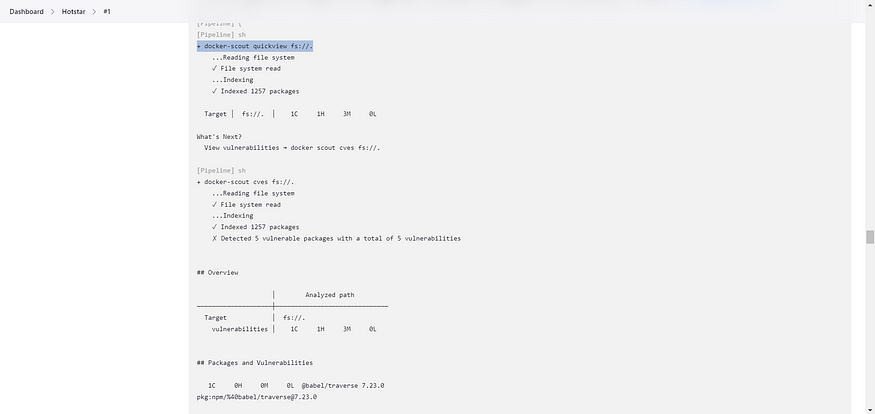
Let’s review the Docker Scout File Scan Report.
When you log in to Docker Hub, you will see that a new image has been created.

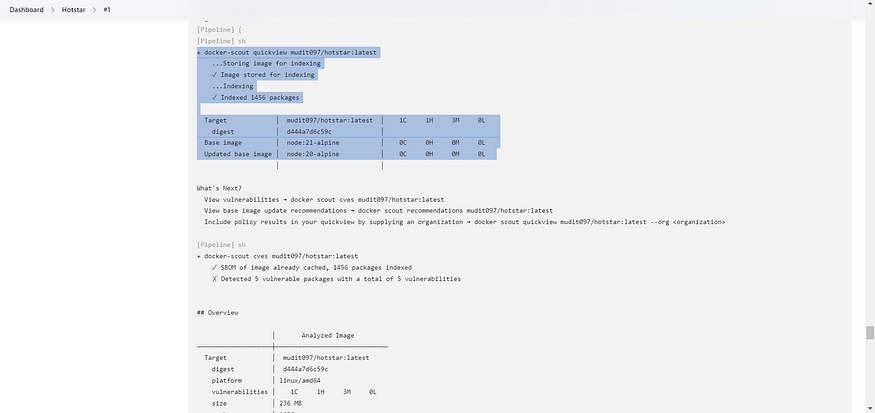
Let’s review Docker Scout Image Analysis.
Quick View
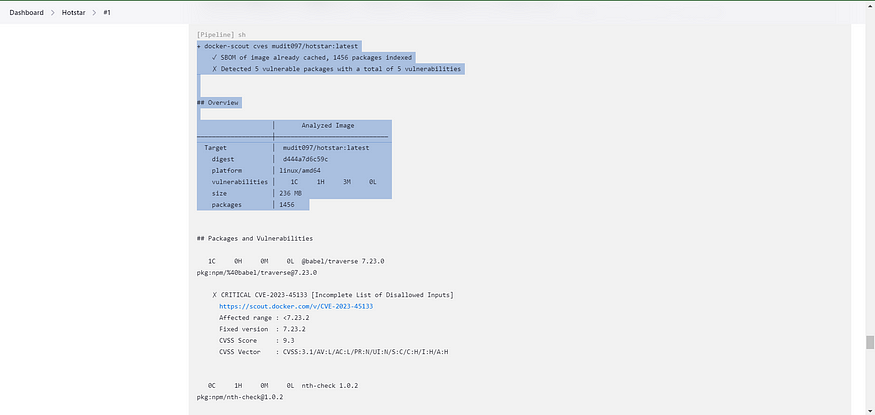
Cves
Recommendations

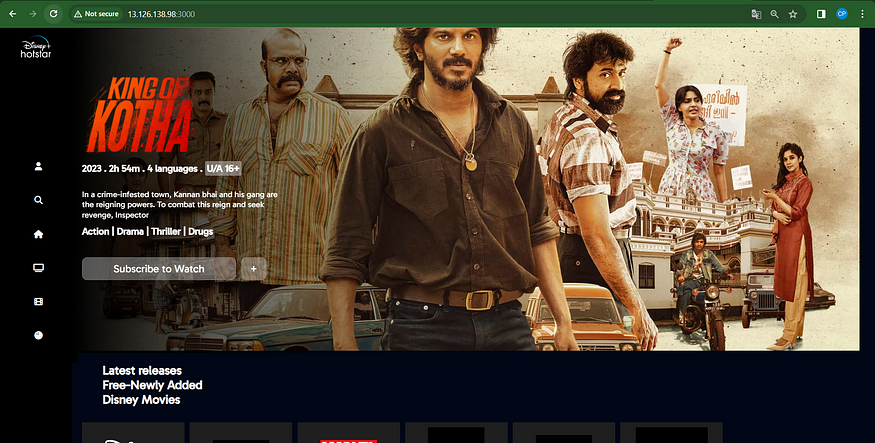
Deploy to Container
<ec2-ip:3000>
Output
Go to PuTTY on your Jenkins instance, open an SSH session, and enter the command below:
aws eks update-kubeconfig --name <CLUSTER NAME> --region <CLUSTER REGION>
aws eks update-kubeconfig --name EKS_CLOUD --region ap-south-1

Let’s see the nodes
kubectl get nodes

Now Give this command in CLI
cat ~/.kube/config
Copy the configuration file to the Jenkins master or the local file manager, and then save it.

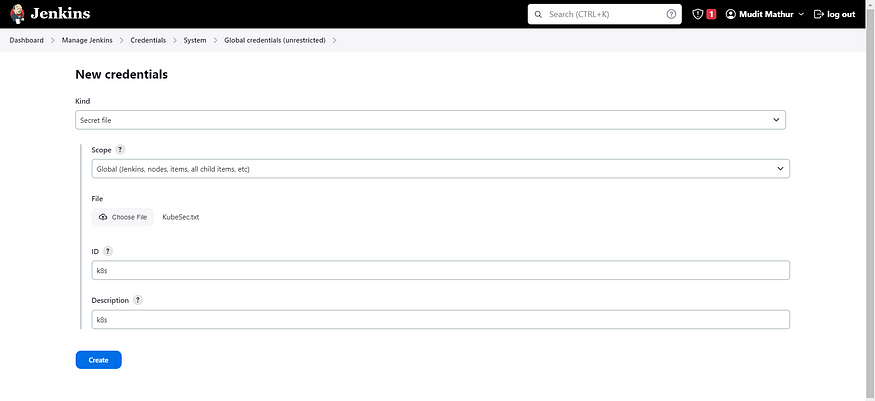
Copy it and save it in documents or another folder. Save it as kubeSec.txt.
Note: Create a kubeSec.txt in your file explorer, save the configuration in it, and use this at the Kubernetes credential section.
Install the Kubernetes plugin. Once it’s successfully installed,…
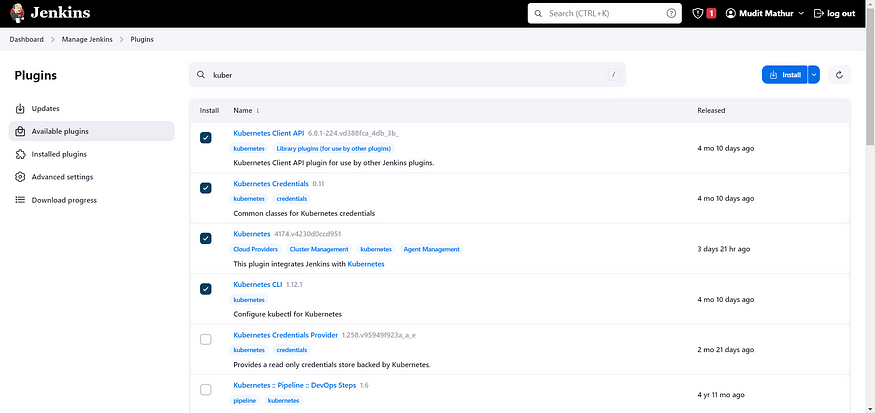
Go to Manage Jenkins → Manage Credentials → Click on Jenkins Global → Add Credentials.
Final step to deploy on the Kubernetes cluster
stage('Deploy to Kubernetes') {
    steps {
        script {
            dir('K8S') {
                withKubeConfig(
                    caCertificate: '',
                    clusterName: '',
                    contextName: '',
                    credentialsId: 'k8s',
                    namespace: '',
                    restrictKubeConfigAccess: false,
                    serverUrl: ''
                ) {
                    sh 'kubectl apply -f deployment.yml'
                    sh 'kubectl apply -f service.yml'
                }
            }
        }
    }
}
Give the command after pipeline success.
kubectl get all
Add the Load Balancer IP address to the security group of the EC2 instances in the cluster. Copy the Load Balancer link and open it in a browser.
You will see an output like this:
Step 4: Destruction
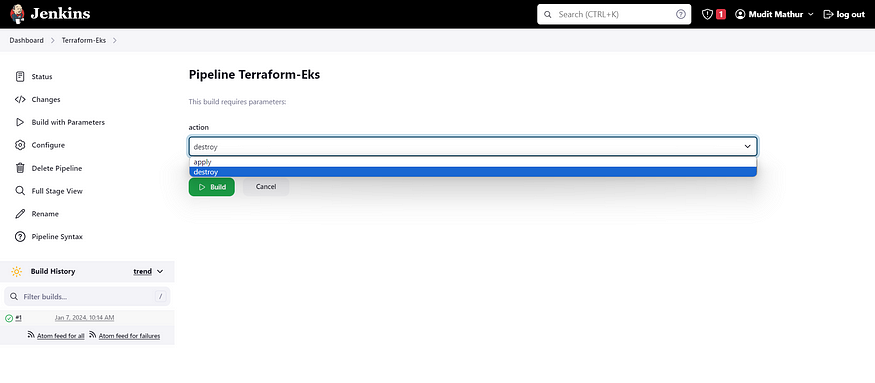
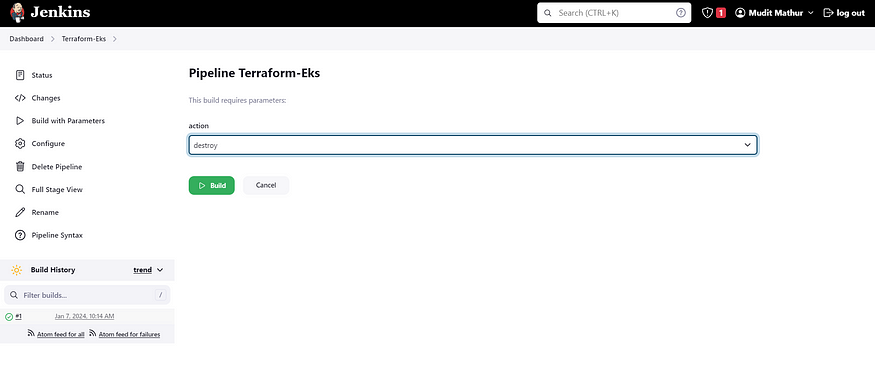
Now, go to the Jenkins Dashboard and click on the Terraform-EKS job.
Build with parameters and select the destroy action.
This will delete the EKS cluster that was provisioned.
After 8–9 minutes, the cluster will be deleted, so please wait for it. Do not remove the EC2 instance until that time.
Cluster deleted
Delete the EC2 instance and IAM role.
Check the load balancer to ensure it has been deleted.
Congratulations on completing the journey of deploying your Hotstar clone using DevSecOps practices on AWS! This process has highlighted the power of seamlessly integrating security measures into the deployment pipeline, ensuring not only efficiency but also a robust shield against potential threats.
Key Highlights:
1. Leveraging AWS services, Docker, Jenkins, and security tools, we orchestrated a secure and automated deployment pipeline.
2. Implementing DevSecOps principles helped fortify the application against vulnerabilities through continuous security checks.
3. The seamless integration of static code analysis, container security, and automated deployment showcases the strength of DevSecOps methodologies.
What’s Next? Continue exploring the realm of DevSecOps and cloud technologies. Experiment with new tools, refine your deployment pipelines, and delve deeper into securing your applications effectively.
Stay Connected: We hope this guide has been insightful and valuable for your learning journey. Don’t hesitate to reach out with questions, feedback, or requests for further topics. Follow us on:
- Hashnode (https://hashnode.com/@MuditM12)
- Medium: (https://medium.com/@muditmathur121)
- GitHub: (https://github.com/mudit097)
- LinkedIn: (https://www.linkedin.com/in/mudit--mathur/)
and find more tech tutorials, guides, and updates.
Thank you for embarking on this DevSecOps journey with us. Keep innovating, securing, and deploying your applications with confidence!


