Implementing a DevSecOps CI/CD Pipeline for a Uber Clone

Mudit Mathur is an experienced DevOps Engineer with expertise in AWS, CI/CD, and automation. He delivers tangible results by streamlining processes and fostering collaboration. Reach out to him at linkedin.com/in/mudit-mathur-535786146 or muditmathur121@gmail.com for efficient DevOps solutions.
Greetings, tech enthusiasts! In today’s exploration, we’ll be delving into the dynamic domain of DevSecOps. Come along as we embark on the journey of deploying an app akin to Uber, leveraging a comprehensive CI/CD methodology. Our focus will be on seamlessly integrating SonarQube and OWASP to fortify security measures. Additionally, we’ll tap into the potency of Docker Scout and witness the adept orchestration of deployment onto an EKS cluster. This immersive session will highlight Jenkins’ role in provisioning EKS through Terraform files, unveiling the enchanting synergy of DevSecOps in action.
Find the project on GitHub: https://github.com/mudit097/uber-clone.git](https://github.com/mudit097/uber-clone.git)
Step1: Launch an Ubuntu instance (T2.large)
1. Sign in to the AWS Console: Log in to your AWS Management Console.
2. Navigate to the EC2 Dashboard: Go to the EC2 Dashboard by selecting “Services” in the top menu and then choosing “EC2” under the Compute section.
- Launch Instance: Click on the “Launch Instance” button to initiate the instance creation process.
4. Choose an Amazon Machine Image (AMI): Select a suitable AMI for your instance, such as the Ubuntu image.
- Choose an Instance Type: In the “Choose Instance Type” step, pick “t2.large” as your instance type. Proceed by clicking “Next: Configure Instance Details.”
6. Configure Instance Details:
— For “Number of Instances,” set it to 1 (unless you need multiple instances).
— Configure additional settings like network, subnets, IAM role, etc., if necessary.
— For “Storage,” click “Add New Volume” and set the size to 8GB (or modify the existing storage to 30GB).
— Click “Next: Add Tags” when you’re done.
- Add Tags (Optional): Add any desired tags to your instance. This step is optional but helps in organizing instances.
8. Configure Security Group:
— Choose an existing security group or create a new one.
— Ensure the security group has the necessary inbound/outbound rules to allow access as required.
9. Review and Launch: Review the configuration details to ensure everything is set as desired.
10. Select Key Pair:
— Select “Choose an existing key pair” and choose the key pair from the drop-down menu.
— Acknowledge that you have access to the selected private key file.
11. Click “Launch Instances” to create the instance.
12. Access the EC2 Instance: Once the instance is launched, access it using the key pair and the instance’s public IP or DNS.
Ensure that you possess the required permissions and adhere to best practices when configuring security groups and key pairs, thereby upholding the security of your EC2 instance.
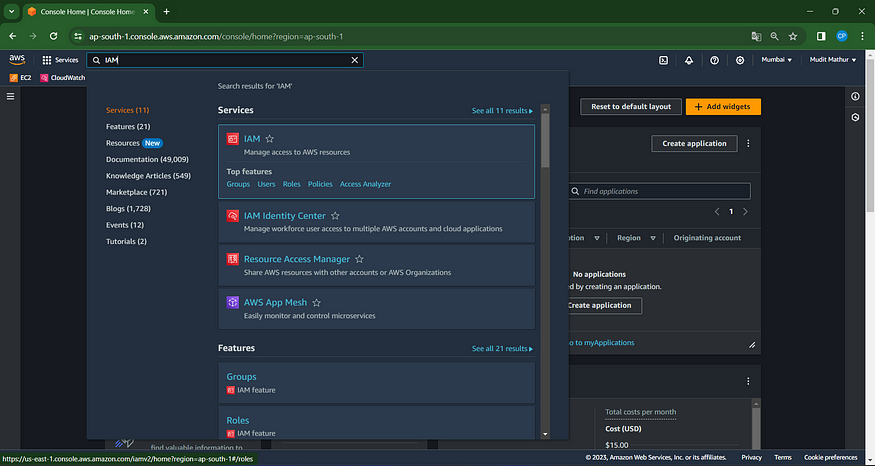
Step 2: Create IAM role
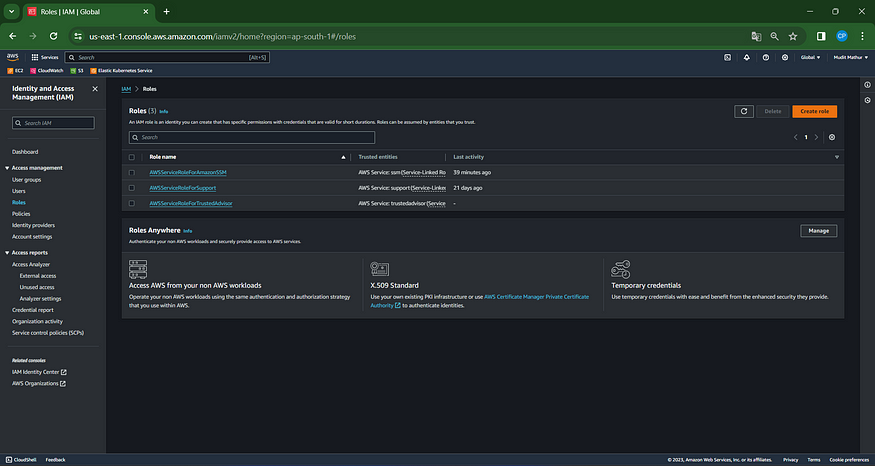
Look for IAM in the AWS search bar and select “Roles.”
Select “Create Role”
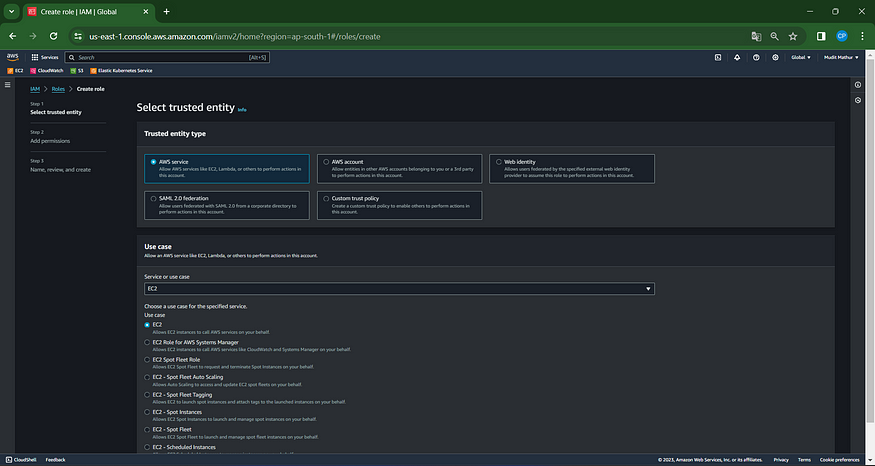
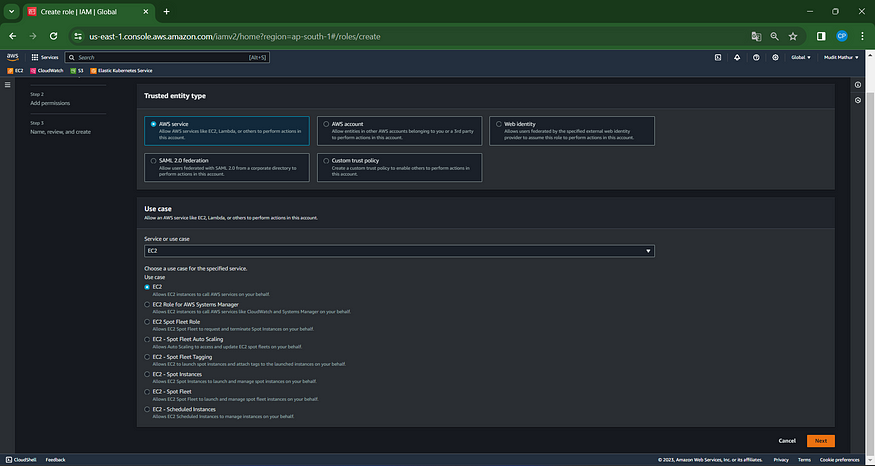
Choose the entity type as an AWS service, opt for EC2 as the use case, and proceed by clicking on Next.
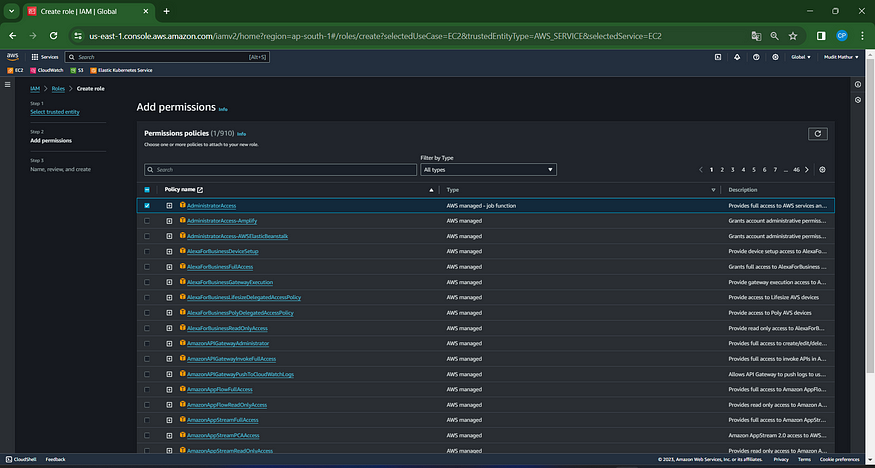
For the permission policy, choose ‘Administrator Access’ (solely for learning purposes), then click Next.

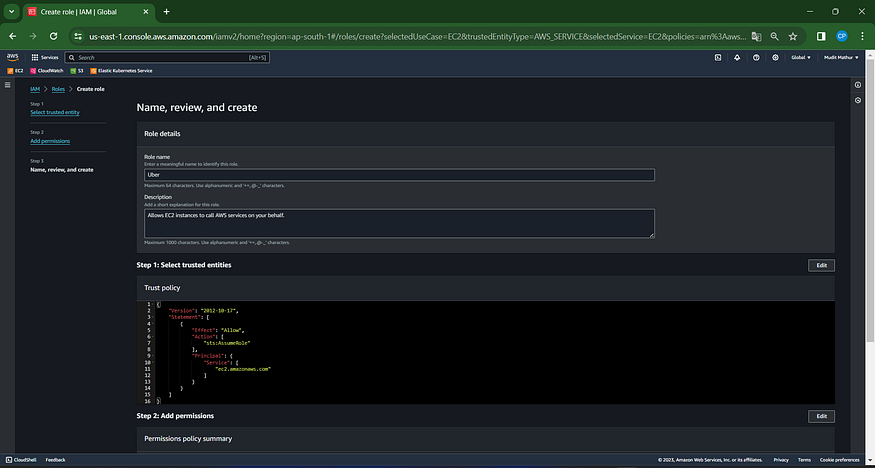
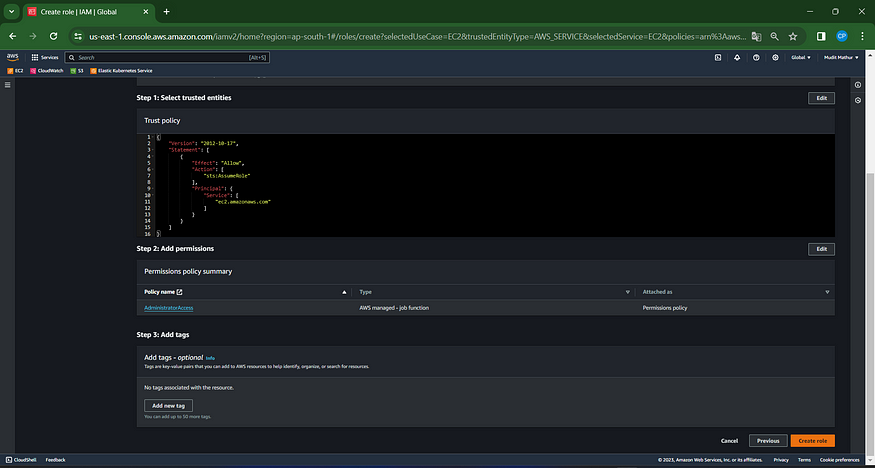
Please enter a name for the role and click on “Create Role.”
A role has been established.
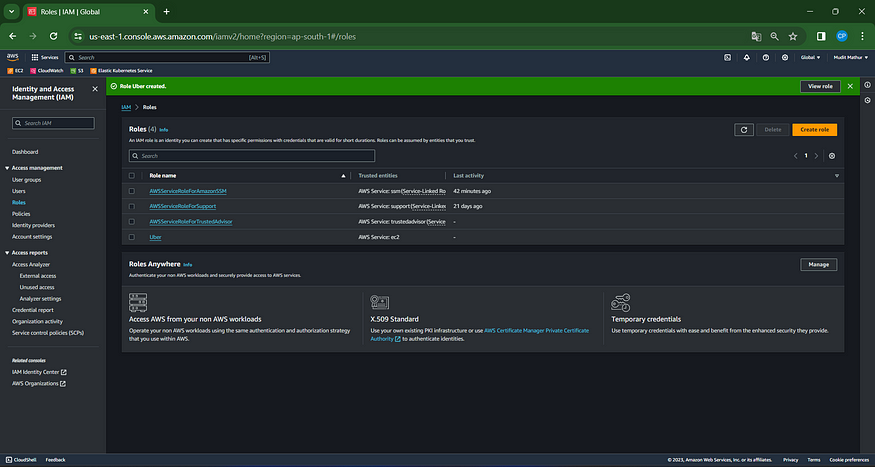
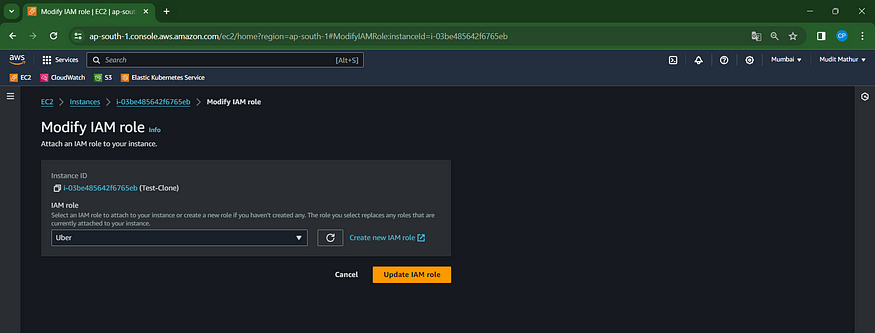
Attach the created role to the EC2 instance we set up earlier, enabling cluster provisioning from that instance.
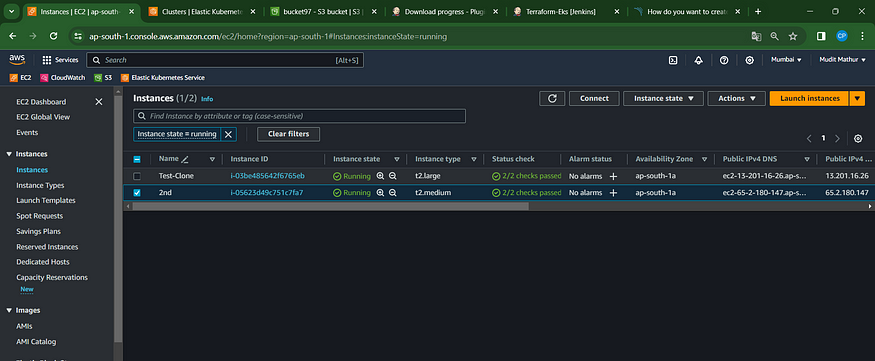
Navigate to the EC2 Dashboard and choose the relevant instance.
Click on Actions –> Security –> Modify IAM role.

Choose the previously created role and click on “Update IAM role.”
Connect the instance using Mobaxterm or Putty.
Step3: Installations of Packages
Create a shell script on an Ubuntu EC2 instance.
sudo su  # Run from within the root directory
vim script1.sh
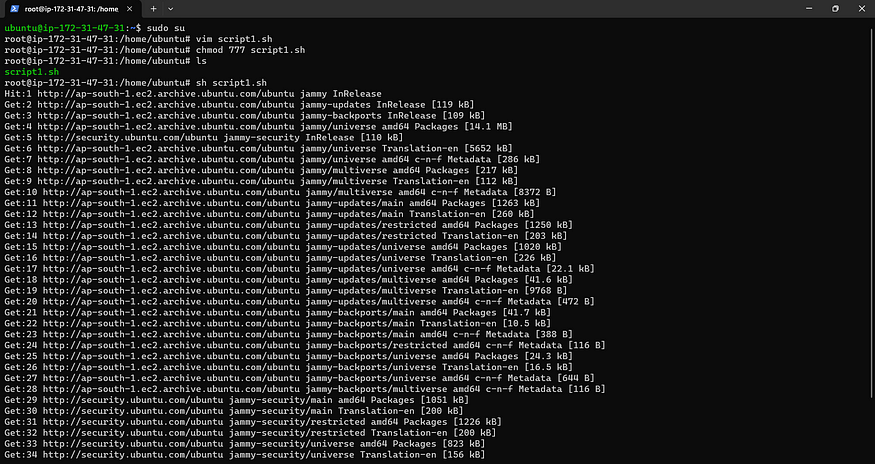
Execute the following script to install Jenkins, Docker, Kubectl, Terraform, AWS CLI, and Sonarqube.
#!/bin/bash
sudo apt update -y
wget -O - https://packages.adoptium.net/artifactory/api/gpg/key/public | tee /etc/apt/keyrings/adoptium.asc
echo "deb [signed-by=/etc/apt/keyrings/adoptium.asc] https://packages.adoptium.net/artifactory/deb $(awk -F= '/^VERSION_CODENAME/{print$2}' /etc/os-release) main" | tee /etc/apt/sources.list.d/adoptium.list
sudo apt update -y
sudo apt install temurin-17-jdk -y
/usr/bin/java --version
curl -fsSL https://pkg.jenkins.io/debian-stable/jenkins.io-2023.key | sudo tee /usr/share/keyrings/jenkins-keyring.asc > /dev/null
echo deb [signed-by=/usr/share/keyrings/jenkins-keyring.asc] https://pkg.jenkins.io/debian-stable binary/ | sudo tee /etc/apt/sources.list.d/jenkins.list > /dev/null
sudo apt-get update -y
sudo apt-get install jenkins -y
sudo systemctl start jenkins
#install docker
# Add Docker's official GPG key:
sudo apt-get update
sudo apt-get install ca-certificates curl gnupg -y
sudo install -m 0755 -d /etc/apt/keyrings
curl -fsSL https://download.docker.com/linux/ubuntu/gpg | sudo gpg --dearmor -o /etc/apt/keyrings/docker.gpg
sudo chmod a+r /etc/apt/keyrings/docker.gpg
# Add the repository to Apt sources:
echo \
  "deb [arch=$(dpkg --print-architecture) signed-by=/etc/apt/keyrings/docker.gpg] https://download.docker.com/linux/ubuntu \
  $(. /etc/os-release && echo "$VERSION_CODENAME") stable" | \
  sudo tee /etc/apt/sources.list.d/docker.list > /dev/null
sudo apt-get update
sudo apt-get install docker-ce docker-ce-cli containerd.io docker-buildx-plugin docker-compose-plugin -y
sudo usermod -aG docker ubuntu
newgrp docker
Please grant executable permissions to the shell script now.
chmod 777 script1.sh
sh script1.sh
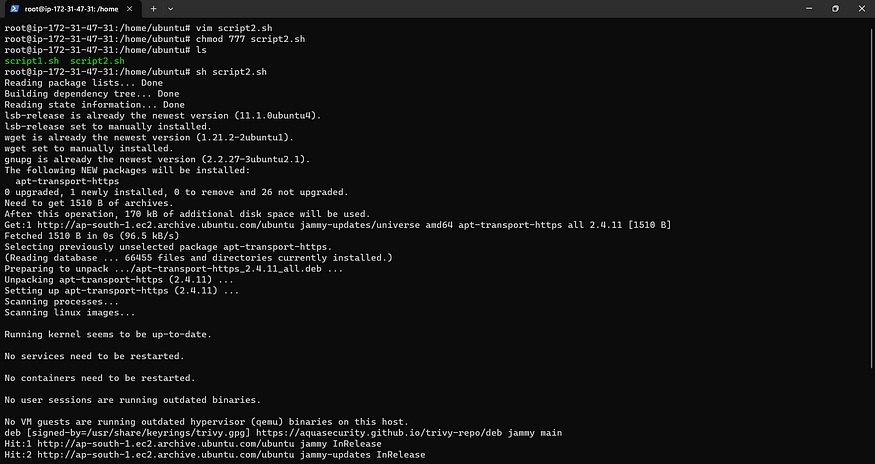
Let’s execute the second script.
vim script2.sh
Add this script
#!/bin/bash
# install trivy
sudo apt-get install wget apt-transport-https gnupg lsb-release -y
wget -qO - https://aquasecurity.github.io/trivy-repo/deb/public.key | gpg --dearmor | sudo tee /usr/share/keyrings/trivy.gpg > /dev/null
echo "deb [signed-by=/usr/share/keyrings/trivy.gpg] https://aquasecurity.github.io/trivy-repo/deb $(lsb_release -sc) main" | sudo tee -a /etc/apt/sources.list.d/trivy.list
sudo apt-get update
sudo apt-get install trivy -y
#install terraform
sudo apt install wget -y
wget -O- https://apt.releases.hashicorp.com/gpg | sudo gpg --dearmor -o /usr/share/keyrings/hashicorp-archive-keyring.gpg
echo "deb [signed-by=/usr/share/keyrings/hashicorp-archive-keyring.gpg] https://apt.releases.hashicorp.com $(lsb_release -cs) main" | sudo tee /etc/apt/sources.list.d/hashicorp.list
sudo apt update && sudo apt install terraform
#install Kubectl on Jenkins
sudo apt update
sudo apt install curl -y
curl -LO https://dl.k8s.io/release/$(curl -L -s https://dl.k8s.io/release/stable.txt)/bin/linux/amd64/kubectl
sudo install -o root -g root -m 0755 kubectl /usr/local/bin/kubectl
kubectl version --client
#install Aws cli
curl "https://awscli.amazonaws.com/awscli-exe-linux-x86_64.zip" -o "awscliv2.zip"
sudo apt-get install unzip -y
unzip awscliv2.zip
sudo ./aws/install
Now
chmod 777 script2.sh
sh script2.sh
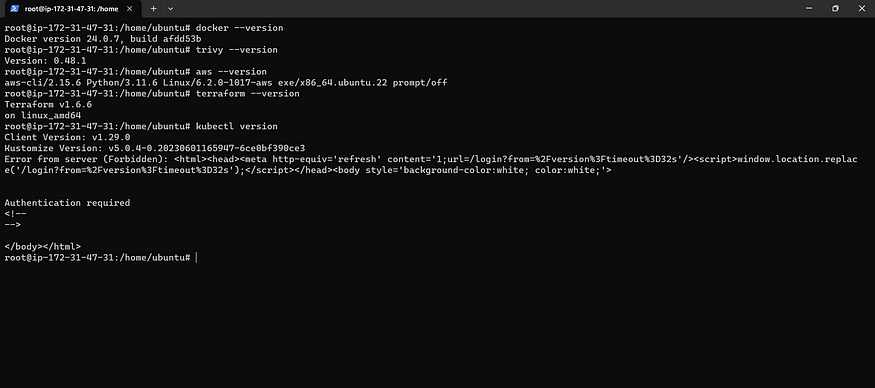
Please verify the package versions now.
docker --version
trivy --version
aws --version
terraform --version
kubectl version
Grant executable permissions using Mobaxtreme
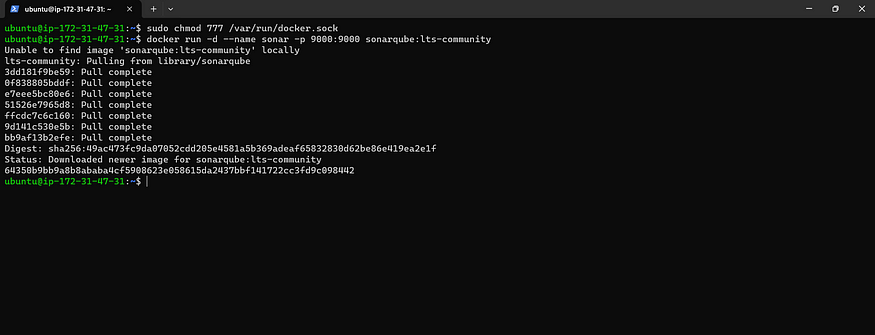
sudo chmod 777 /var/run/docker.sock
docker run -d --name sonar -p 9000:9000 sonarqube:lts-community
Step4: Connect to Jenkins and Sonarqube
Now, please copy the public IP address of the EC2 instance and paste it into your web browser.
Prior to that, modify the inbound rules of the EC2 instance to allow traffic on ports 8080 and 9000.
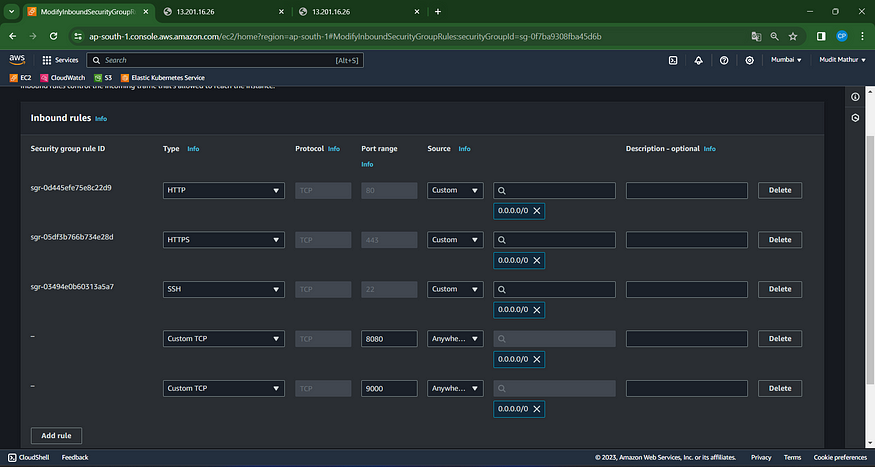
<Ec2-ip:8080> #you will Jenkins login page
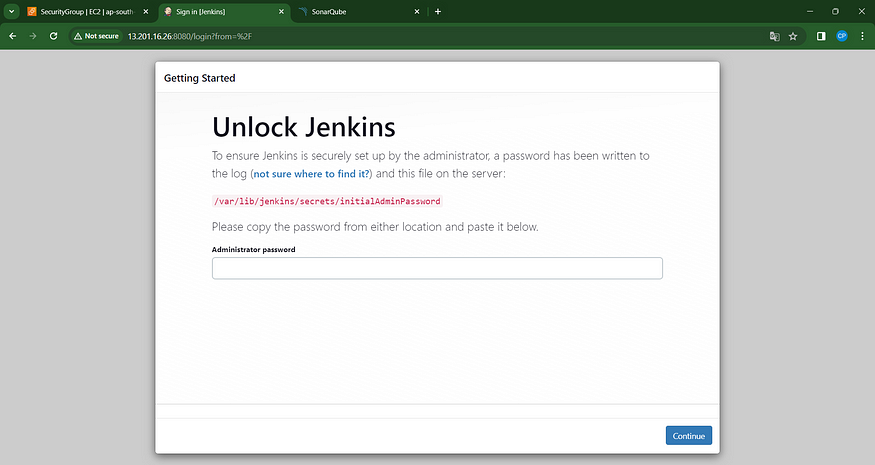
Connect your instance to PuTTY or MobaXterm and then provide the following command to set the Administrator password:
sudo cat /var/lib/jenkins/secrets/initialAdminPassword

Now, proceed to install the recommended plugins.
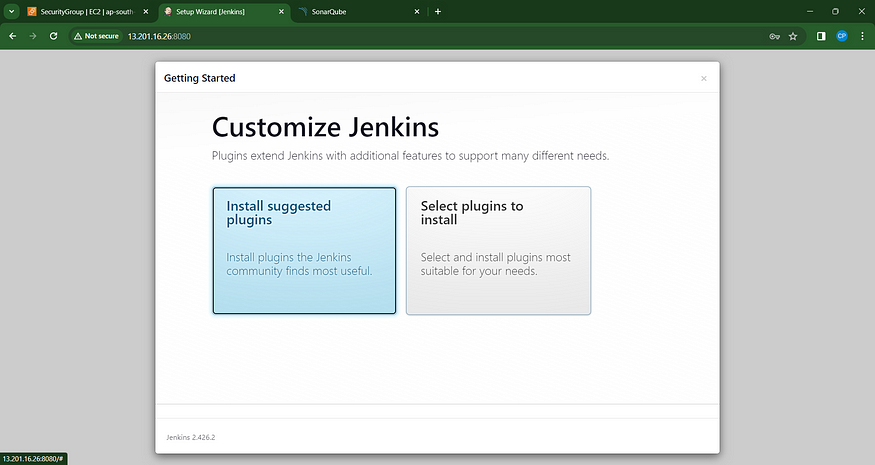
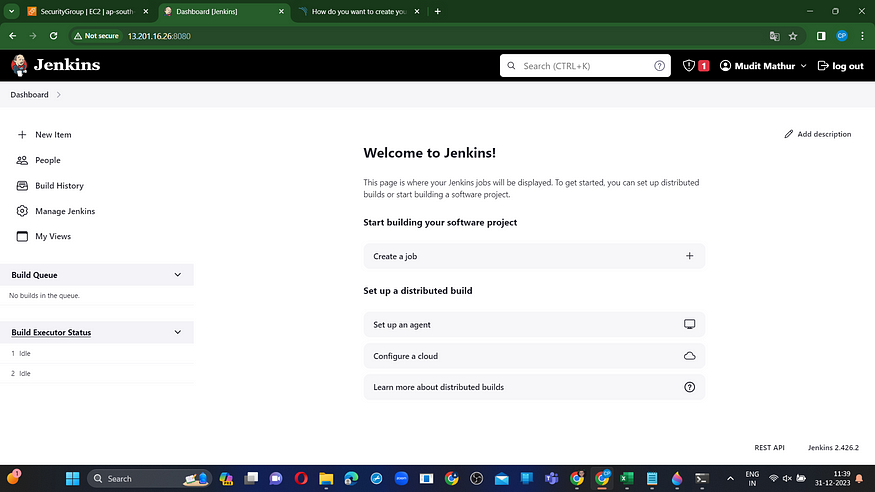
Jenkins will be installed and all libraries will be installed.
Establish an administrative user account.
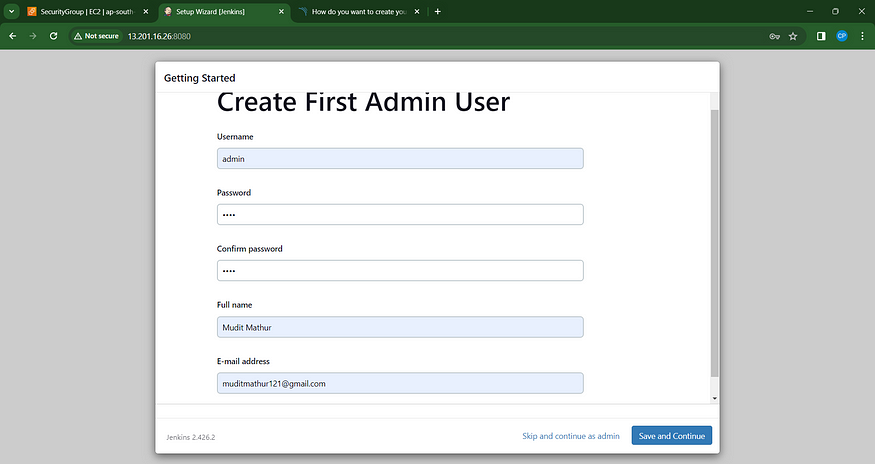
Click ‘Save and Continue’ on the Jenkins dashboard.
Copy the public IP once more, and then paste it into a new browser tab using port 9000.
<ec2-ip:9000> #runs sonar container
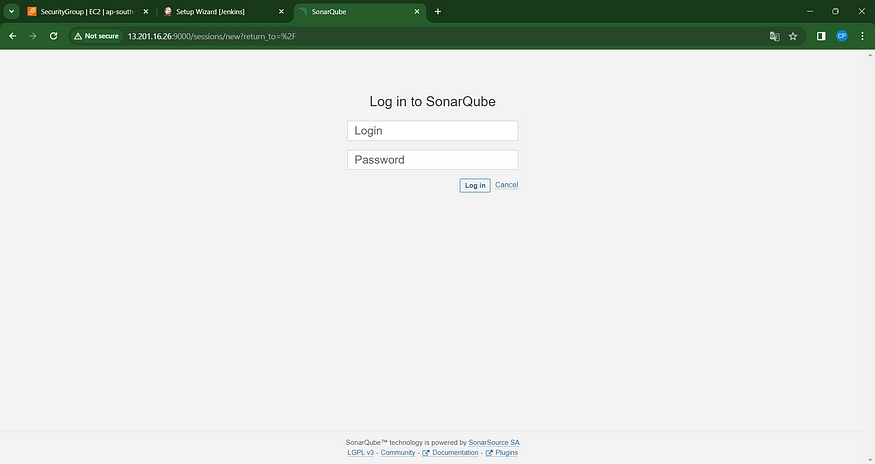
Please provide your username and password, then select the “Login” option. You can also update your password after logging in.
username admin
password admin
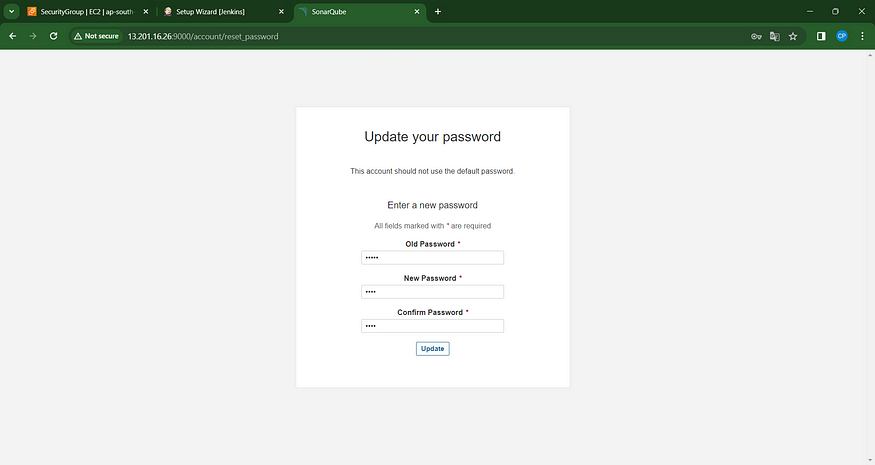
New Password Update: Access the Sonar Dashboard.
Step5: Terraform plugin install and EKS provision
Now, navigate to Jenkins and incorporate a Terraform plugin to facilitate the provisioning of AWS EKS through the Pipeline Job.
Access the Jenkins dashboard –> Navigate to Manage Jenkins –> Select Plugins
In the Available Plugins section, search for ‘Terraform’ and proceed to install it.

Locate the path to our Terraform installation (which will be utilized in the tools section of Terraform).
which terraform

Now, return to ‘Manage Jenkins’ –> ‘Global Tool Configuration.’
Include Terraform in the Tools section.
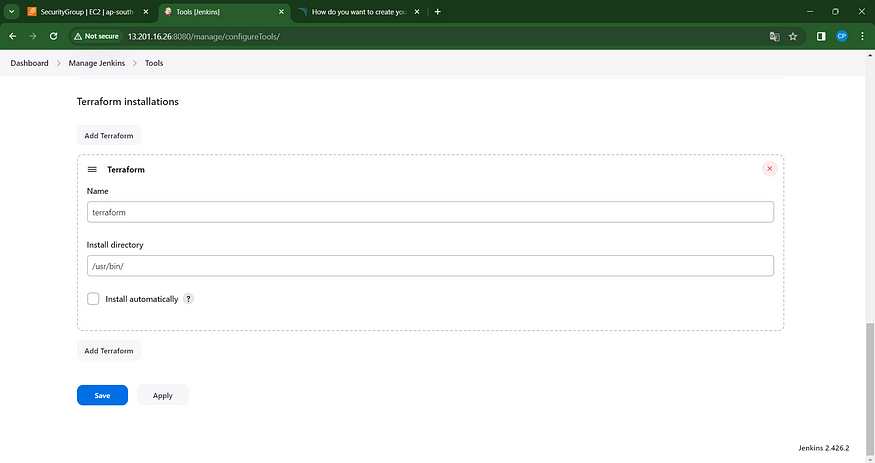
Apply and save your changes.
MODIFY THE S3 BUCKET NAME IN THE BACKEND.TF](https://github.com/mudit097/uber-clone.git) FILE.
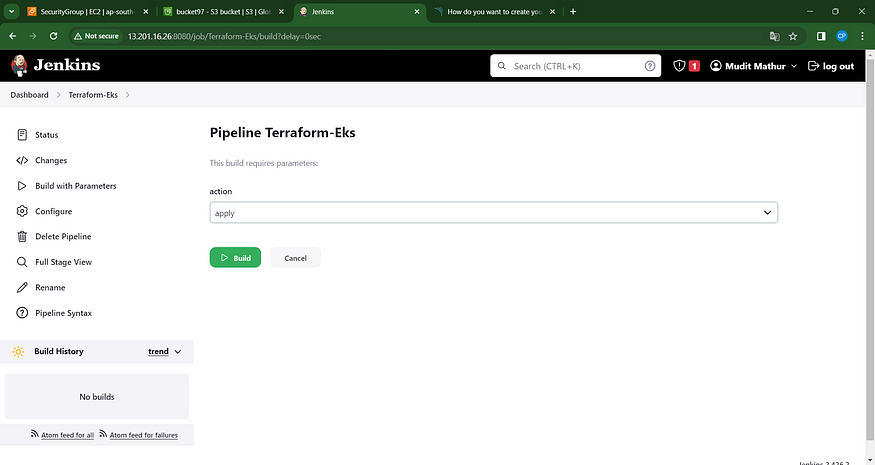
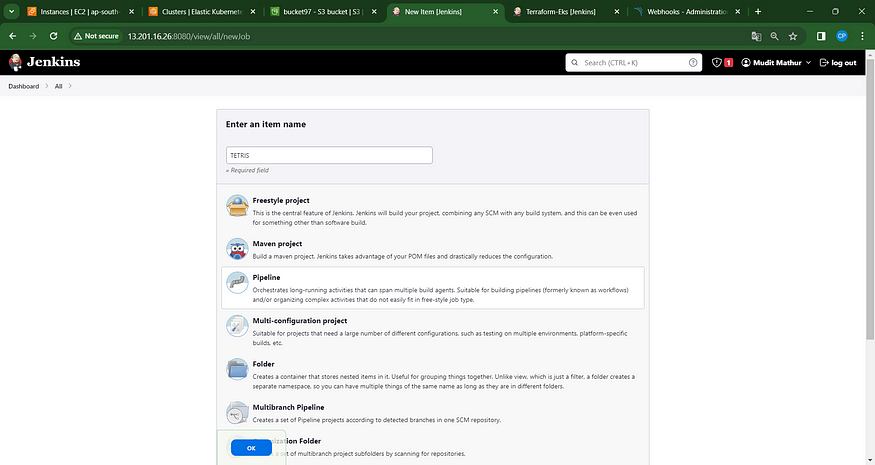
Next, initiate a new task for provisioning EKS.
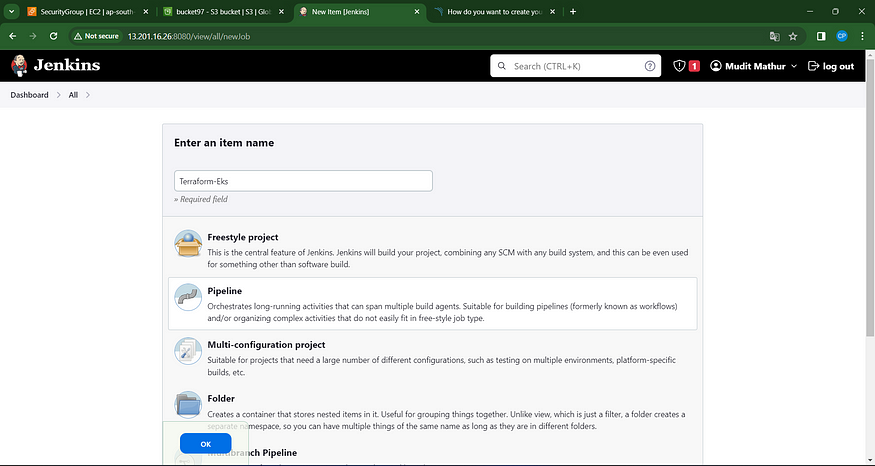
I aim to implement this using build parameters for the application and destruction processes exclusively. Please incorporate this within the job, as illustrated in the image below.
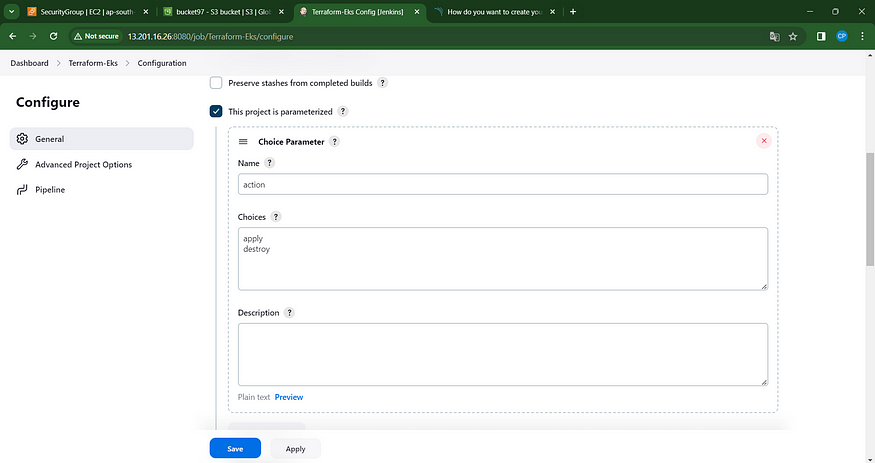
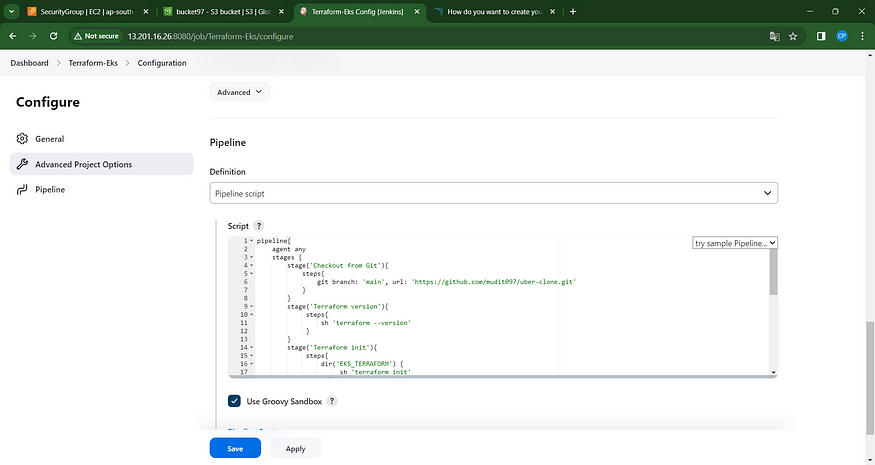
Let’s incorporate a pipeline.
pipeline{
    agent any
    stages {
        stage('Checkout from Git'){
            steps{
                git branch: 'main', url: 'https://github.com/mudit097/uber-clone.git'
            }
        }
        stage('Terraform version'){
             steps{
                 sh 'terraform --version'
             }
        }
        stage('Terraform init'){
             steps{
                 dir('EKS_TERRAFORM') {
                      sh 'terraform init'
                   }
             }
        }
        stage('Terraform validate'){
             steps{
                 dir('EKS_TERRAFORM') {
                      sh 'terraform validate'
                   }
             }
        }
        stage('Terraform plan'){
             steps{
                 dir('EKS_TERRAFORM') {
                      sh 'terraform plan'
                   }
             }
        }
        stage('Terraform apply/destroy'){
             steps{
                 dir('EKS_TERRAFORM') {
                      sh 'terraform ${action} --auto-approve'
                   }
             }
        }
    }
}
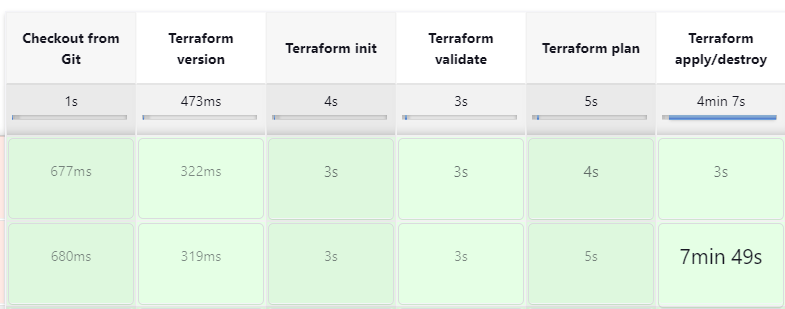
Apply, save, and build using parameters, then choose ‘apply’ as the action.
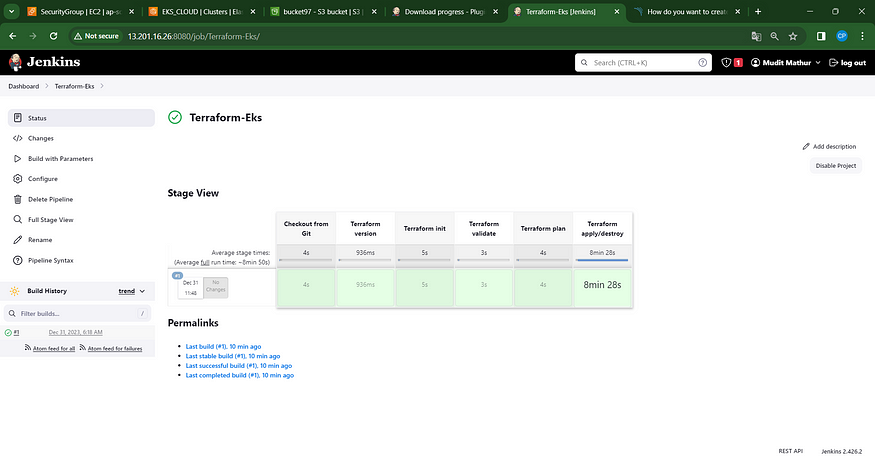
Stage view; provisioning expected within approximately 10 minutes.
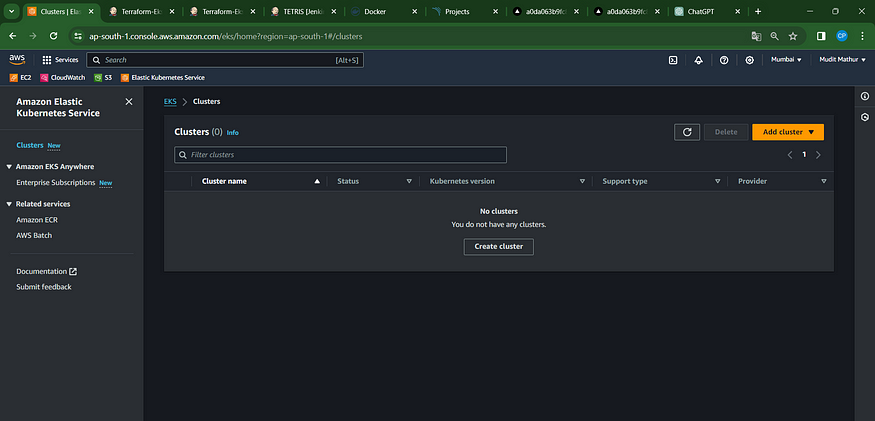
Verify in your AWS console to confirm the creation of the EKS instance.
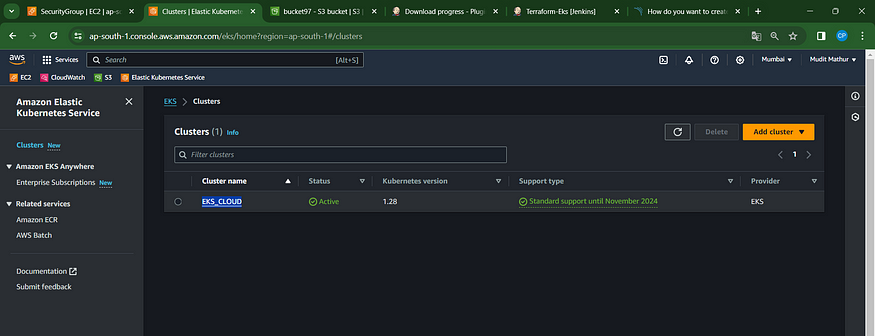
An EC2 instance has been successfully generated for the Node group.
Step6: Plugins installation & setup (Java, Sonar, Nodejs, owasp, Docker)
Navigate to the Jenkins dashboard.
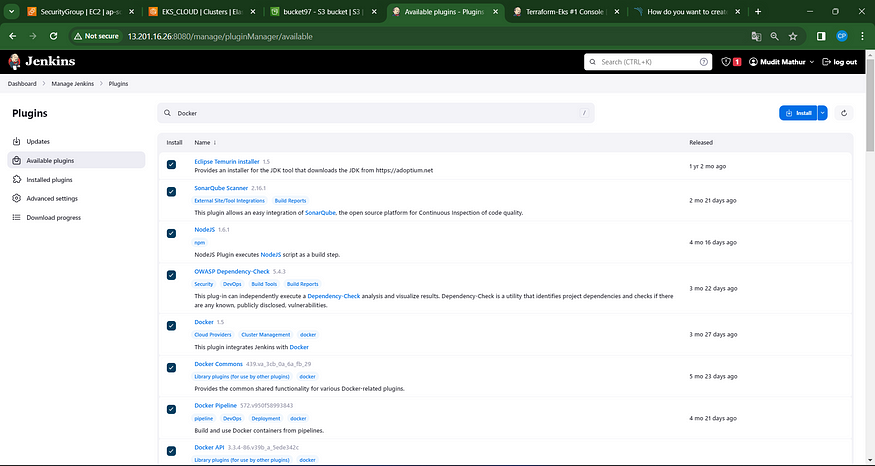
Go to “Manage Jenkins” → “Manage Plugins” → “Available Plugins.”
Search for the following plugins:
1. Eclipse Temurin Installer
2. SonarQube Scanner
3. Node.js
4. OWASP Dependency-Check
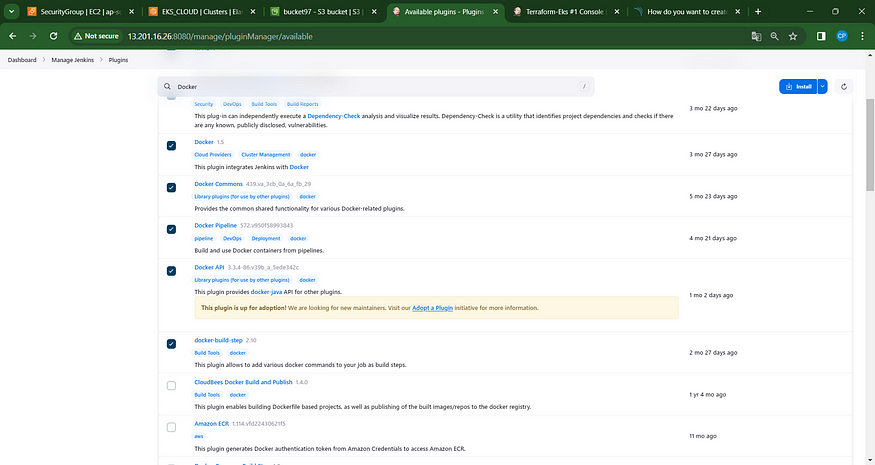
5. Docker
6. Docker Commons
7. Docker Pipeline
8. Docker API
9. Docker Build Step
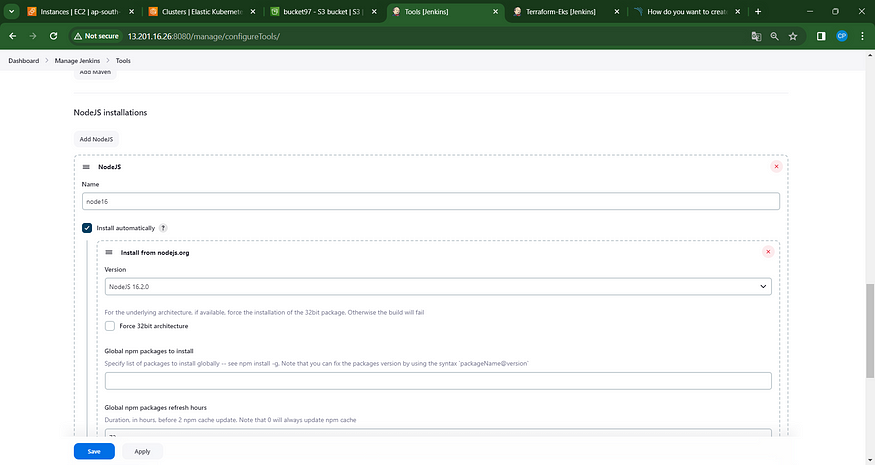
Step7: Configure in Global Tool Configuration
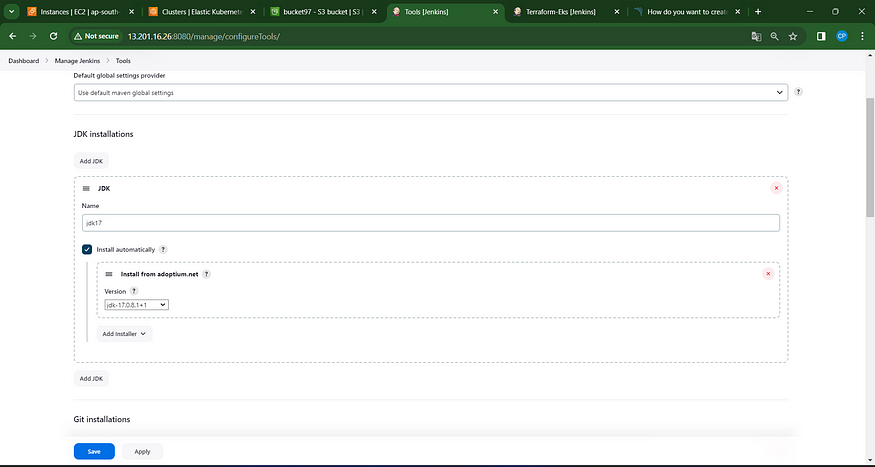
Navigate to Manage Jenkins → Tools → Install JDK 17 and NodeJs 16 → Click Apply and Save.
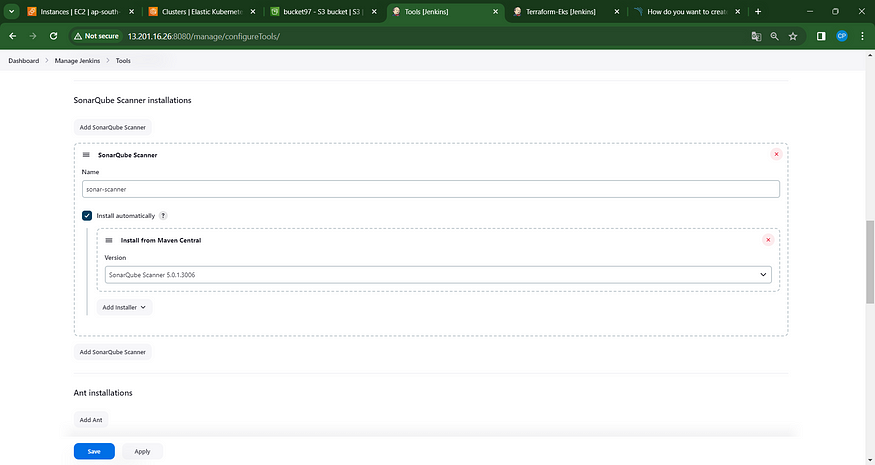
For SonarQube, ensure you are using the most up-to-date version.
For OWASP, please utilize version 6.5.1.
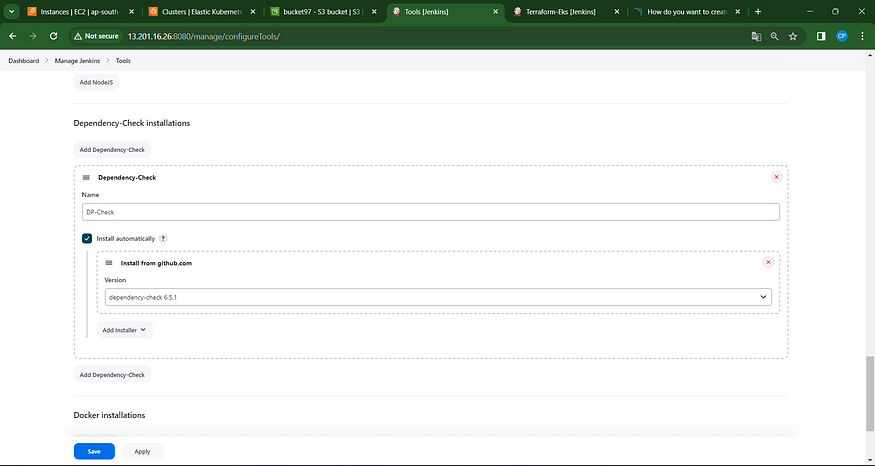
Use the latest version of Docker

Click apply and save.
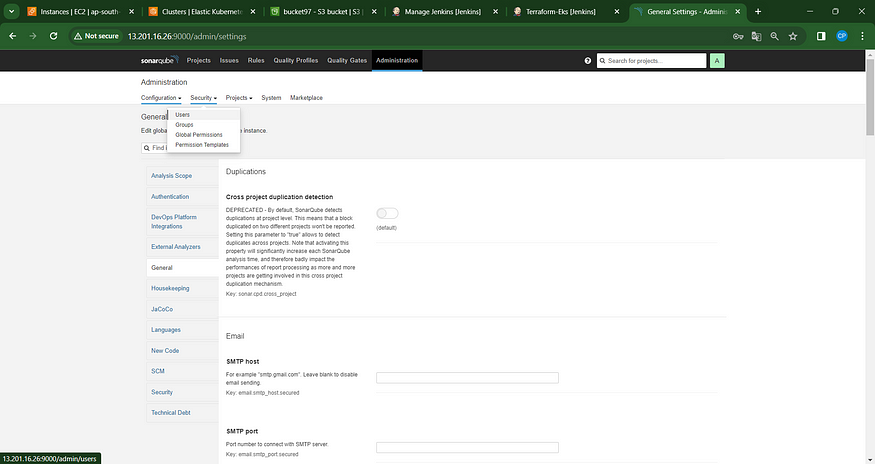
Step8: Configure Sonar Server in Manage Jenkins
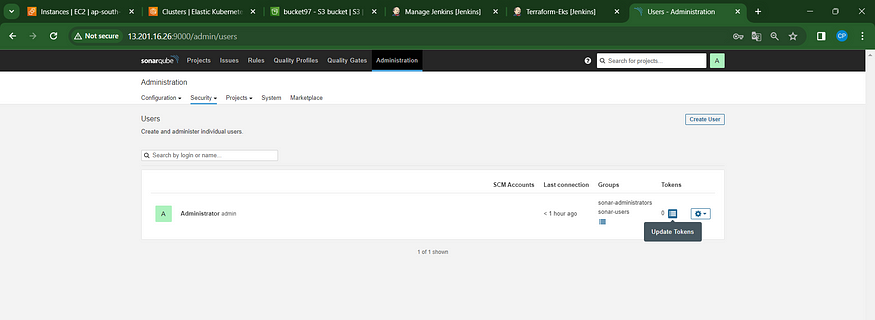
Retrieve the Public IP Address of your EC2 Instance. Sonarqube operates on Port 9000, so use <Public IP>:9000. Navigate to your Sonarqube Server, then select Administration → Security → Users → Tokens. Click on “Update Token,” assign it a name, and finally, click on “Generate Token.”
click on update Token
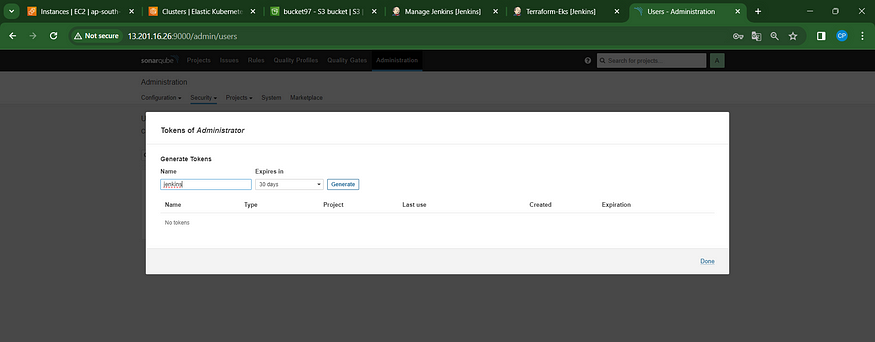
Create a token with a name and generate
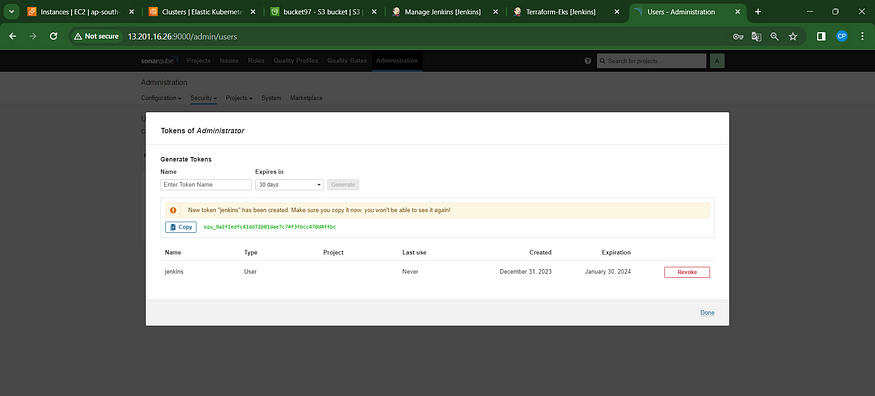
Copy that token
Navigate to the Jenkins Dashboard → Manage Jenkins → Credentials → Add Secret Text. Ensure it appears as follows:
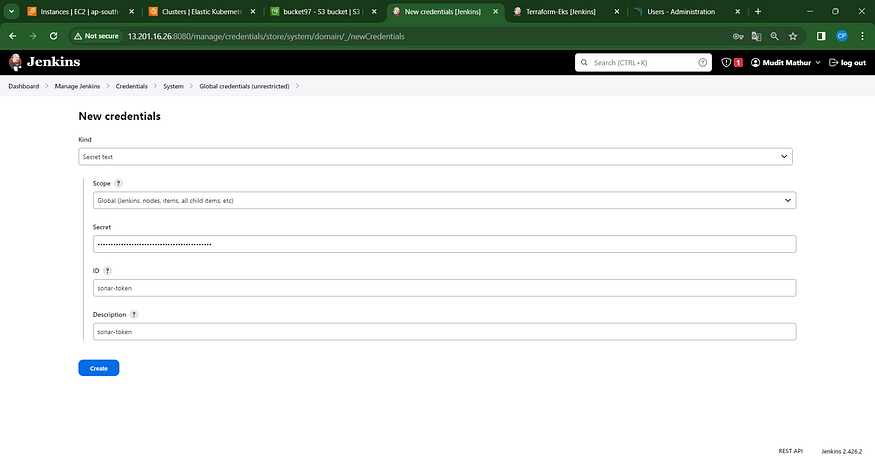
You will see this page once you click on ‘create.’

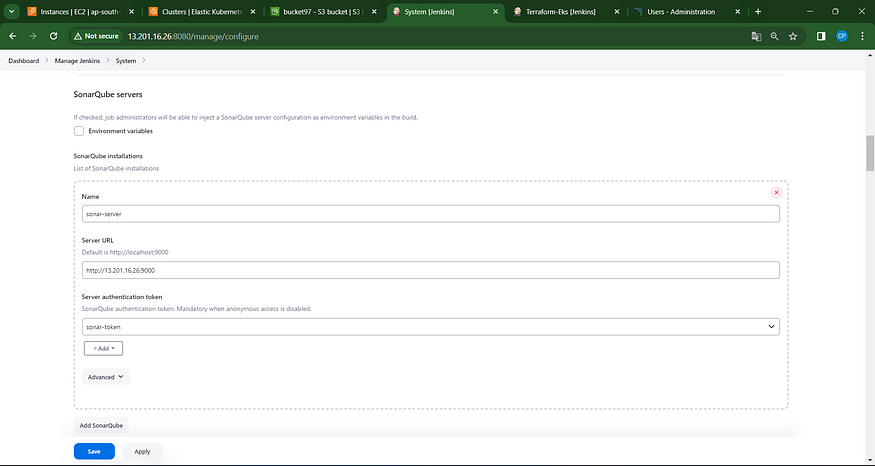
Now, navigate to the Dashboard → Manage Jenkins → System and add the settings as shown in the image below.
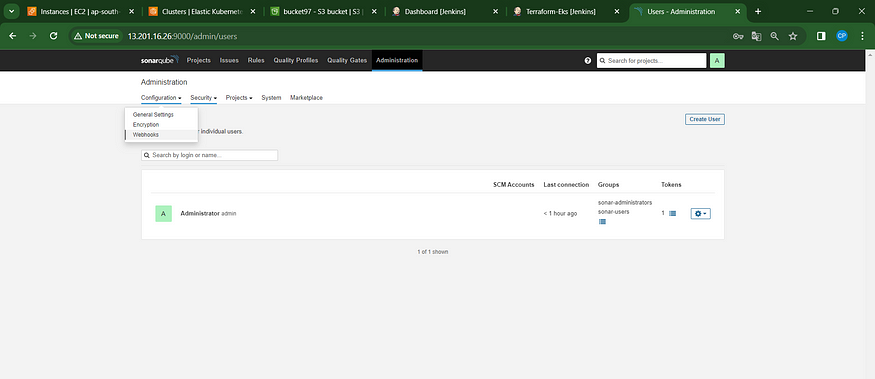
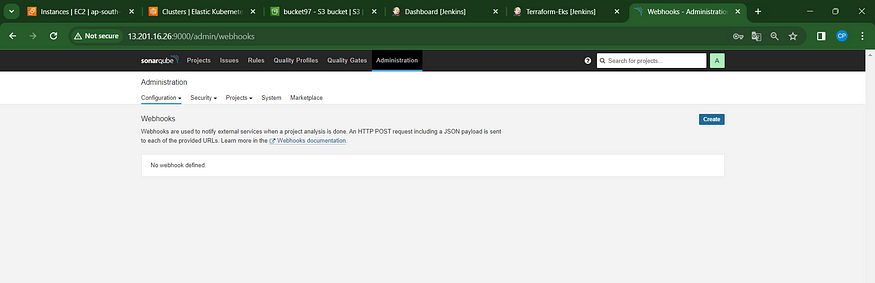
Click ‘Apply and Save’ in the Sonarqube Dashboard. Additionally, include a quality gate in the Administration section by navigating to Configuration and selecting Webhooks.
Click on Create
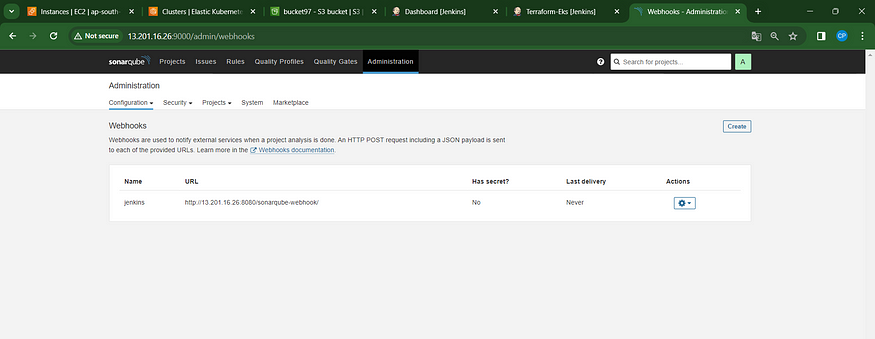
Add details
#in url section of quality gate
<http://jenkins-public-ip:8080>/sonarqube-webhook/>

Now, integrate Docker credentials with Jenkins to facilitate logging in and pushing the image.
Navigate to “Manage Jenkins” –> “Credentials” –> “Global” –> “Add Credential.”
Enter your DockerHub username and password in the provided fields under Global Credentials.

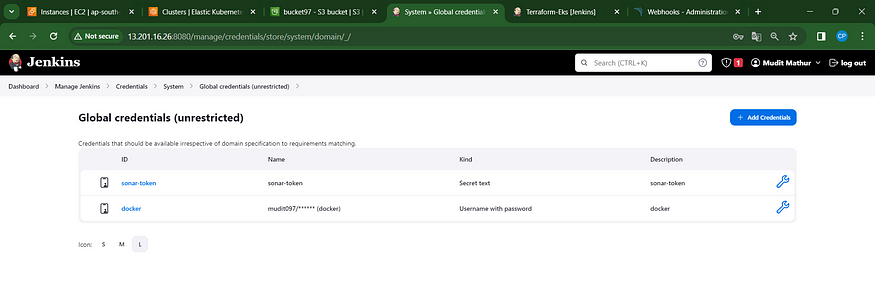
Create.
Step09: Pipeline upto Docker
Now, let’s generate a new task for our pipeline.
Add this to Pipeline
pipeline{
    agent any
    tools{
        jdk 'jdk17'
        nodejs 'node16'
    }
    environment {
        SCANNER_HOME=tool 'sonar-scanner'
    }
    stages {
        stage('clean workspace'){
            steps{
                cleanWs()
            }
        }
        stage('Checkout from Git'){
            steps{
                git branch: 'main', url: 'https://github.com/mudit097/uber-clone.git'
            }
        }
        stage("Sonarqube Analysis "){
            steps{
                withSonarQubeEnv('sonar-server') {
                    sh ''' $SCANNER_HOME/bin/sonar-scanner -Dsonar.projectName=Uber \
                    -Dsonar.projectKey=Uber'''
                }
            }
        }
        stage("quality gate"){
           steps {
                script {
                    waitForQualityGate abortPipeline: false, credentialsId: 'Sonar-token'
                }
            }
        }
        stage('Install Dependencies') {
            steps {
                sh "npm install"
            }
        }
        stage('OWASP FS SCAN') {
            steps {
                dependencyCheck additionalArguments: '--scan ./ --disableYarnAudit --disableNodeAudit', odcInstallation: 'DP-Check'
                dependencyCheckPublisher pattern: '**/dependency-check-report.xml'
            }
        }
         stage('TRIVY FS SCAN') {
            steps {
                sh "trivy fs . > trivyfs.txt"
            }
        }
        stage("Docker Build & Push"){
            steps{
                script{
                   withDockerRegistry(credentialsId: 'docker', toolName: 'docker'){
                       sh "docker build -t uber ."
                       sh "docker tag uber mudit097/uber:latest "
                       sh "docker push mudit097/uber:latest "
                    }
                }
            }
        }
        stage("TRIVY"){
            steps{
                sh "trivy image mudit097/uber:latest > trivyimage.txt"
            }
        }
        stage("deploy_docker"){
            steps{
                sh "docker run -d --name uber -p 3000:3000 mudit097/uber:latest"
            }
        }
    }
}
Click “Apply and Save.”
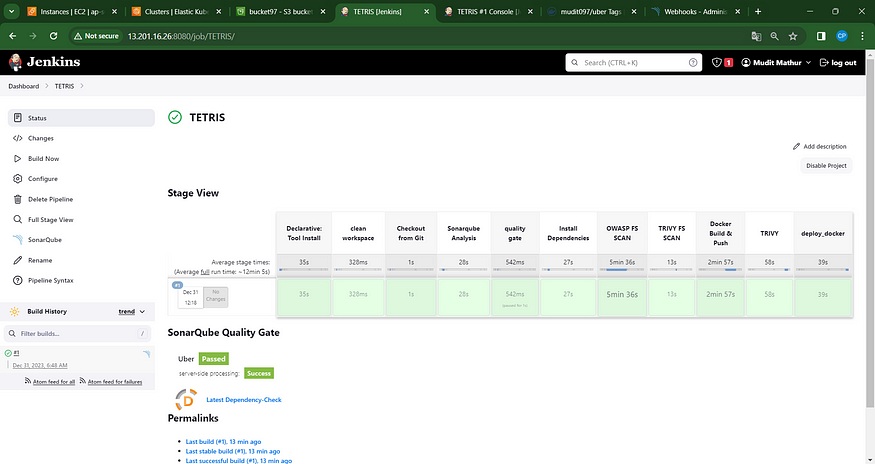
Initiate Build
View Stage
To access the report, navigate to the Sonarqube Server and select the “Projects” section.
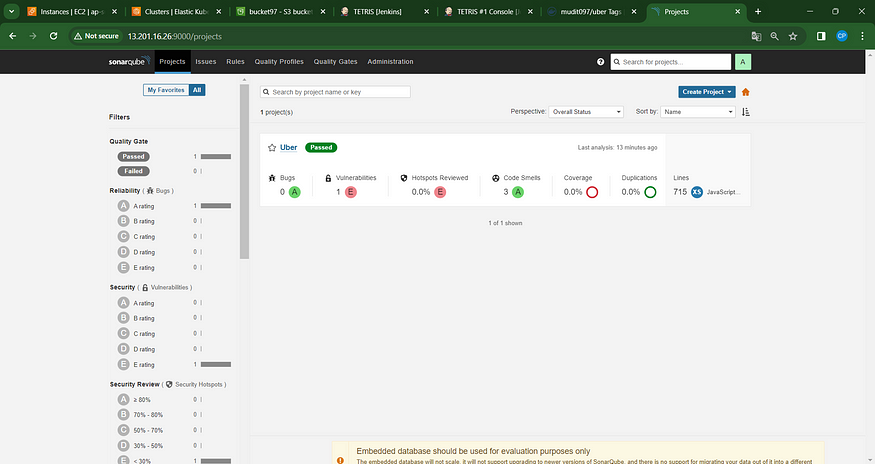
The report has been generated successfully, and the status indicates a pass. There are 715 lines that have been scanned. For a more comprehensive report, navigate to the “Issues” section.
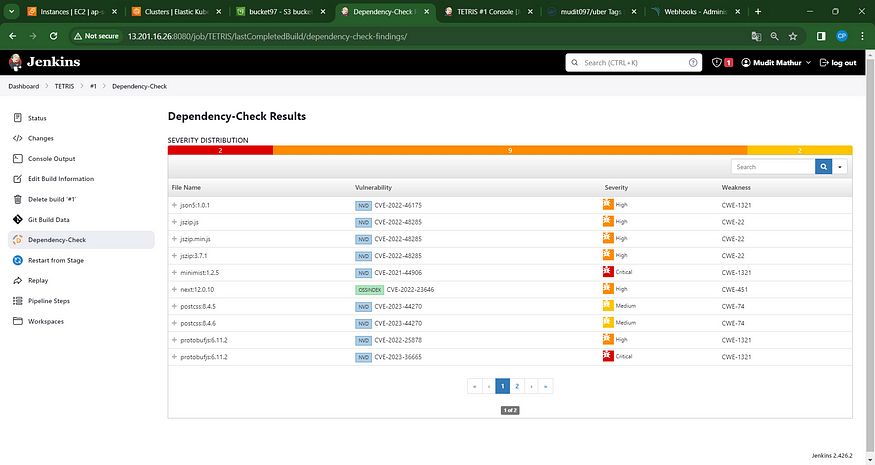
In the OWASP section, you’ll find a graphical representation of the status along with details on vulnerabilities.
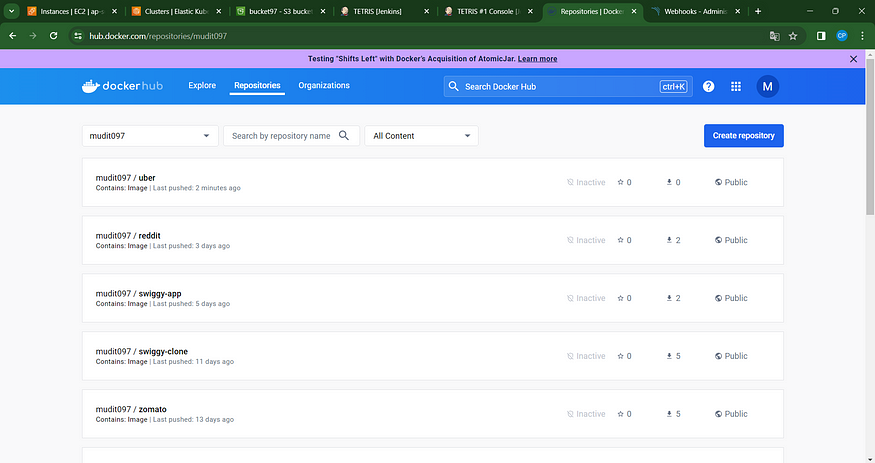
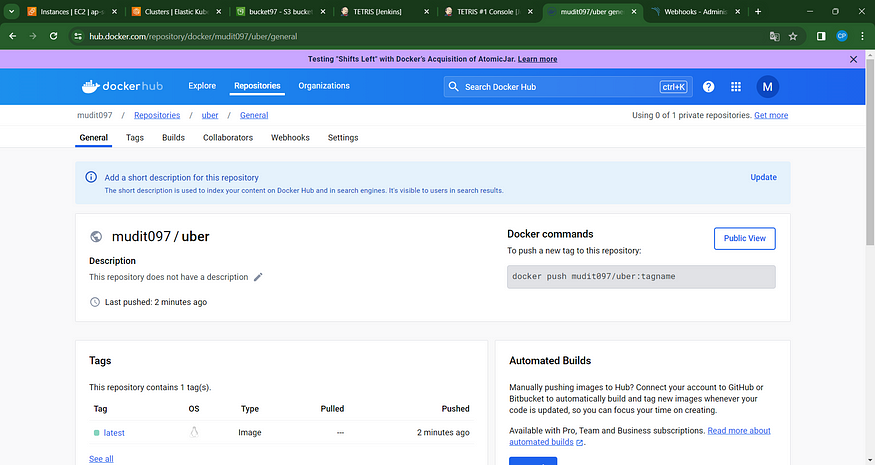
When logging into Docker Hub, you’ll notice the creation of a new image.
Step10: Kubernetes Deployment
Navigate to the Putty application on your Jenkins instance, access the SSH feature, and input the following command:
aws eks update-kubeconfig --name <CLUSTER NAME> --region <CLUSTER REGION>
aws eks update-kubeconfig --name EKS_CLOUD --region ap-south-1

Let’s see the nodes
kubectl get nodes

Transfer the configuration file to the Jenkins master or the local file manager, and ensure to save it.
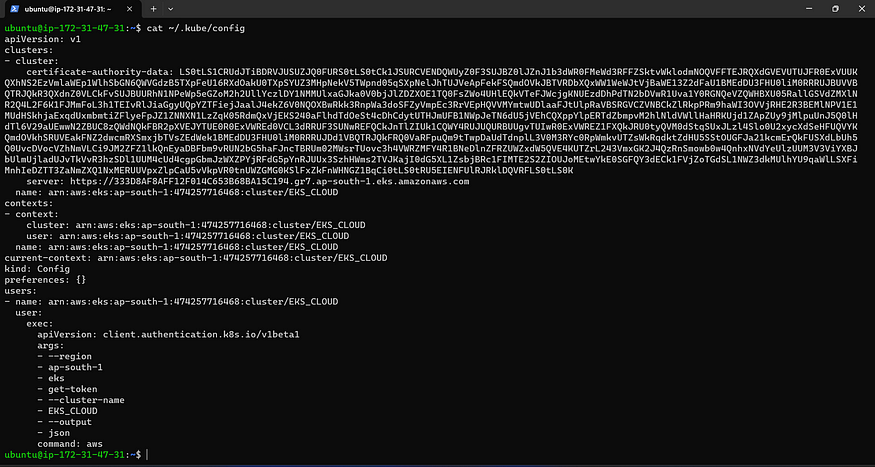
Copy and save the following text in a document or another folder. Save it as “secret-file.txt”:
Note: Create a secret-file.txt in your file explorer, save the configuration in it, and use it in the Kubernetes credential section.
Install the Kubernetes Plugin. Once it’s installed successfully,
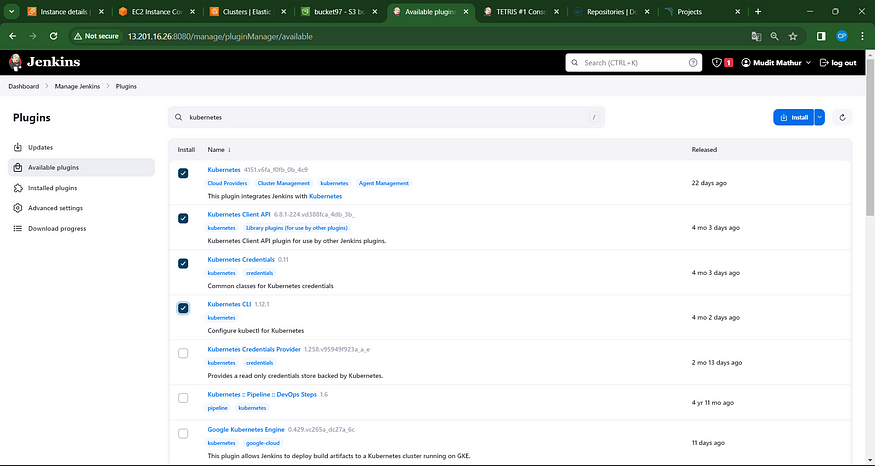
Navigate to “Manage Jenkins” → “Manage Credentials” → Select “Jenkins Global” → Click “Add Credentials.”

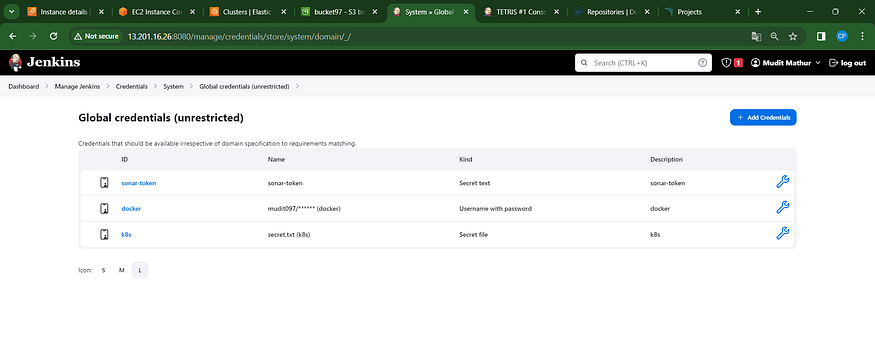
Finalizing the deployment process on the Kubernetes cluster.
stage('Deploy to kubernets'){
            steps{
                script{
                    dir('K8S') {
                        withKubeConfig(caCertificate: '', clusterName: '', contextName: '', credentialsId: 'k8s', namespace: '', restrictKubeConfigAccess: false, serverUrl: '') {
                                sh 'kubectl apply -f deployment.yml'
                                sh 'kubectl apply -f service.yml'
                        }
                    }
                }
            }
        }
You will observe output similar to the following:
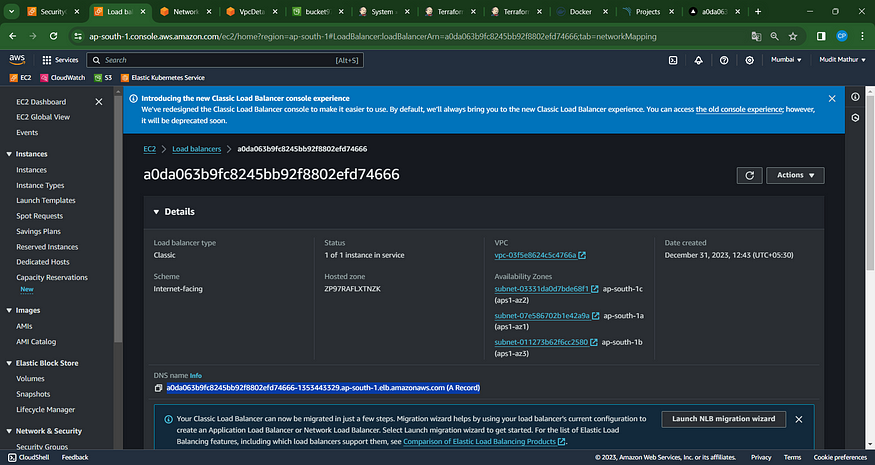
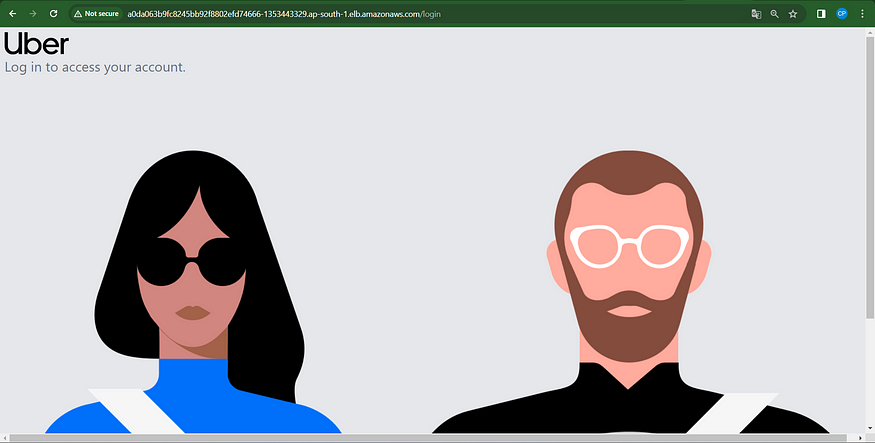
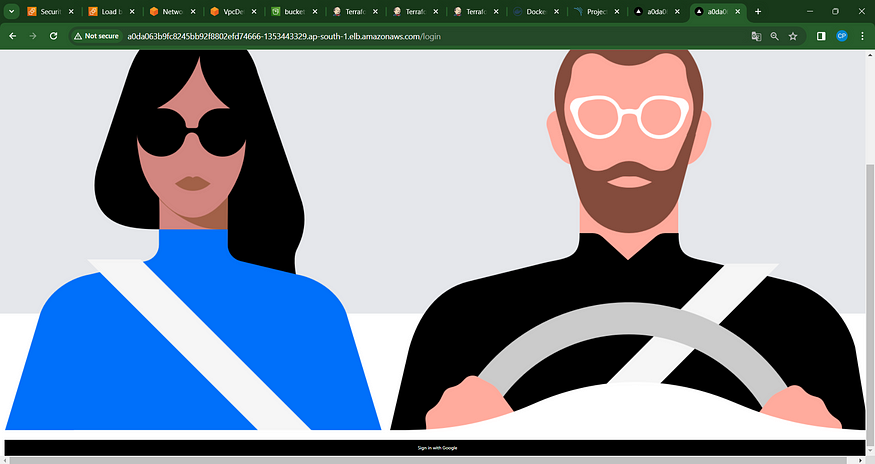
Open your browser and navigate to the AWS DNS ELB endpoint: “a0da063b9fc8245bb92f8802efd74666–1353443329.ap-south-1.elb.amazonaws.com/login”](https://github.com/mudit097/uber-clone.git).
"a0da063b9fc8245bb92f8802efd74666–1353443329.ap-south-1.elb.amazonaws.com/login".
Output
Step 11: Deconstruction
Navigate to the Jenkins Dashboard and select the Terraform-Eks job.
Build with parameters and choose the destroy action.
This action will initiate the deletion of the provisioned EKS cluster.

After 10 minutes, the cluster will be deleted, so please wait for its completion. Avoid removing the EC2 instance during this period.
Cluster successfully deleted.
Step 12: Conclusion
In this journey to implement a robust DevSecOps CI/CD pipeline for our Uber Clone project, we embarked on a series of meticulous steps. Beginning with the launch of an Ubuntu instance and the creation of IAM roles, we laid the groundwork for a secure and efficient workflow.
The installation of essential packages and the connection to Jenkins and Sonarqube set the stage for seamless integration and analysis. Incorporating Terraform plugins for EKS provisioning expanded our infrastructure capabilities, while the meticulous setup of various plugins like Java, Sonar, Node.js, OWASP, and Docker fortified our development environment.
Configurations were meticulously handled at both the global tool and Sonar server levels within Jenkins, ensuring a streamlined and standardized process across the pipeline. The establishment of pipelines up to Docker deployment and Kubernetes deployment showcased the continuous integration and delivery mechanisms in action.
Finally, the controlled destruction phase demonstrated the ability to efficiently manage and decommission resources, promoting cost-effectiveness and resource optimization.
This comprehensive journey underscored the significance of a well-orchestrated DevSecOps pipeline. It emphasized the amalgamation of development, security, and operations in a cohesive manner, driving efficiency, reliability, and security throughout the software development lifecycle.
The realization of this pipeline for an Uber Clone project not only showcases the power of DevSecOps methodologies but also sets a precedent for similar projects aiming for a robust, automated, and secure development environment.
As we conclude this implementation, it’s crucial to recognize that DevSecOps is not a one-time setup but an ongoing commitment to continuous improvement, adaptability to evolving technologies, and an unwavering focus on enhancing the software delivery lifecycle.
Cheers to a future where DevSecOps principles continue to revolutionize and elevate software development, ensuring not just speed and efficiency, but also resilience and security in every line of code.


