

Hey gaming enthusiasts, who else misses the thrill of 90’s gaming? Let’s take a nostalgic journey and relive those iconic moments! Join us as we venture into the captivating world of Super Mario, now brought to life on Amazon’s Elastic Kubernetes Service (EKS). It’s time to dust off those controllers — the game is afoot!
Super Mario is a classic beloved by many, and in this guide, we’ll walk you through deploying Super Mario on AWS EKS. Harnessing the power of Kubernetes, we’ll seamlessly orchestrate the game’s deployment on Amazon’s EKS, ensuring scalability, reliability, and effortless management. So, gear up and get ready to jump, stomp, and rescue Princess Peach — the Mushroom Kingdom awaits!
Prerequisites:
An Ubuntu Instance
IAM role
Terraform should be installed on the instance
AWS CLI and KUBECTL on Instance
LET'S DEPLOY
STEP 1: Launch the Ubuntu instance
Sign in to AWS Console: Log in to your AWS Management Console.
Navigate to EC2 Dashboard: Go to the EC2 Dashboard by selecting "Services" in the top menu and then choosing "EC2" under the Compute section.
Launch Instance: Click on the "Launch Instance" button to start the instance creation process.
Choose an Amazon Machine Image (AMI): Select an appropriate AMI for your instance. For example, you can choose Ubuntu image.
Choose an Instance Type: In the "Choose Instance Type" step, select
t2.microas your instance type. Proceed by clicking "Next: Configure Instance Details."Configure Instance Details:
For "Number of Instances," set it to 1 (unless you need multiple instances).
Configure additional settings like network, subnets, IAM role, etc., if necessary.
For "Storage," click "Add New Volume" and set the size to 8GB (or modify the existing storage to 8GB).
Click "Next: Add Tags" when you're done.
Add Tags (Optional): Add any desired tags to your instance. This step is optional, but it helps in organizing instances.
Configure Security Group:
Choose an existing security group or create a new one.
Ensure the security group has the necessary inbound/outbound rules to allow access as required.
Review and Launch: Review the configuration details. Ensure everything is set as desired.
Select Key Pair:
Select "Choose an existing key pair" and choose the key pair from the dropdown.
Acknowledge that you have access to the selected private key file.
Click "Launch Instances" to create the instance.
Access the EC2 Instance: Once the instance is launched, you can access it using the key pair and the instance's public IP or DNS.
Ensure you have necessary permissions and follow best practices while configuring security groups and key pairs to maintain security for your EC2 instance.
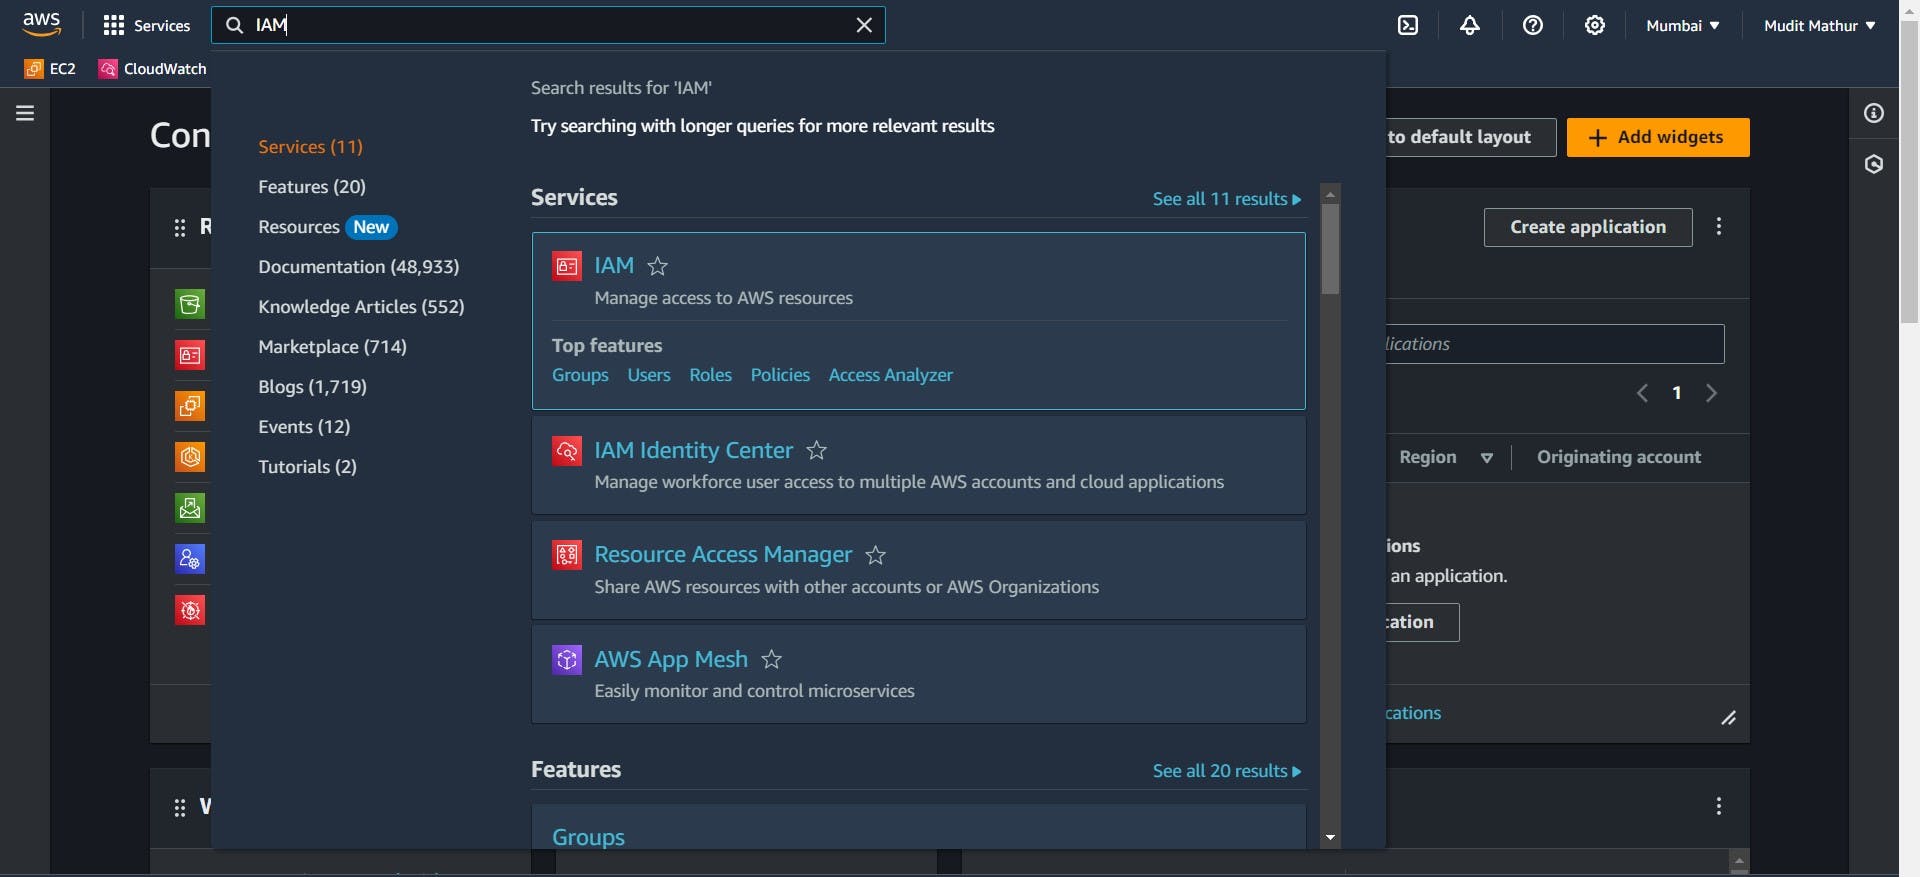
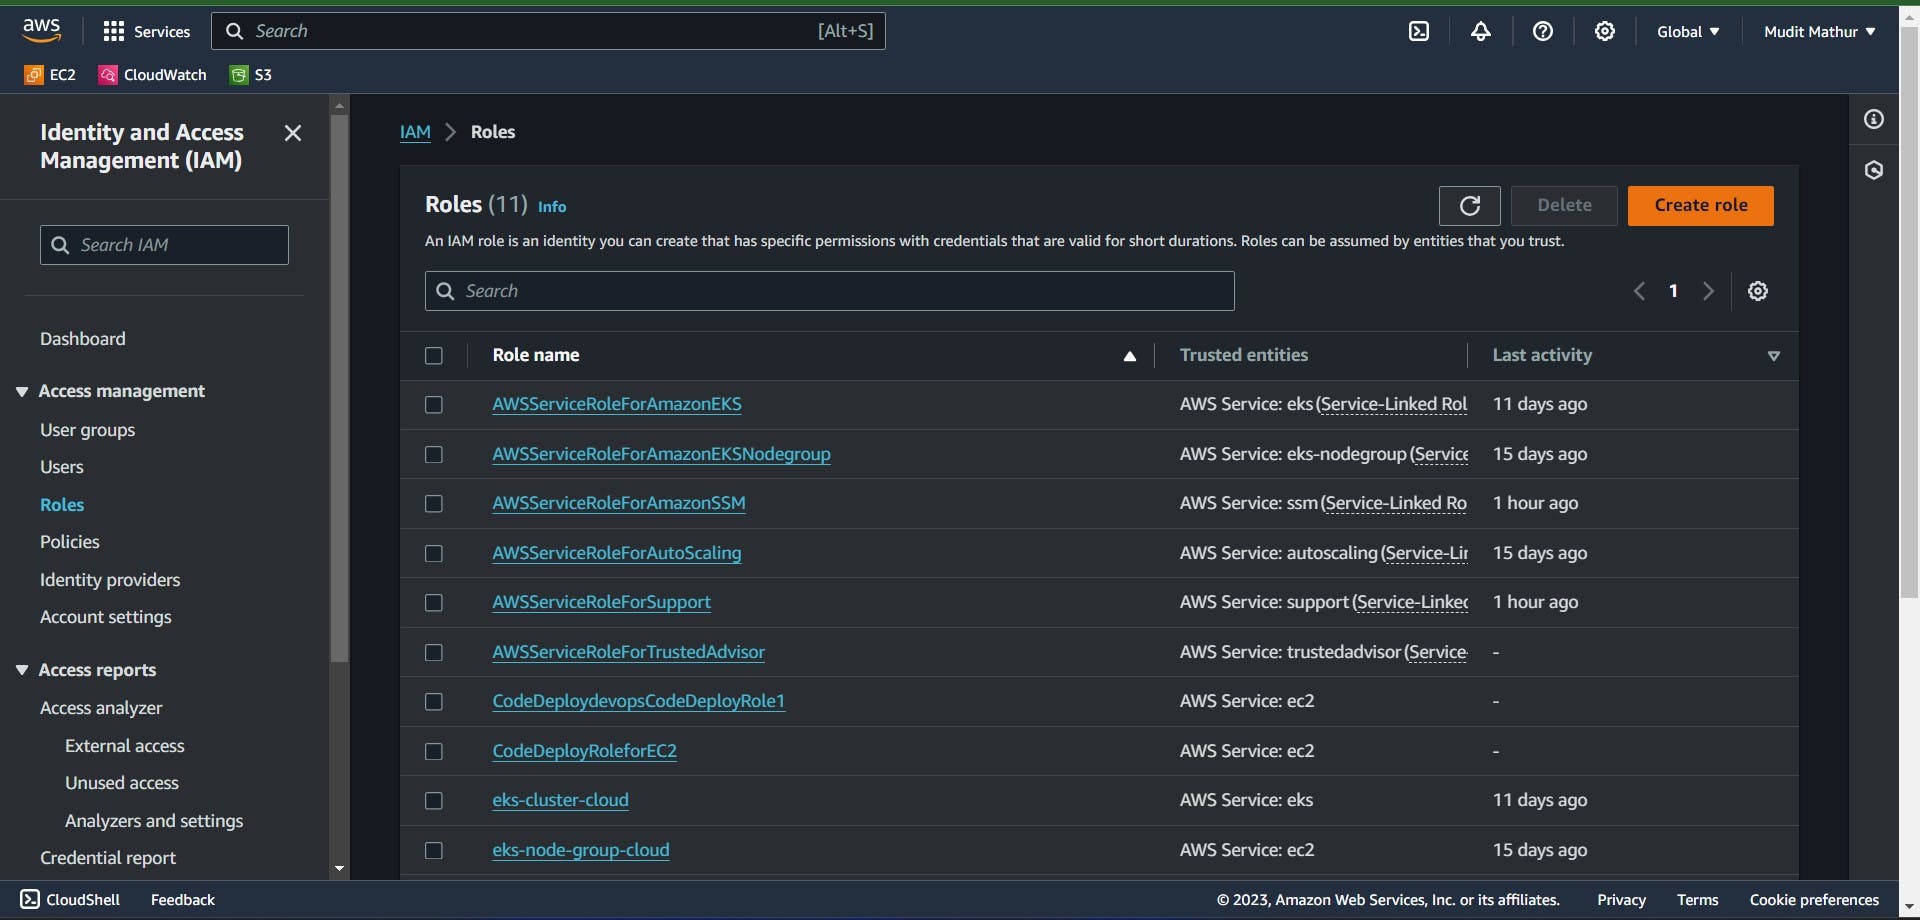
STEP 2: Create an IAM role
Search for IAM in the search bar of AWS and click on roles.
Click on Create Role
Select entity type as AWS service
Use the case as EC2 and click on Next.

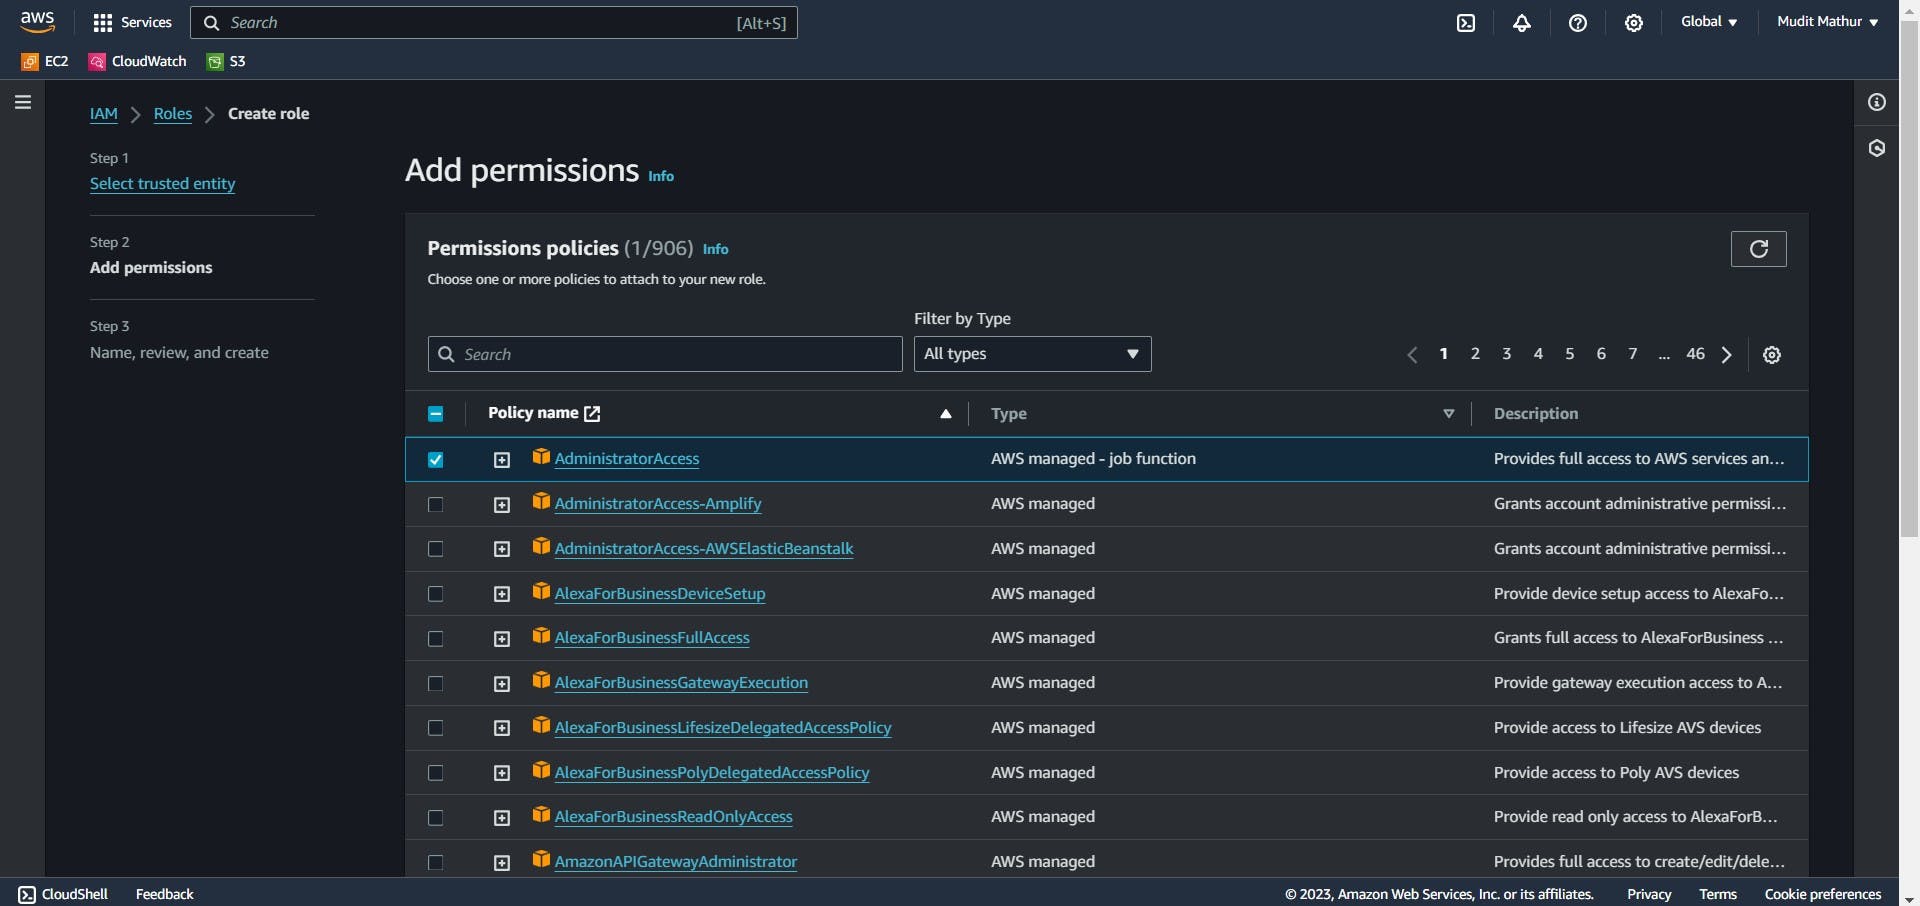
For permission policy select Administrator Access (Just for learning purpose), click Next.
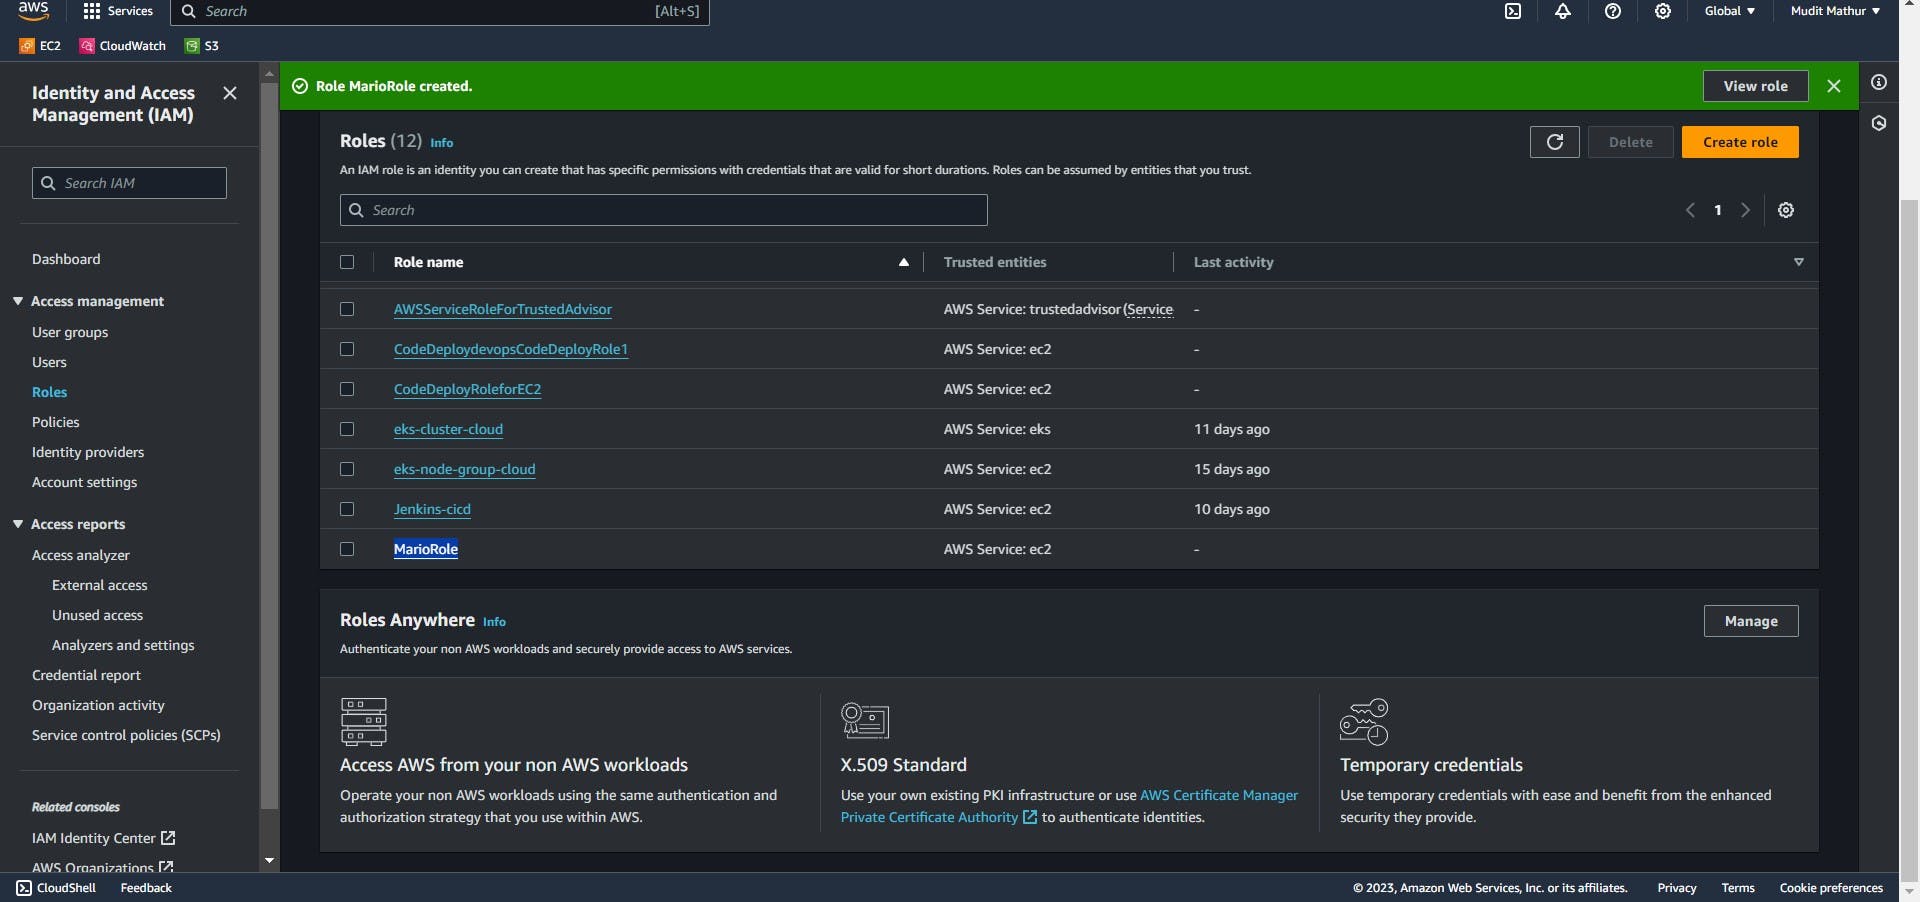
Provide a Name for Role and click on Create role.
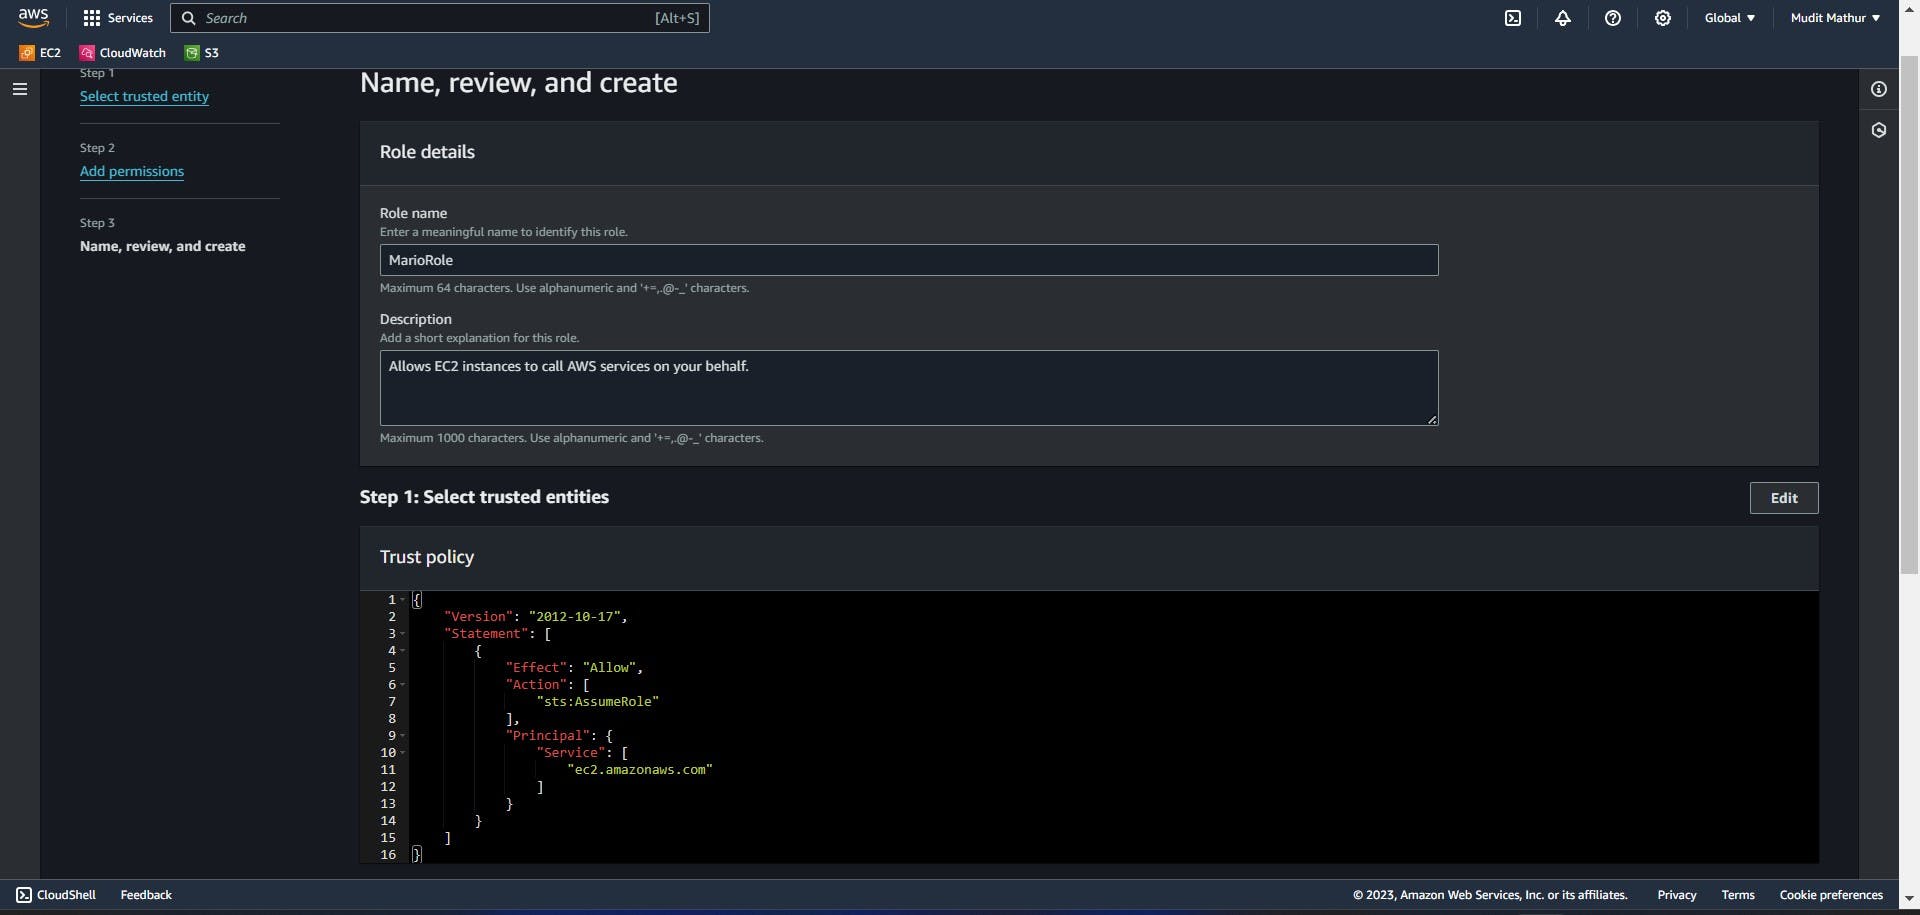
The role is created.
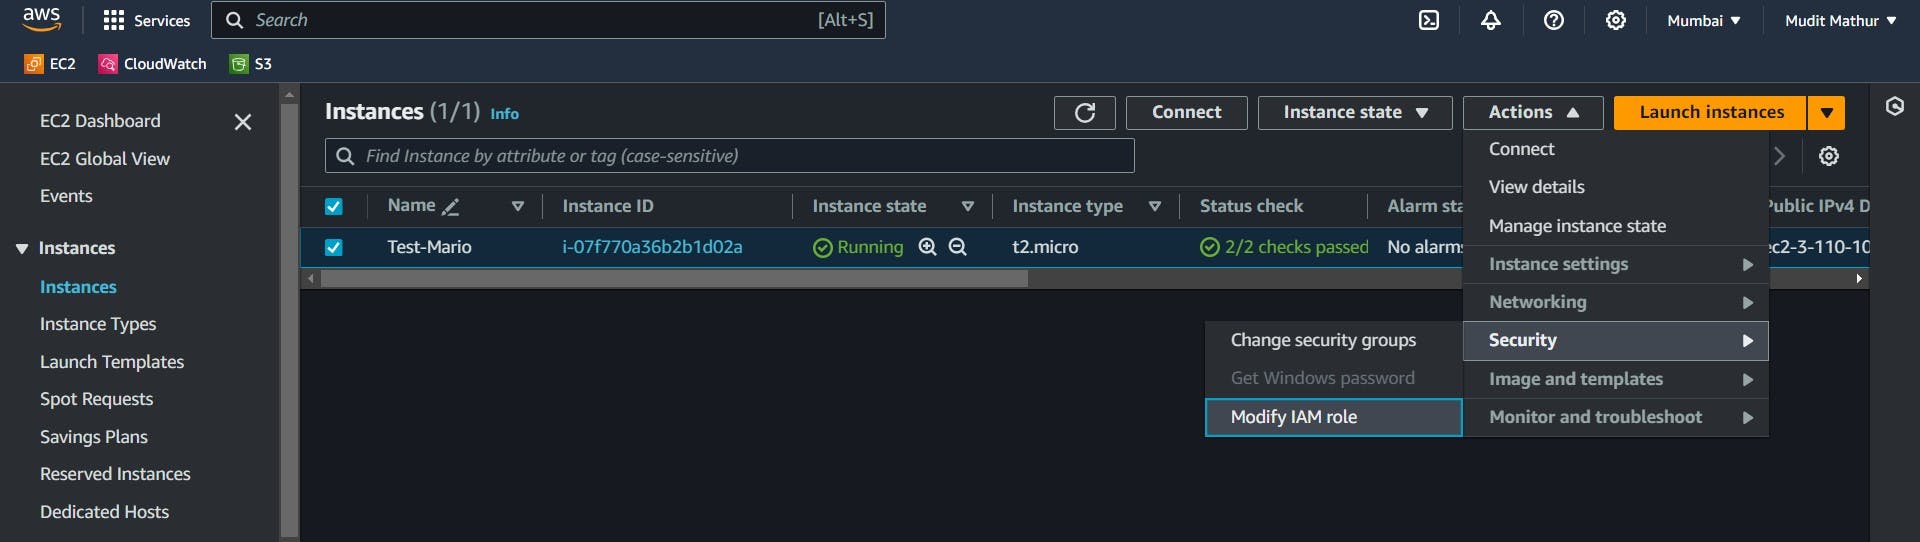
Now Attach this role to Ec2 instance that we created earlier, so we can provision cluster from that instance.
Go to EC2 Dashboard and select the instance.
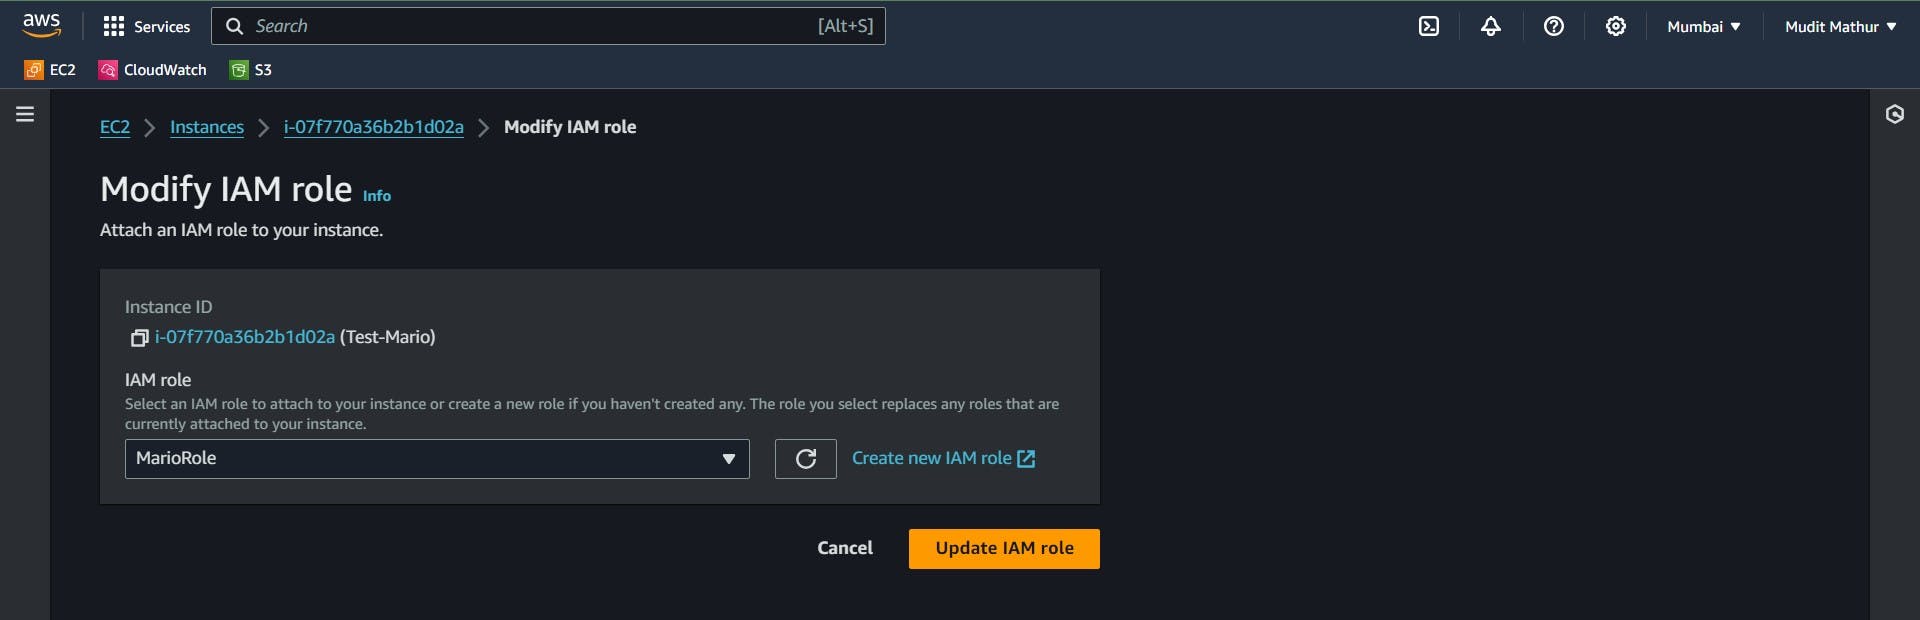
Click on Actions --> Security --> Modify IAM role.
Select the Role that was created earlier and click on Update IAM role.
Connect the instance to Mobaxtreme or Putty
STEP 3: Cluster provision
Now clone this Repo.
https://github.com/mudit097/k8s-mario.git
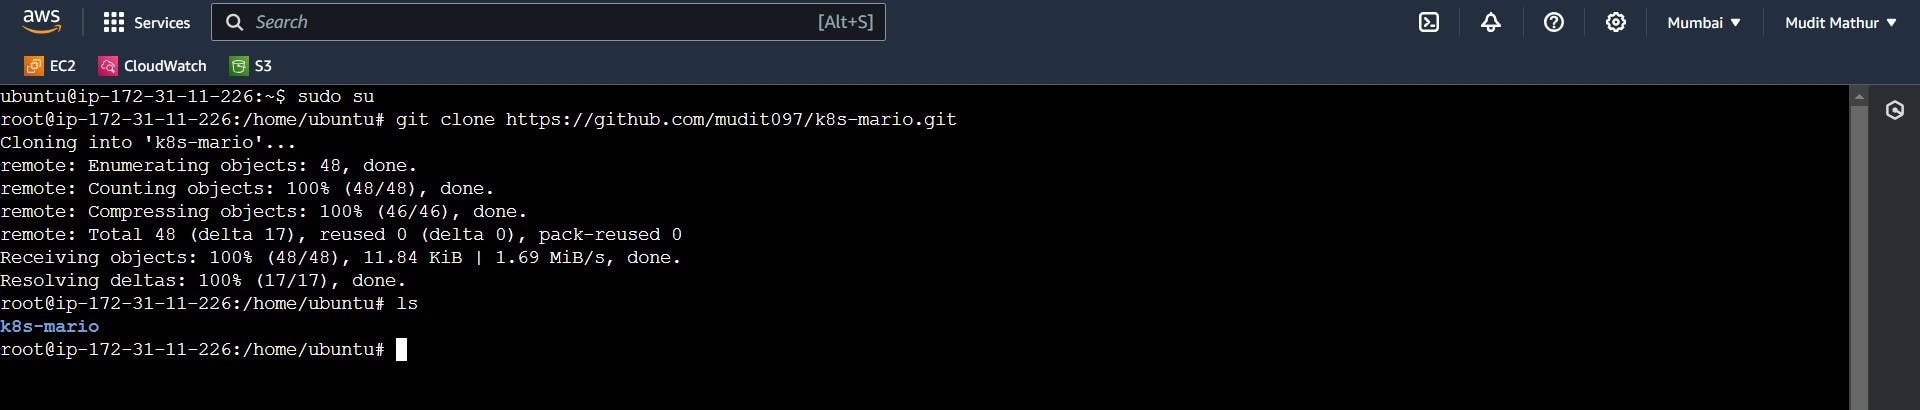
change directory
cd k8s-mario
Provide the executable permission to script.sh file, and run it.
sudo chmod +x script.sh
./script.sh
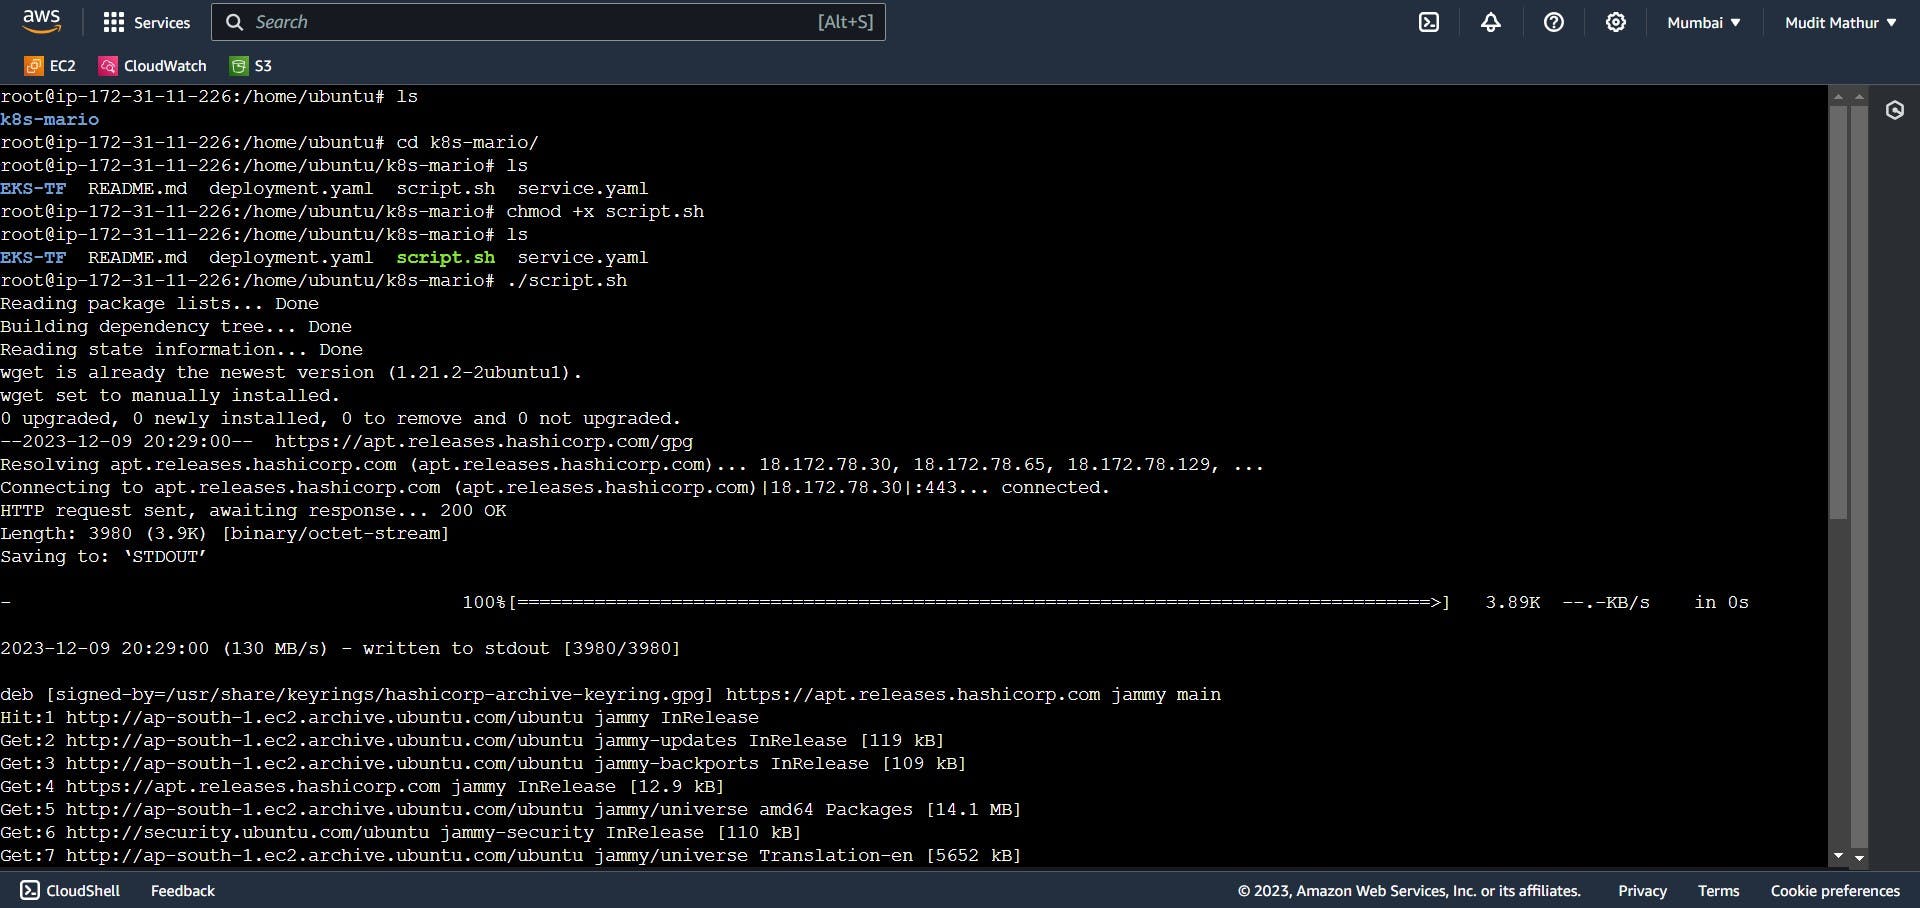
This script will install Terraform, AWS cli, Kubectl, Docker.
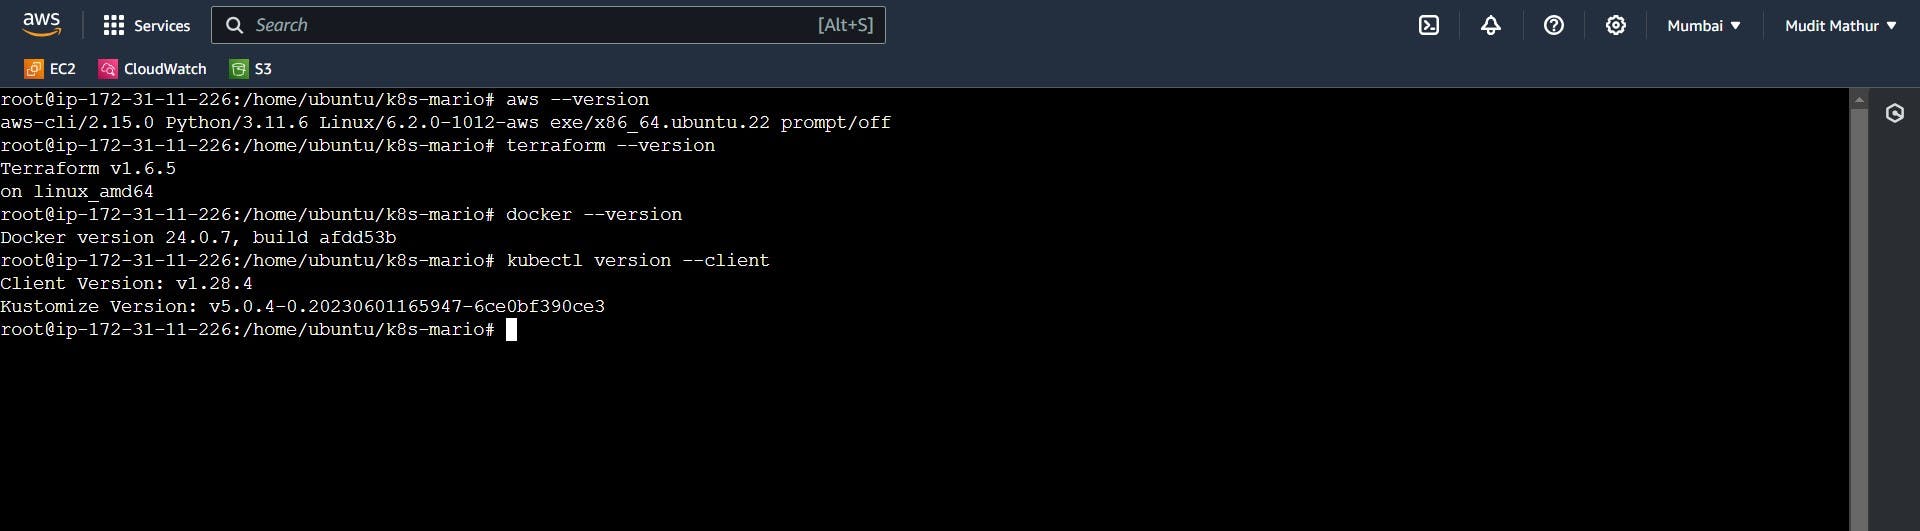
Check versions
docker --version
aws --version
kubectl version --client
terraform --version
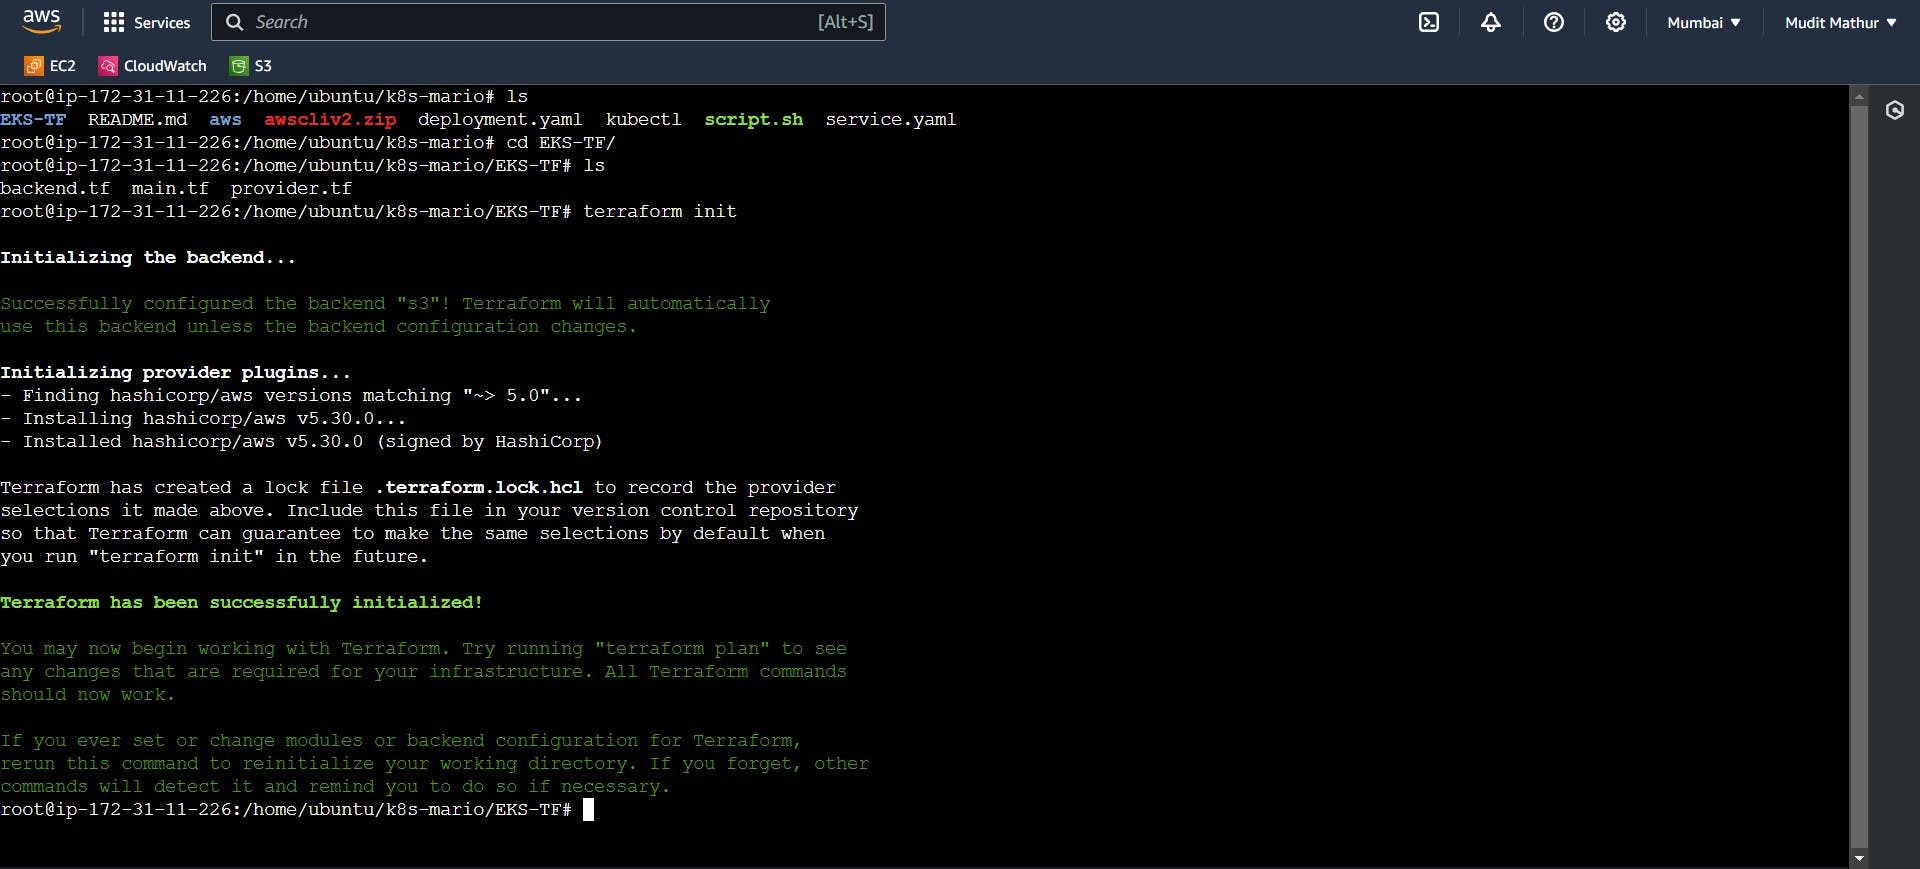
Now change directory into the EKS-TF
Run Terraform init
NOTE: Don’t forgot to change the s3 bucket name in the backend.tf file
cd EKS-TF
terraform init
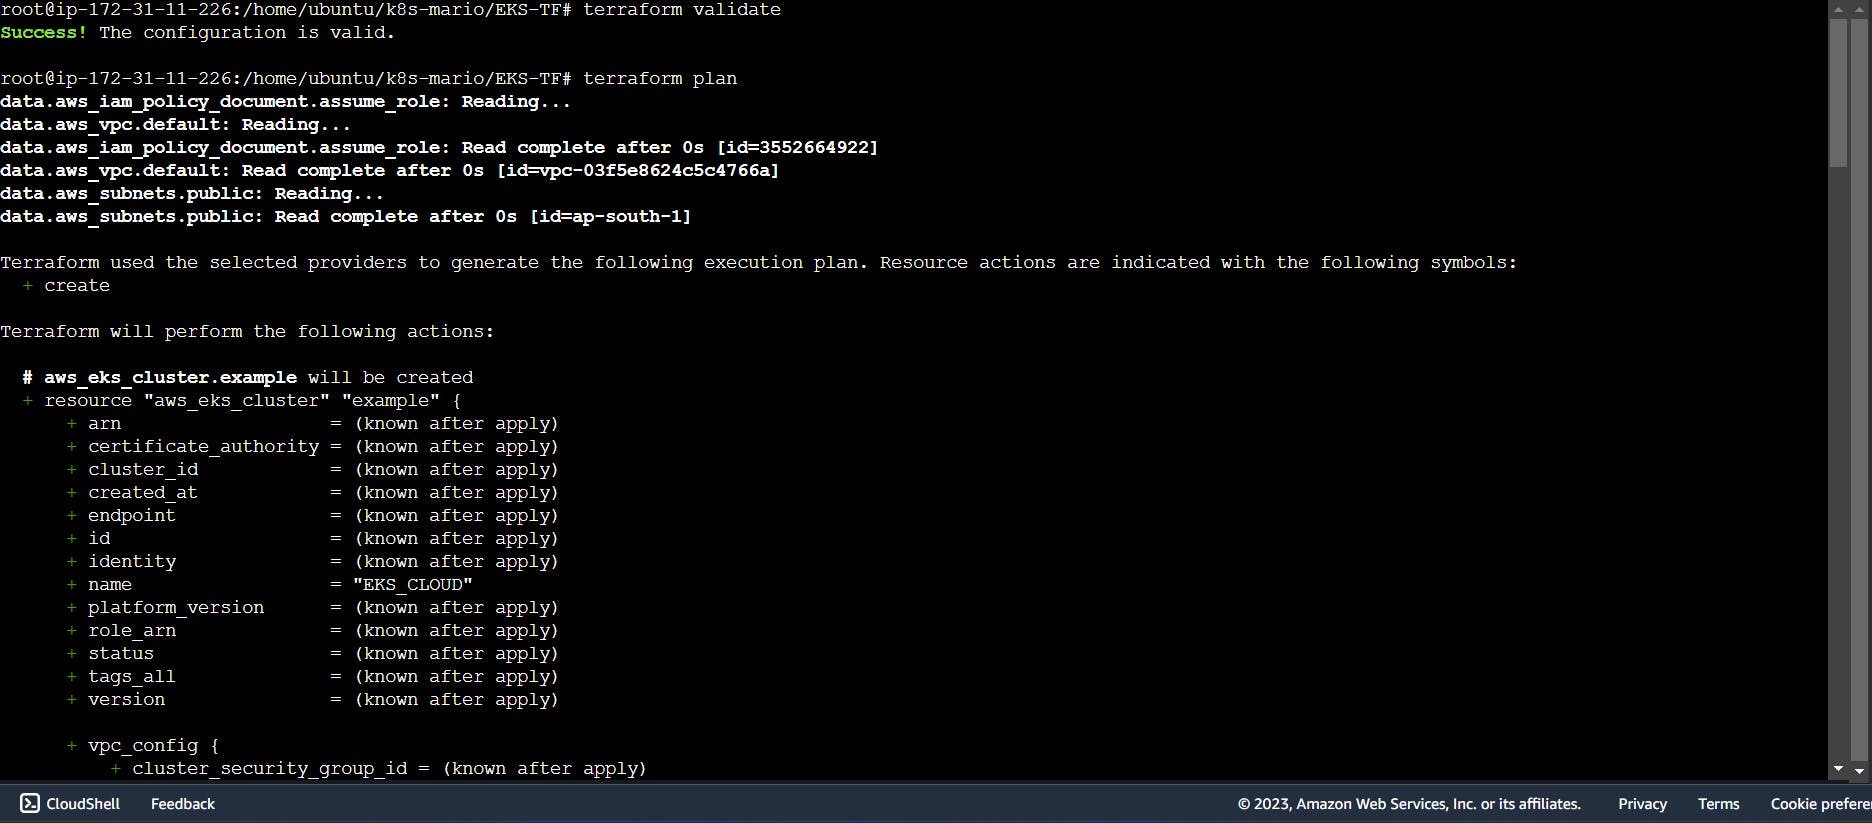
Now run terraform validate and terraform plan
terraform validate
terraform plan
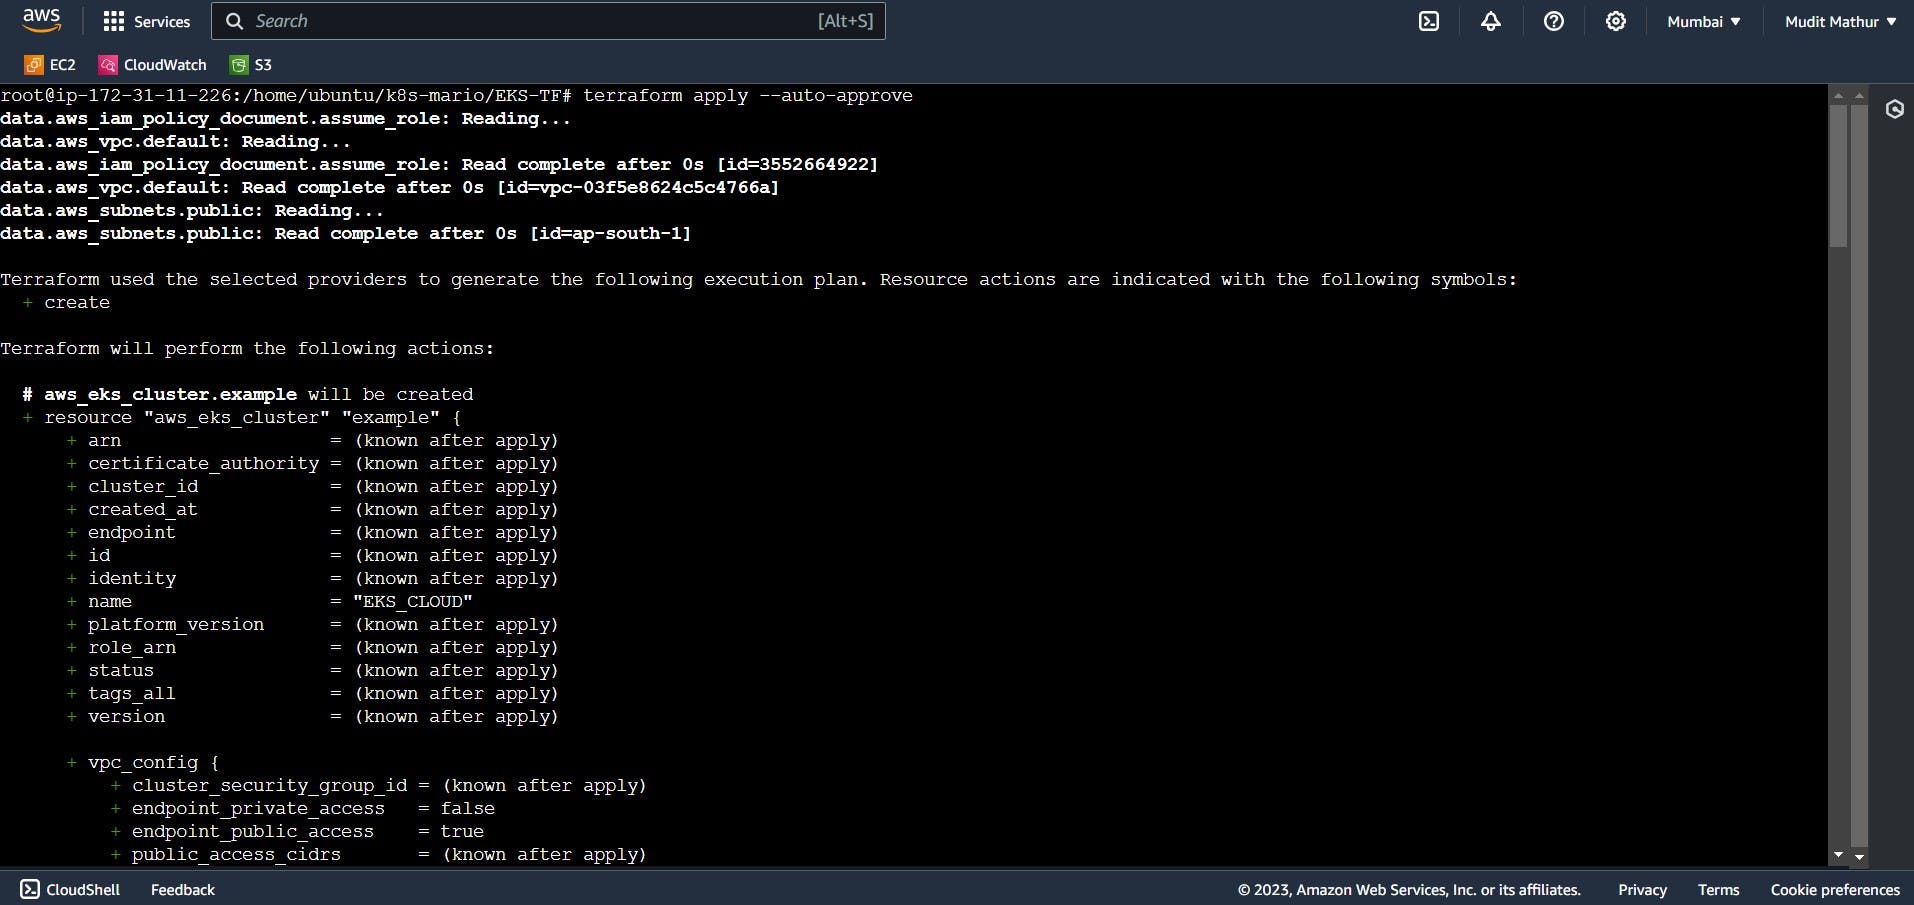
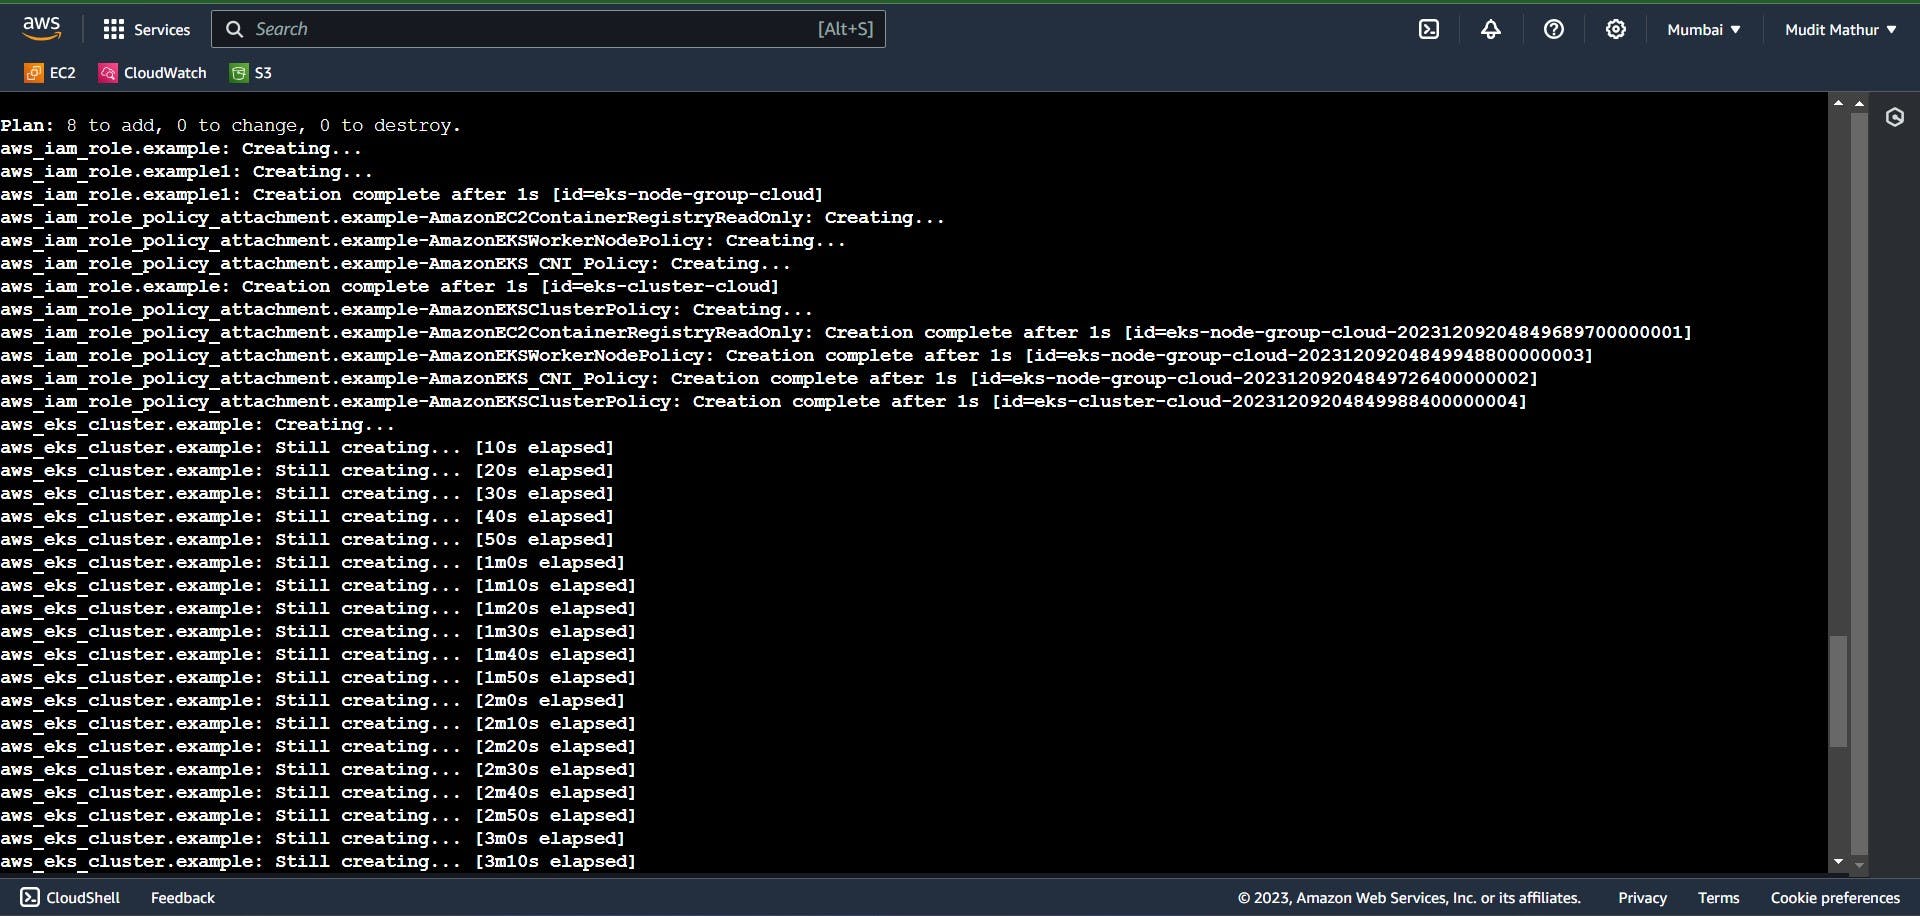
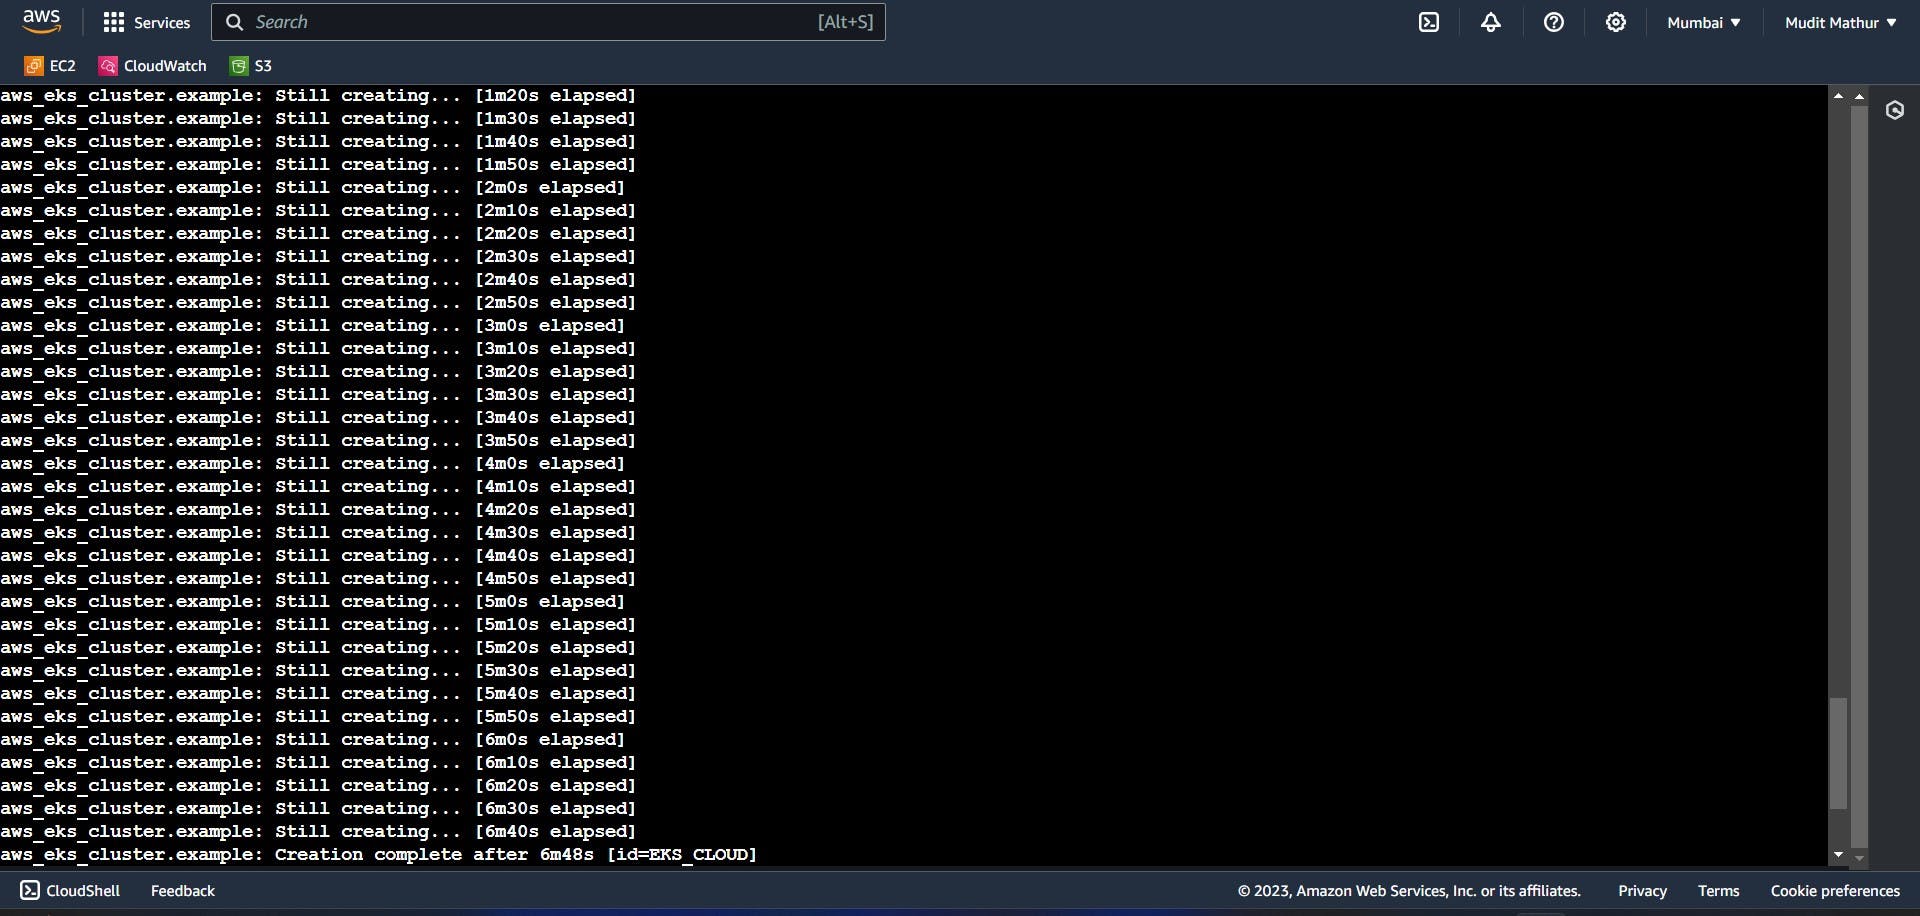
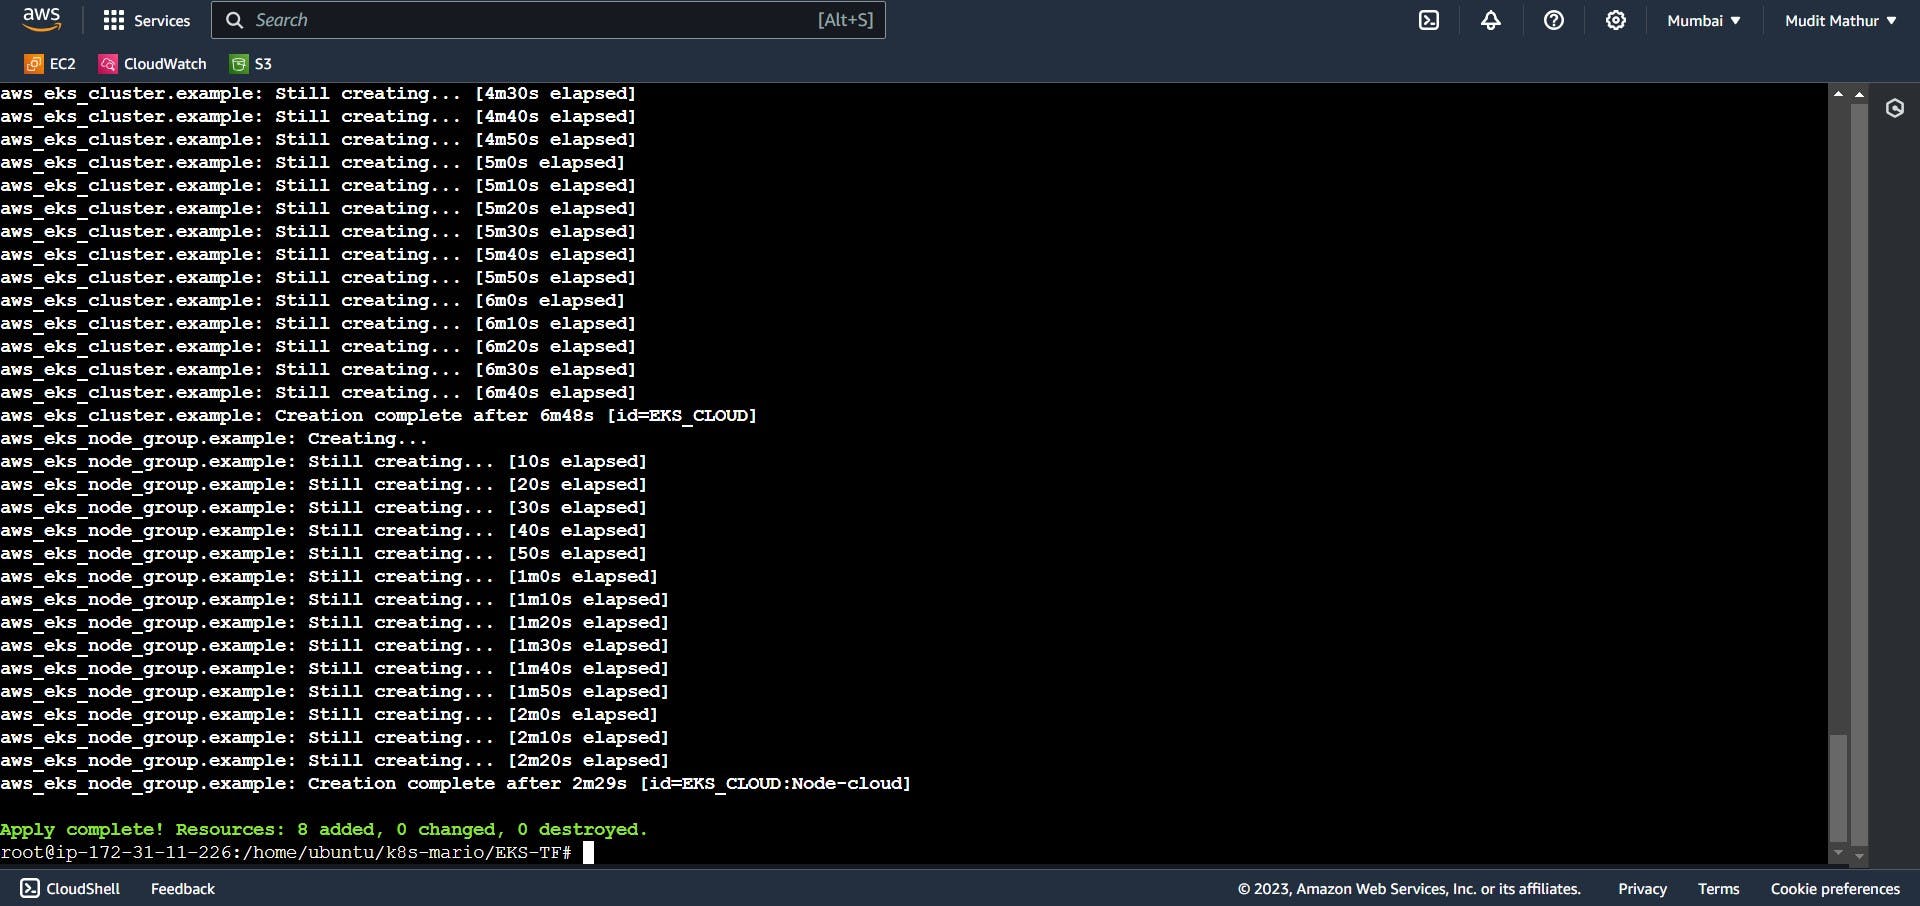
Now Run Terraform apply to the provision cluster.
terraform apply --auto-approve
Completed in 10mins
Update the Kubernetes configuration
Make sure to change your desired region
aws eks update-kubeconfig --name EKS_CLOUD --region ap-south-1

Now change the directory back to k8s-Mario
cd ..
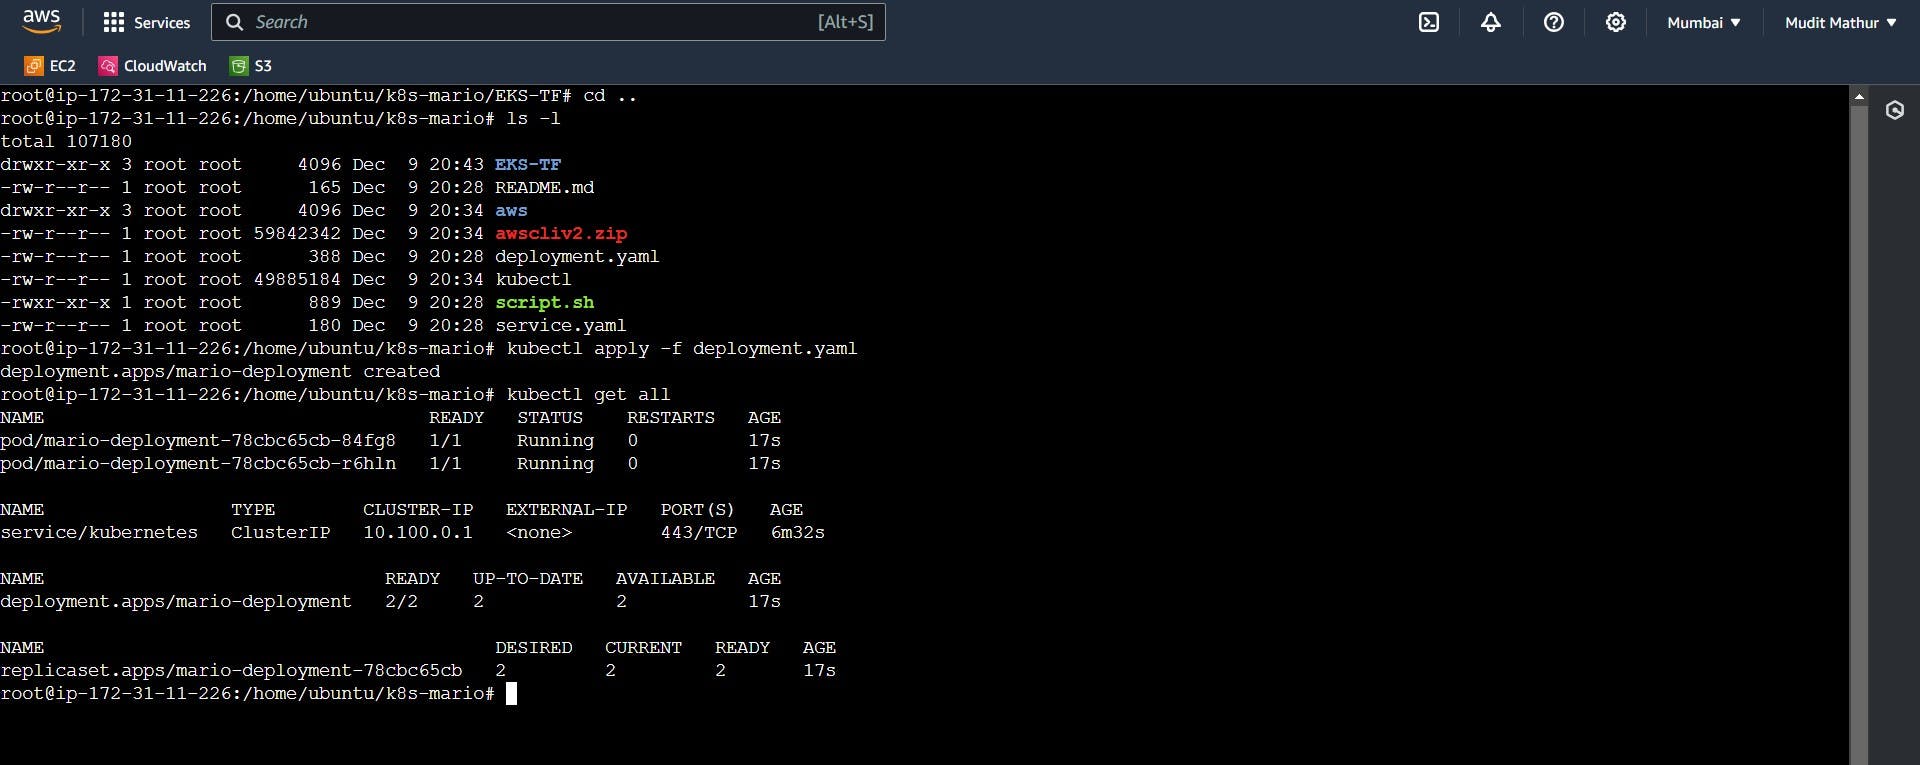
Let’s apply the deployment and service
Deployment
kubectl apply -f deployment.yaml
#to check the deployment
kubectl get all
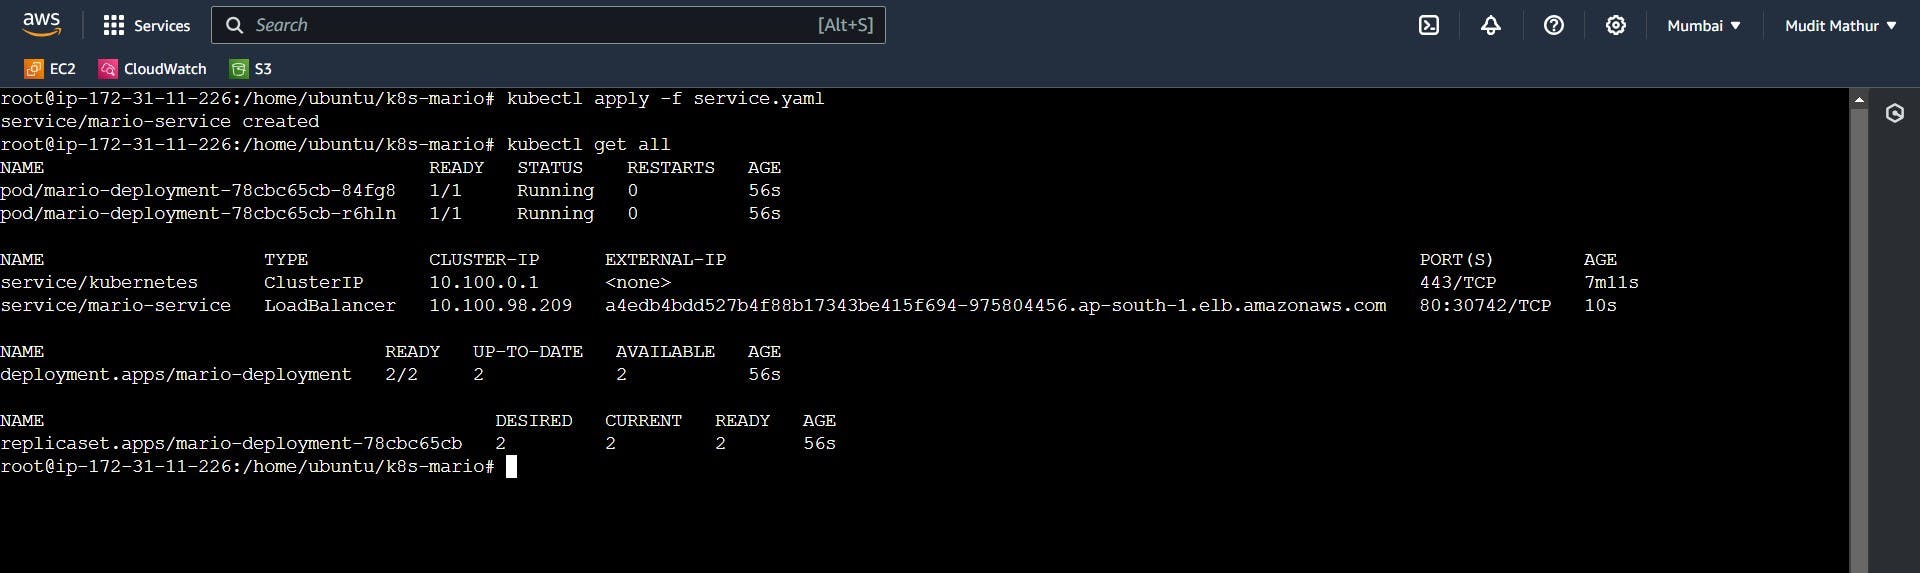
Now let’s apply the service
Service
kubectl apply -f service.yaml
kubectl get all
Now let’s describe the service and copy the LoadBalancer Ingress
kubectl describe service mario-service
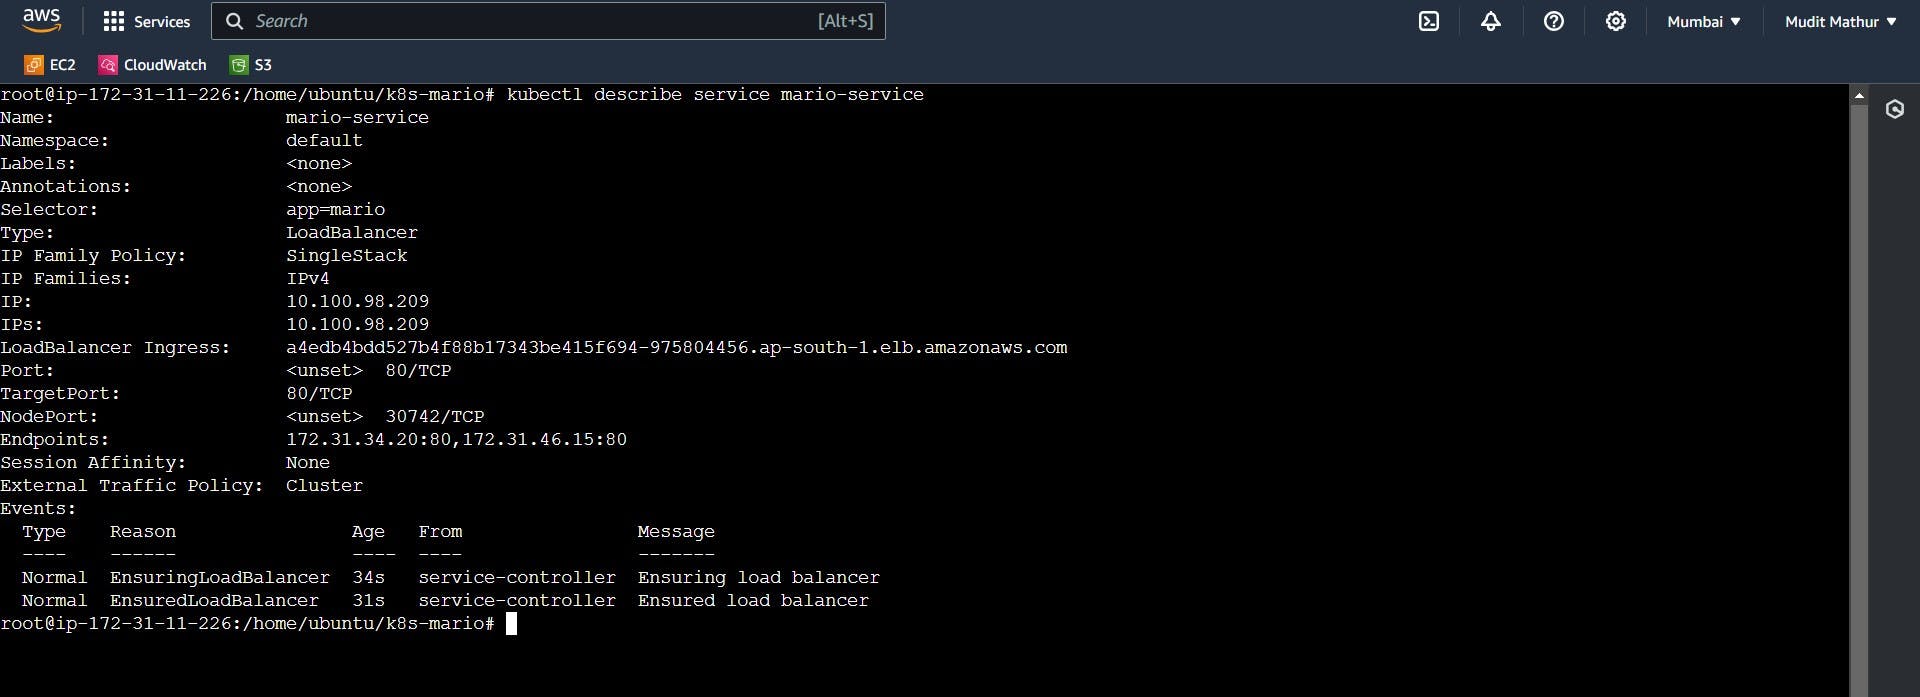
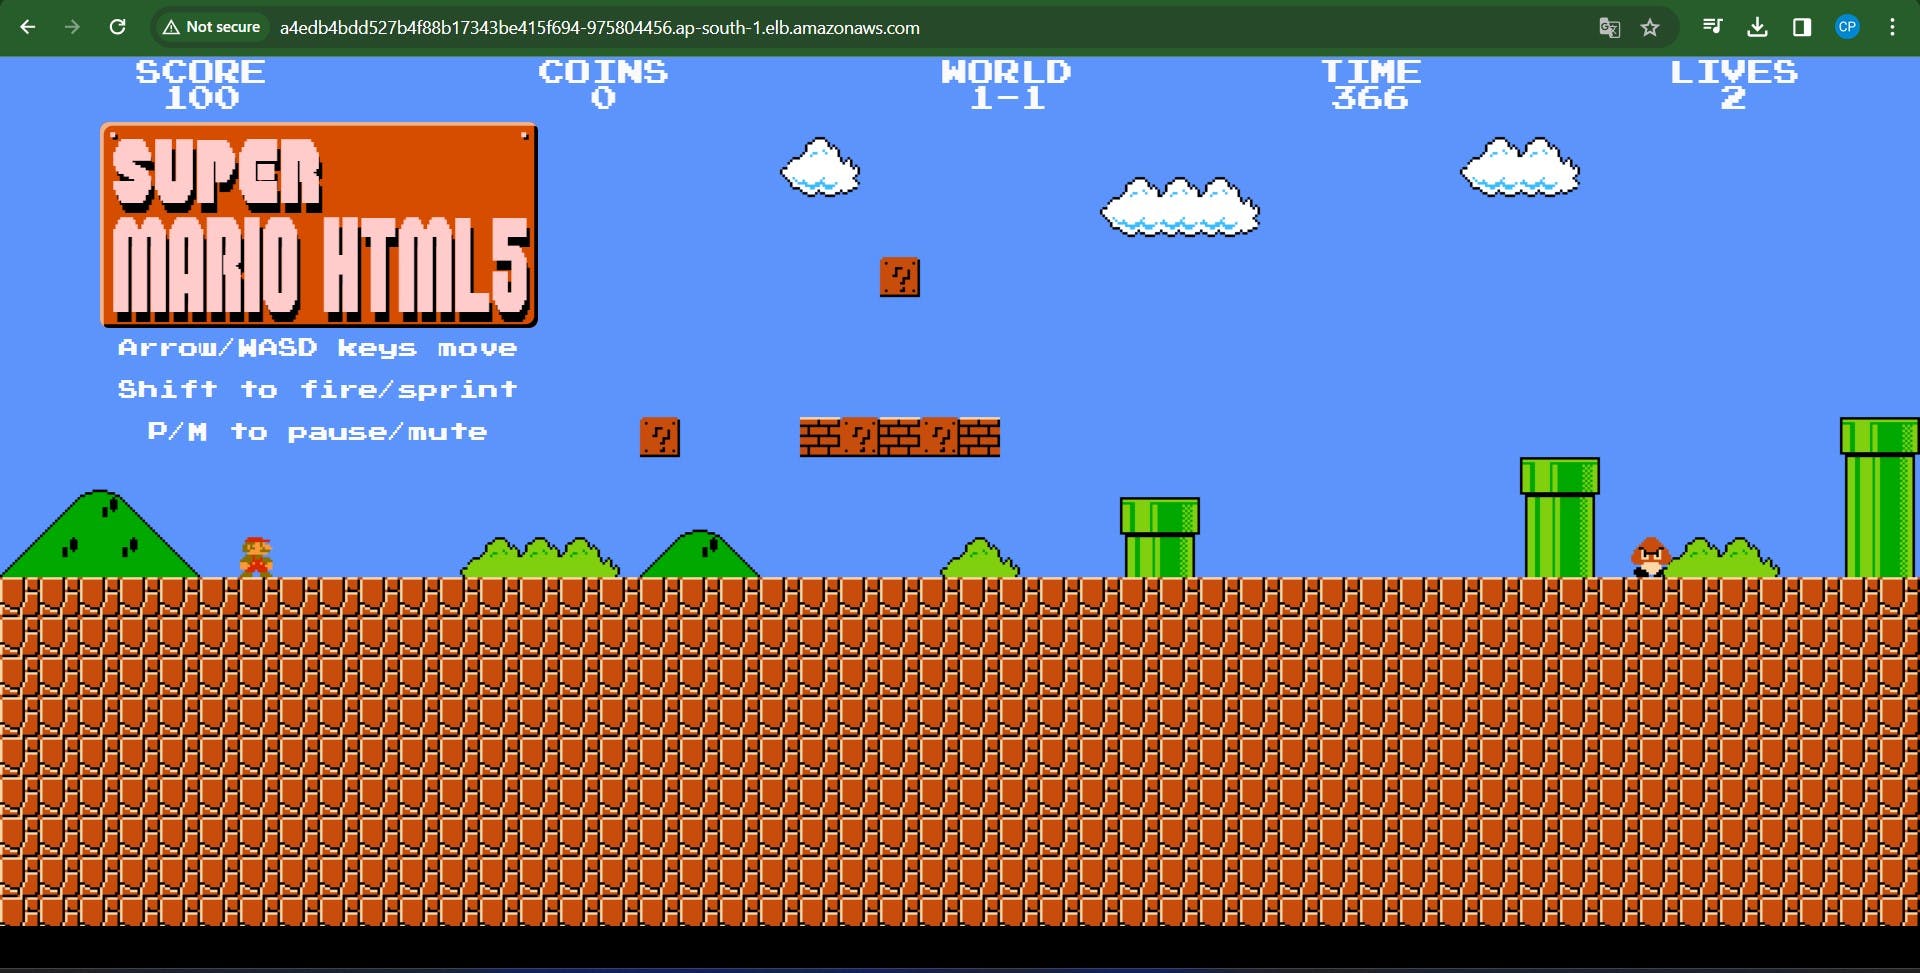
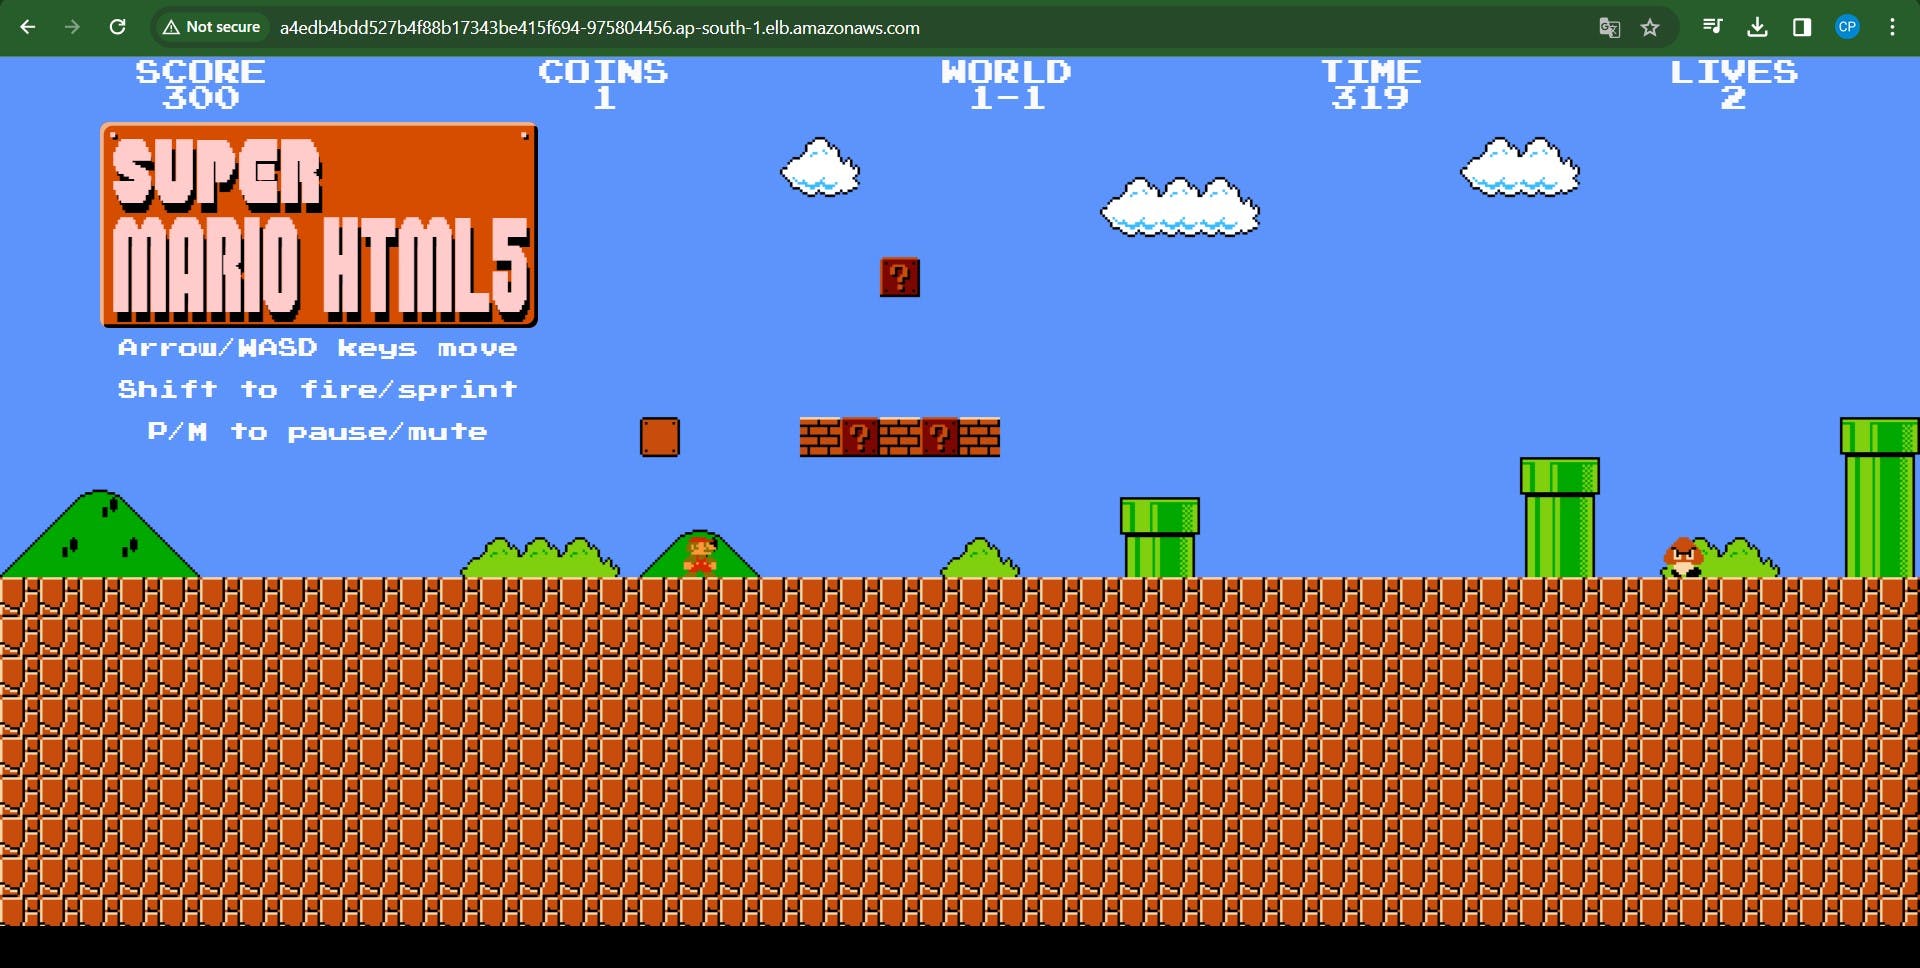
Paste the ingress link in a browser and you will see the Mario game.
Let’s Go back to 1985 and play the game like children.
This is an official image by Mudit Mathur
You can check in Docker-hub as well mudit097/mario:latest
Destruction :
Let's remove the service and deployment first
kubectl get all
kubectl delete service mario-service
kubectl delete deployment mario-deployment
Let’s Destroy the cluster
terraform destroy --auto-approve

Thank you for embarking on this nostalgic voyage to the 80s! We trust you relished rediscovering the magic of classic movies through our innovative holographic screening technology. Blending the cherished past with cutting-edge advancements exemplifies the everlasting charm of timeless films. Until our next adventure, keep enjoying cinematic wonders and revisiting those unforgettable moments! 🎬🌟