YouTube API Integration: A Comprehensive Guide to Setting up CI/CD with GitLab and Docker

Mudit Mathur is an experienced DevOps Engineer with expertise in AWS, CI/CD, and automation. He delivers tangible results by streamlining processes and fostering collaboration. Reach out to him at linkedin.com/in/mudit-mathur-535786146 or muditmathur121@gmail.com for efficient DevOps solutions.
In the rapidly evolving realm of software development, efficiency and dependability take center stage. Embracing Continuous Integration and Continuous Deployment (CI/CD) pipelines provides a means to automate and enhance your development and deployment workflows. This comprehensive guide walks you through the process of establishing a robust CI/CD pipeline for a React-based YouTube app clone using GitLab.
Imagine this: you’re embarking on the creation of a YouTube-inspired platform, where users can seamlessly explore videos and channels. While the project is exhilarating, navigating the intricacies of the development workflow can be a challenge. Enter GitLab CI/CD — a solution that brings simplicity and power to the automation of your work.
This step-by-step tutorial caters to developers and tech enthusiasts eager to enhance their projects with the efficiency of CI/CD. By the end of this journey, you’ll have mastered the art of setting up a robust CI/CD pipeline, complete with automated testing, code quality checks, and secure containerization. Join us as we unravel the potential of CI/CD and transform your development experience while constructing a React YouTube app clone.
Are you ready? Let’s demystify CI/CD and elevate your development journey!
Original Credit: Ajay Kumar Yegireddi
YouTube video: https://www.youtube.com/watch?v=YHPvCB3IQdI&feature=youtu.be
1. Step 1: Create an API key for YouTube 🎬
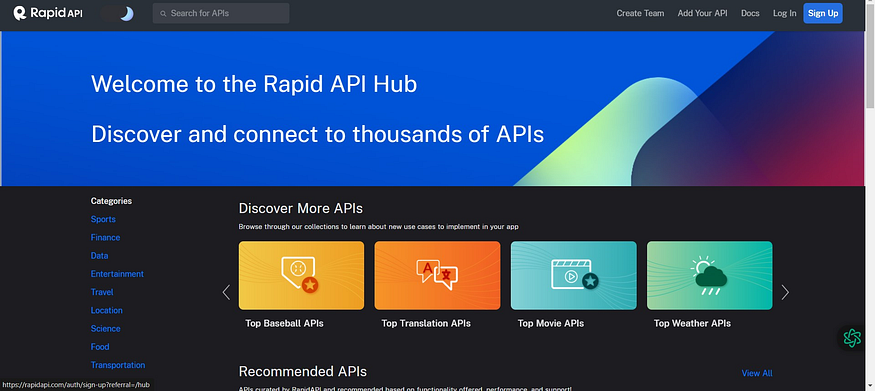
Open a new tab in the browser and search for rapidapi.com
It will automatically provide your mail and select a mail to create an account
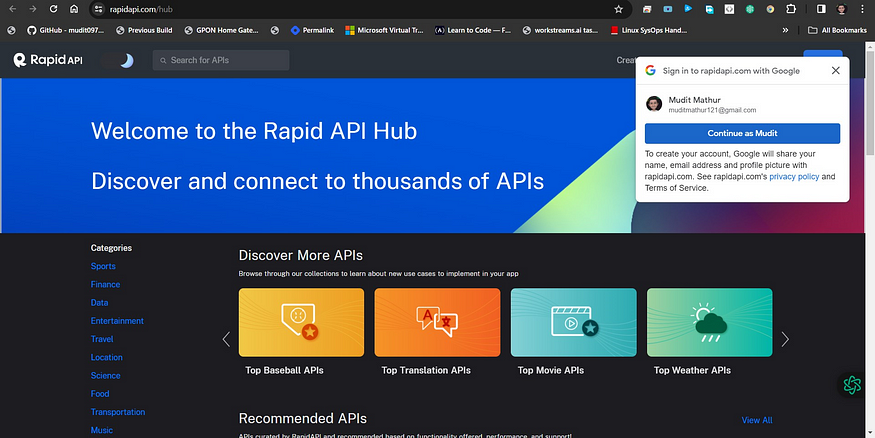
Account is created
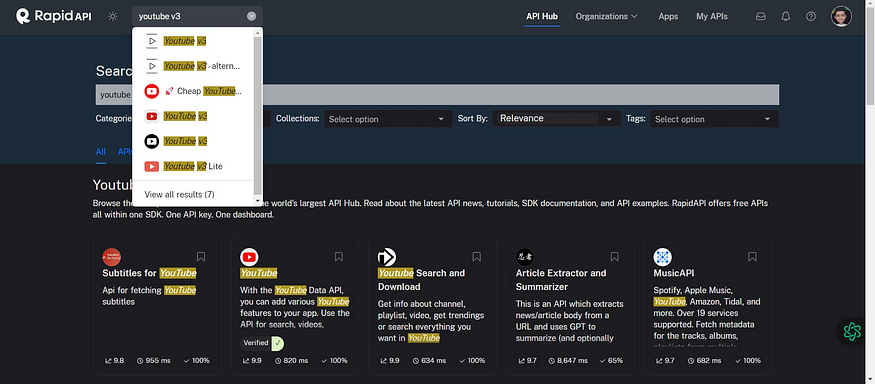
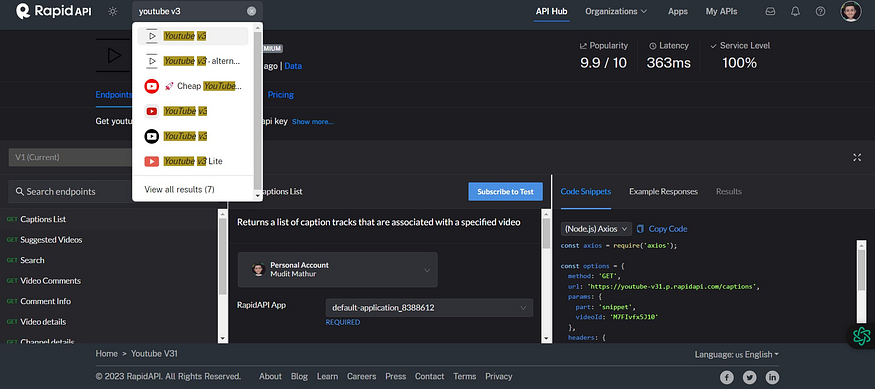
Now in the search bar search for YouTube and select YouTube v3
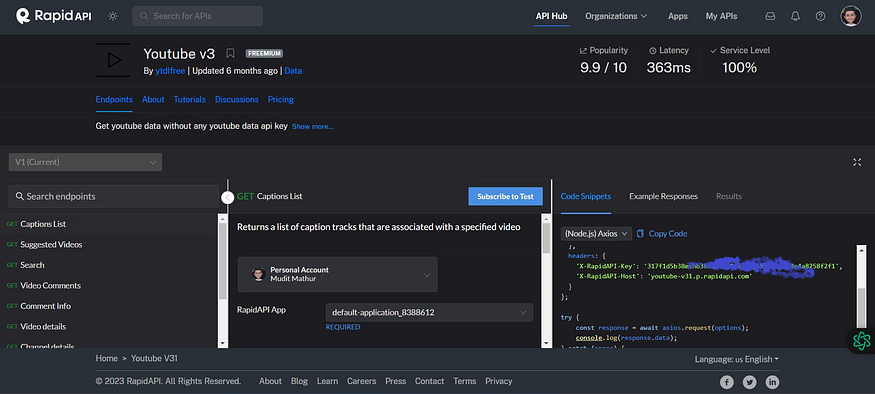
Copy API and save it for further use at the docker stage.
docker build — build-arg REACT_APP_RAPID_API_KEY=<API-KEY> -t ${imageName} .
Second way:
Open a new tab in the browser and search for rapidapi.com
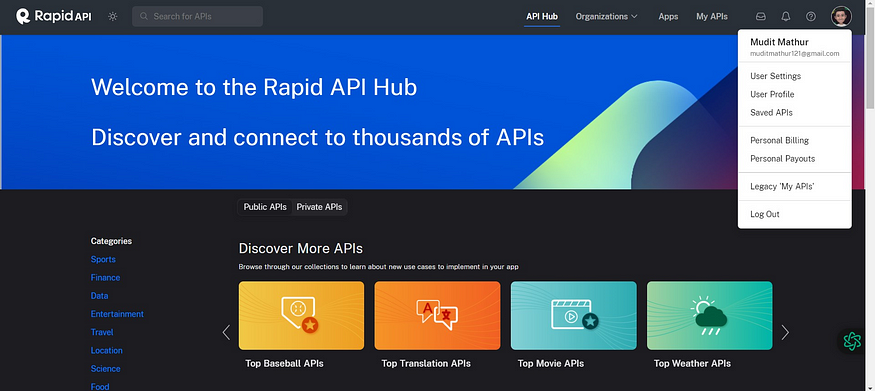
You will see the page like this and click on signUp
Now click on Sign Up with Google

Select your mail here
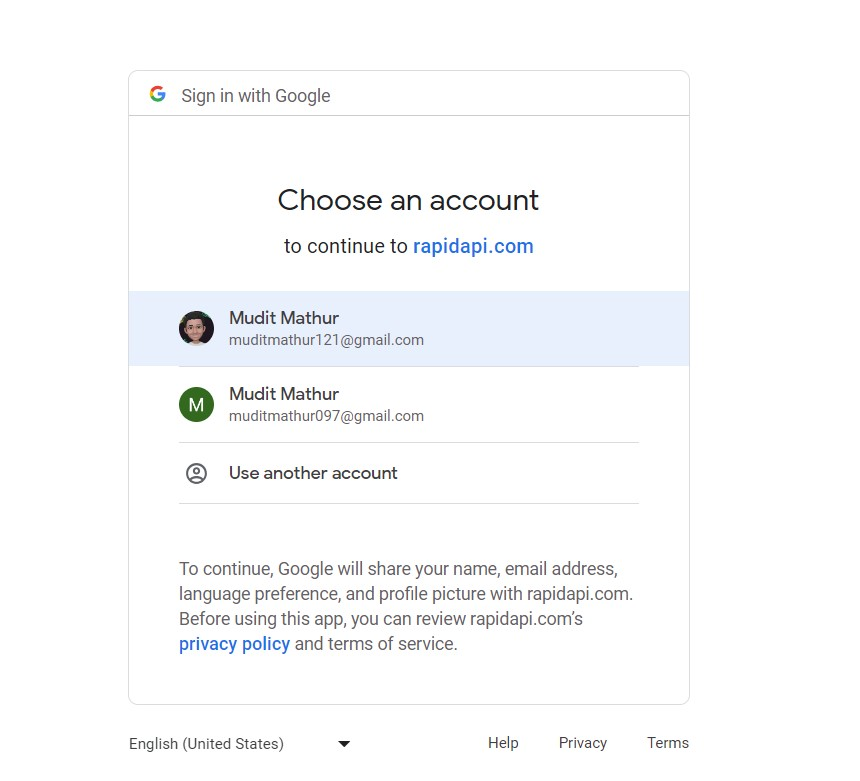
It will automatically create your account now

Now in the search bar search for YouTube and select YouTube v3
Copy API and save it for further use at the docker stage.
docker build — build-arg REACT_APP_RAPID_API_KEY=<API-KEY> -t ${imageName} .
2. Step 2: Create a Repository and push it to GitLab 🛠️
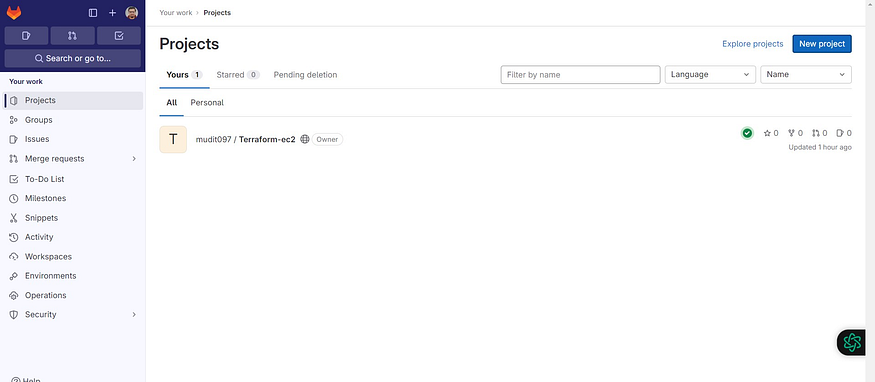
Go to GitLab.com and login to your account
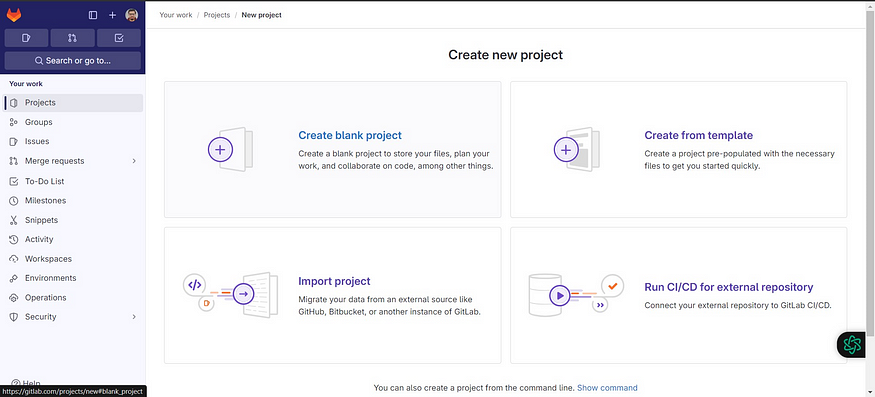
Click on New Project
Click on Create Blank Project
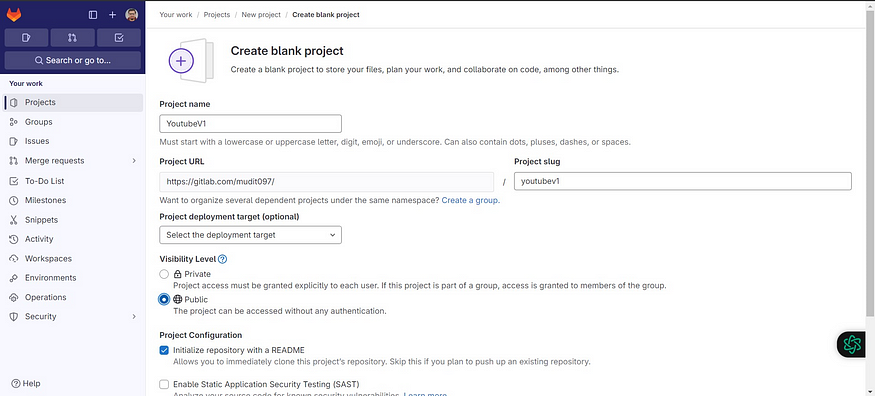
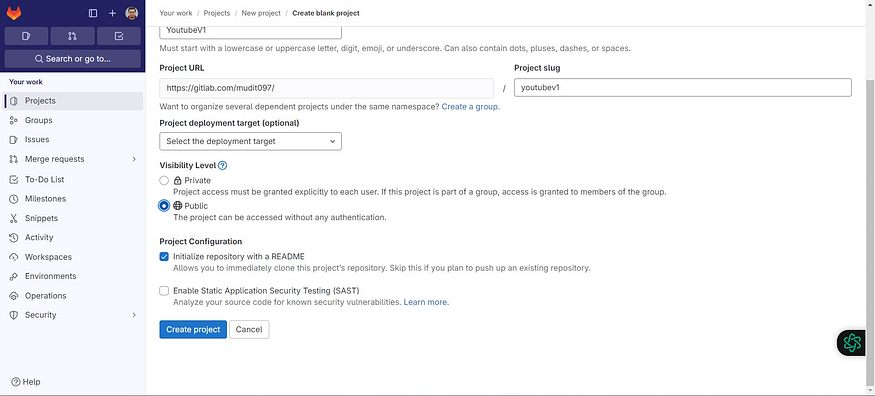
Provide a name for the Project
Keep Visibility to the public
Uncheck the Readme and create the Project.
Use the below commands to push code to GitLab
push an existing folder
cd existing_folder
git init --initial-branch=main
git remote add origin https://gitlab.com/mudit097/youtubev1.git
git add .
git commit -m "Initial commit"
git push -u origin main
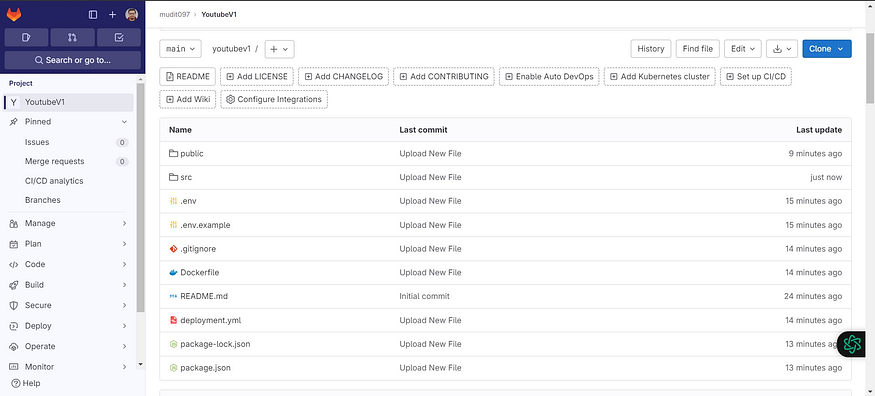
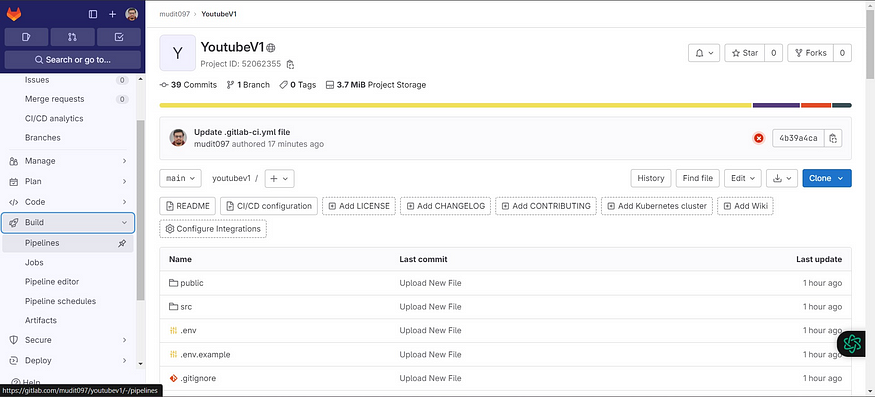
Files pushed to GitLab
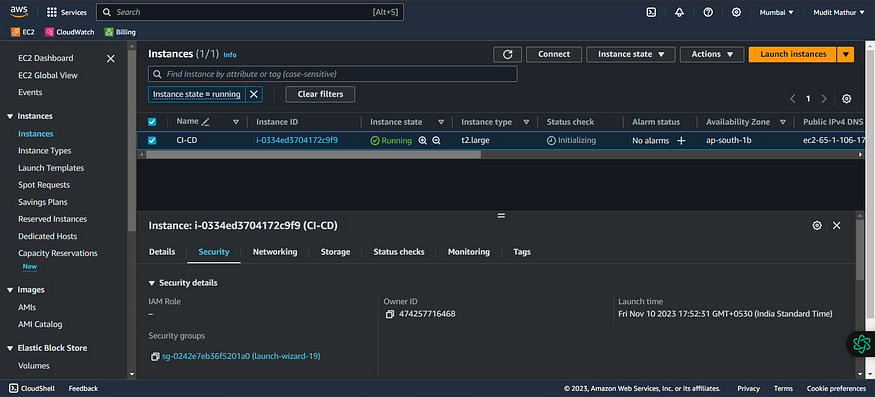
3. Step 3: Launch an EC2 instance and run SonarQube on it ☁️
Log into AWS Console: Sign in to your AWS account.
Launch an Instance:
Choose “EC2” from services. Click “Launch Instance.”
Choose an AMI: Select an Ubuntu image.
Choose an Instance Type: Pick “t2.medium.”
Key Pair: Choose an existing key pair or create a new one.
Configure Security Group:
Create a new security group. Add rules for HTTP, and HTTPS, and open all ports for learning purposes. Add Storage: Allocate at least 10 GB of storage.
Launch Instance: Review and launch the instance.
Access Your Instance: Use SSH to connect to your instance with the private key.
Keep in mind, that opening all ports is not recommended for production environments; it’s just for educational purposes.
Connect to Your EC2 Instance and install docker:
Run the below commands to install the docker
sudo apt-get update
sudo apt-get install docker.io -y
sudo usermod -aG docker $USER #my case is ubuntu
newgrp docker
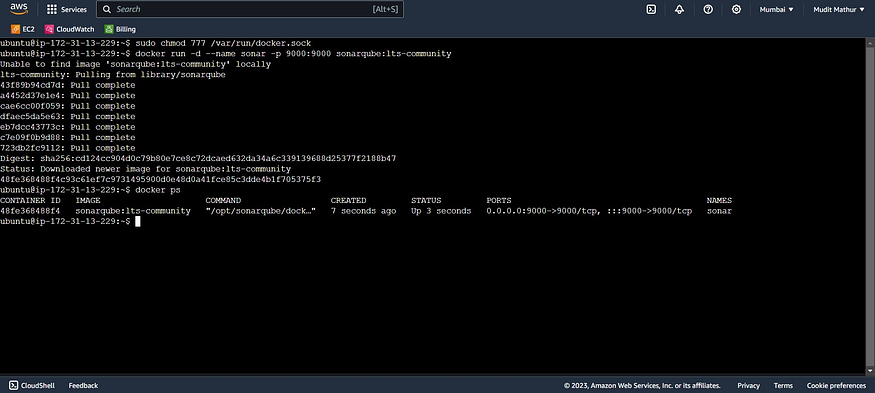
sudo chmod 777 /var/run/docker.sock
After the docker installation, we will create a Sonarqube container (Remember to add 9000 ports in the security group).
Run this command on your EC2 instance to create a SonarQube container:
docker run -d --name sonar -p 9000:9000 sonarqube:lts-community
Now copy the IP address of the ec2 instance
<ec2-public-ip:9000>
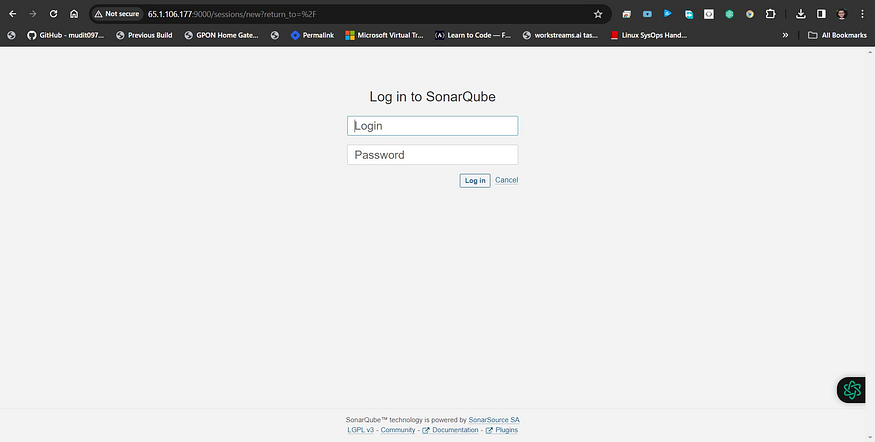
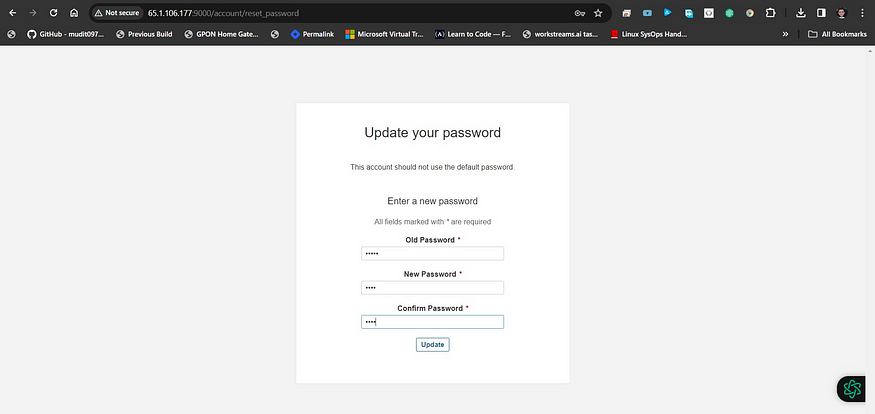
Enter username and password, click on login and change password
username admin
password admin
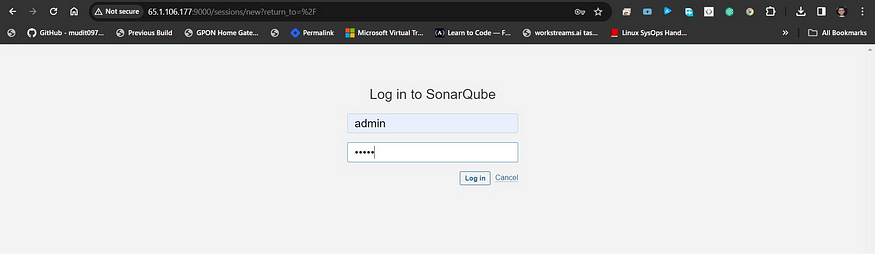
Update New password, This is Sonar Dashboard.
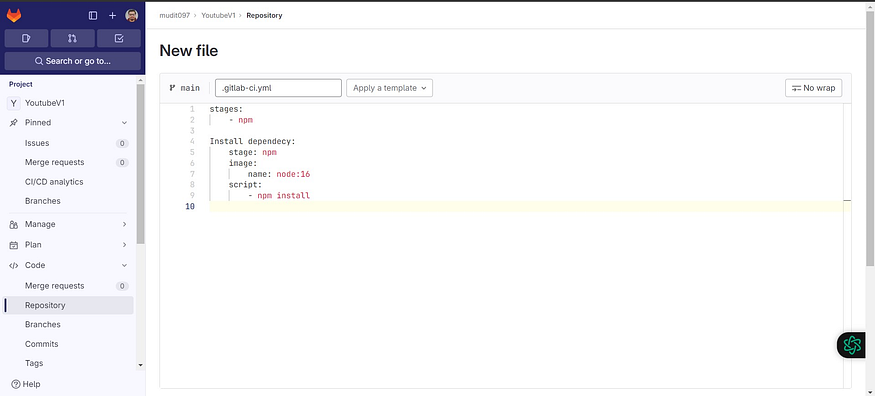
4. Step 4A: Create a .gitlab-ci.yml File 📝
Now go to GitLab click on ‘+’ and click on Newfile

File name .gitlab-ci.yml
Content
stages:
    - npm

Install dependecy:
    stage: npm
    image:
        name: node:16
    script:
        - npm install
Commit the changes and it will automatically start the build
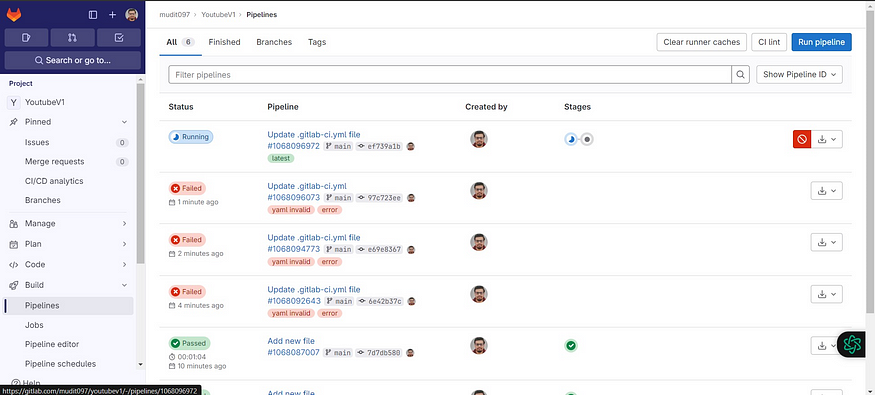
Now click on Build and Pipelines
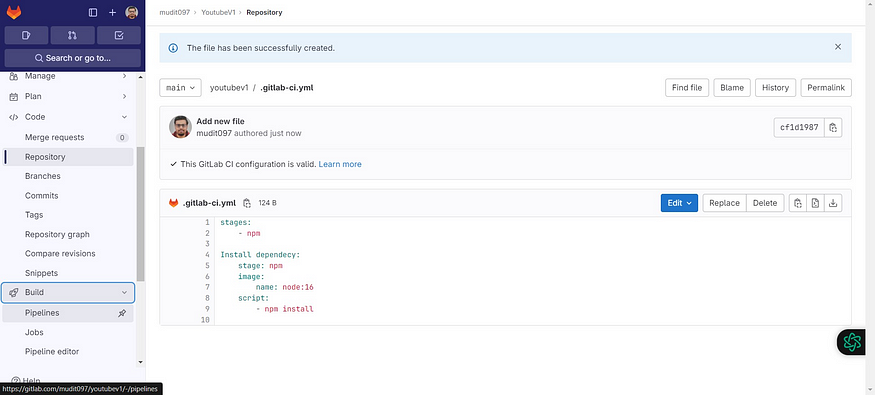
Now click on Running.
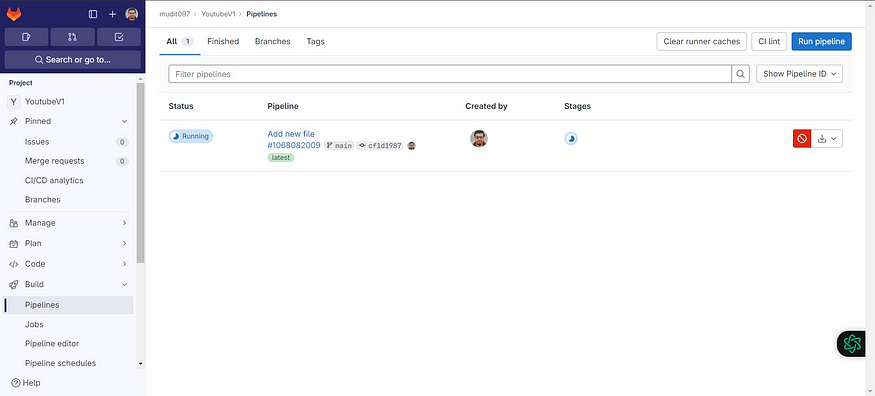
Click on Install dependency
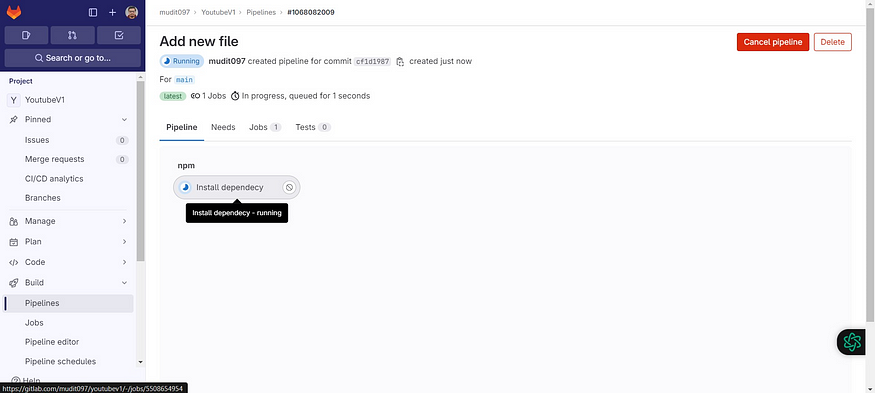
You will build output

Now add the Sonarqube stage to the pipeline
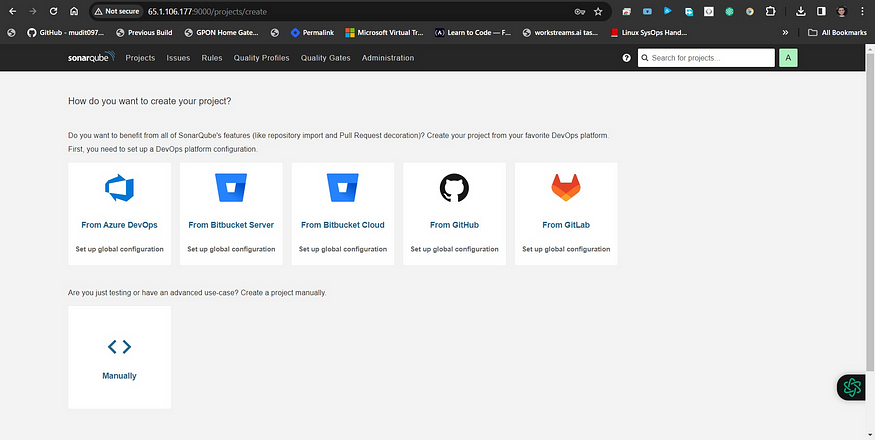
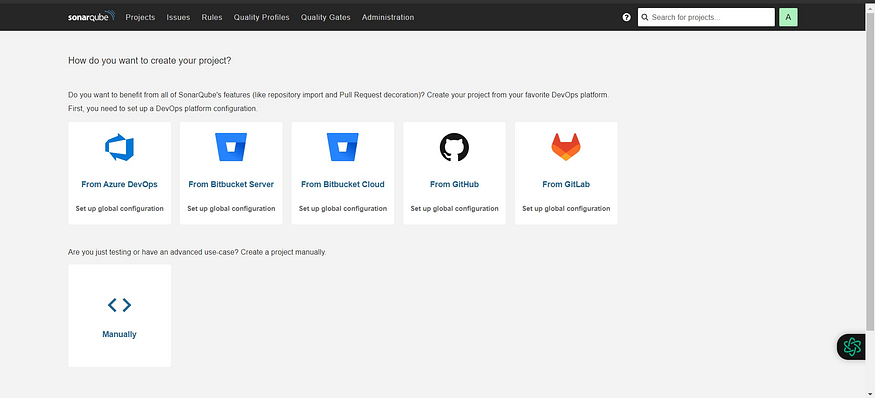
Go to the Sonarqube dashboard and click on Manually.
Provide the name of the Project and click on Setup
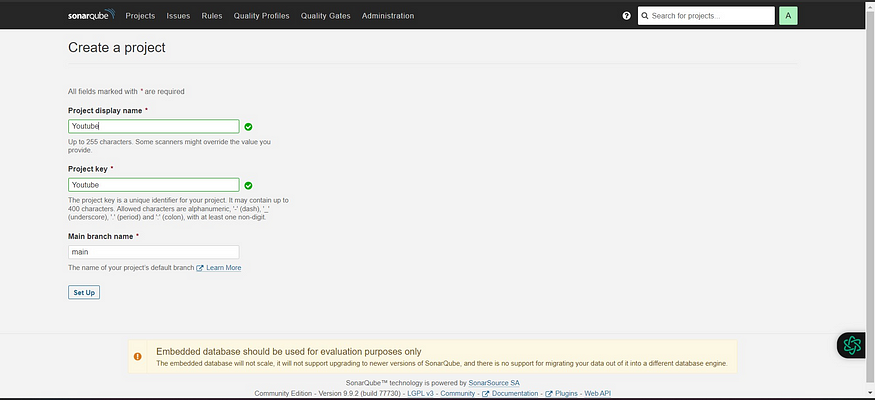
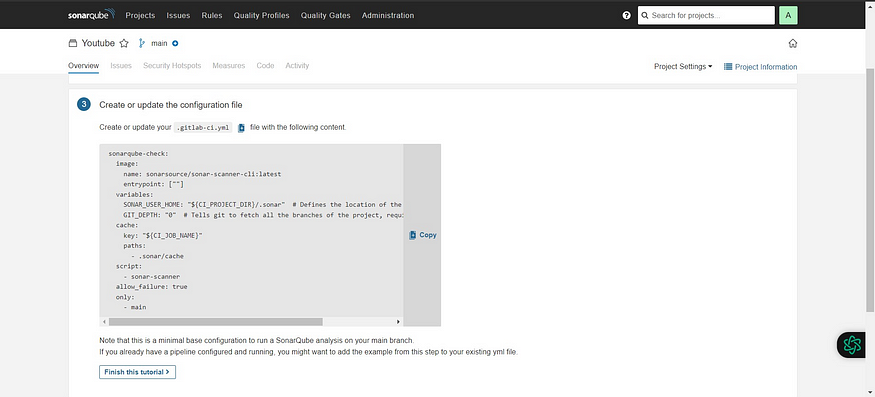
Select the CI tool as GitLab CI
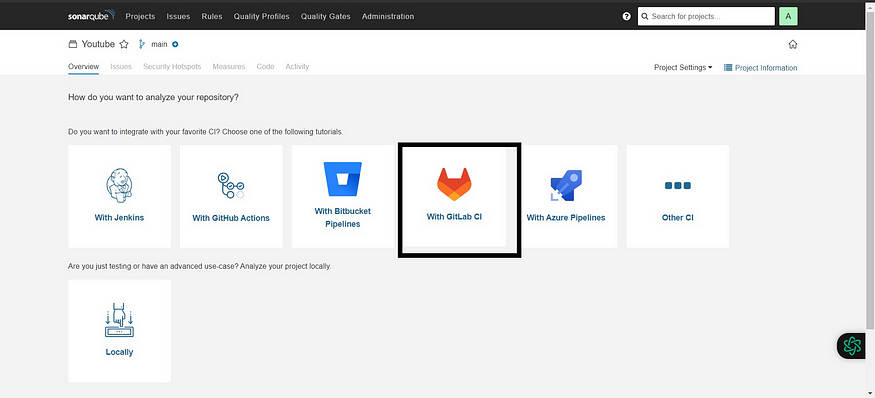
Select Other because we are using the JS App
It will provide code and we need to create a file inside our repo
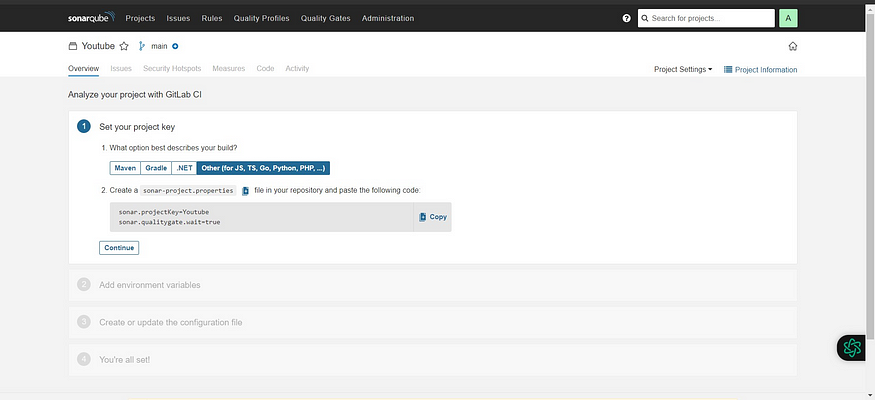
Go to Gitlab and click on + and Newfile
Filename is sonar-project.properties
Paste the content that you got from Sonarqube
The file looks like this and click on commit changes
Go to Sonarqube and click on continue
Now it will provide Variables to add to our GitLab
5. Step 4B: Add the required variables for the project 🧩
Variables Generated

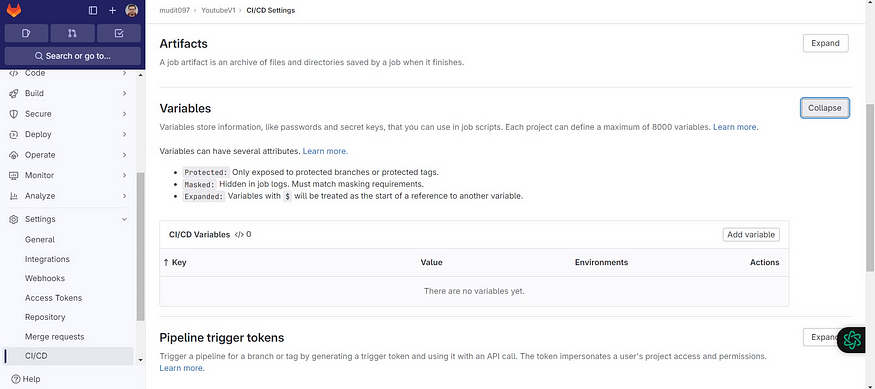
Now go to GitLab
Click on settings and CI/CD
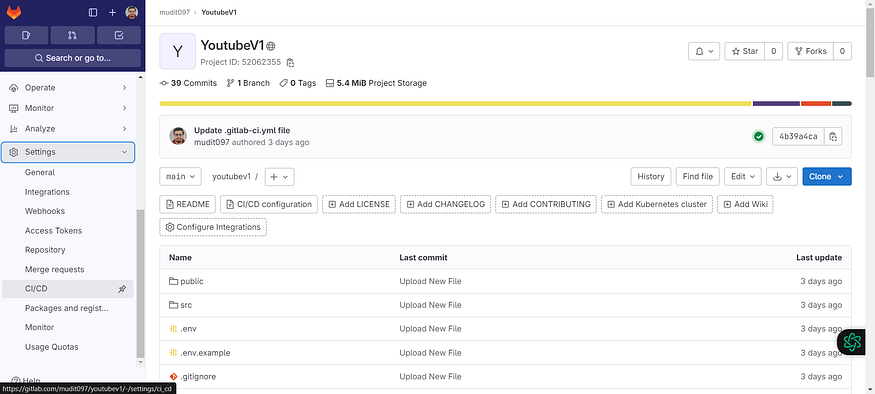
Click on Expand in variables
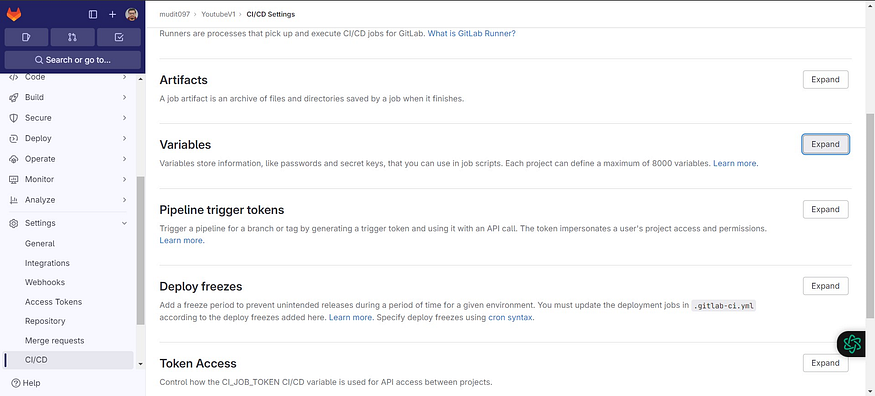
Click on Add variable
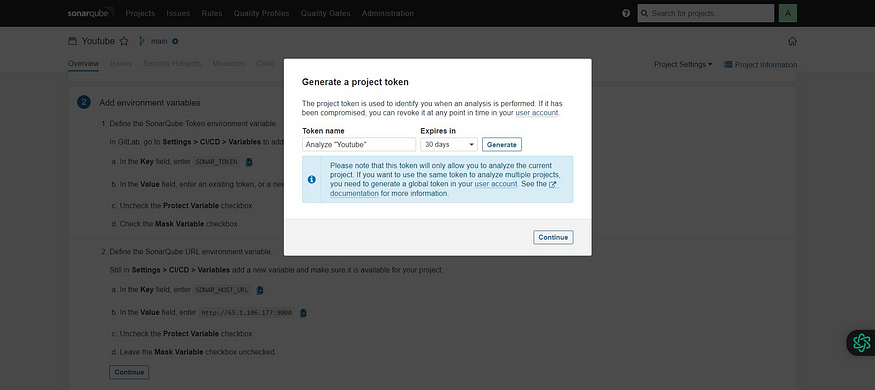
Now go back to Sonarqube and copy the Key
Click on Generate a token
Again Click on Generate
Copy the token
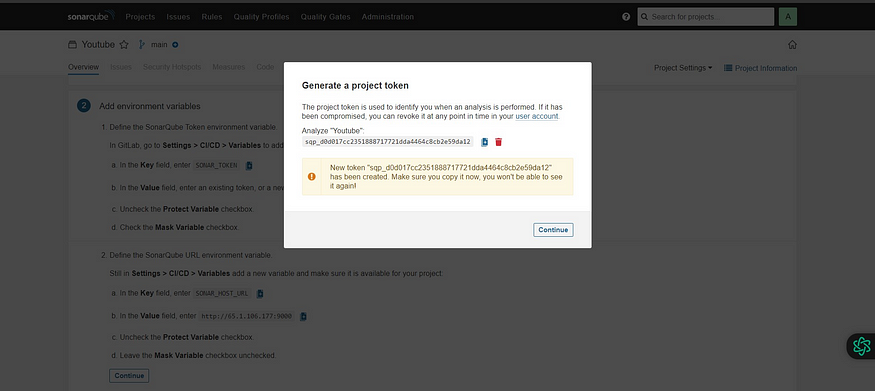
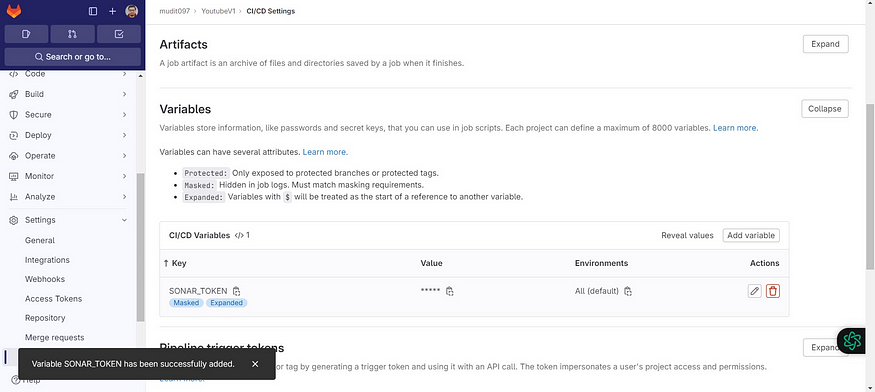
Now come back to GitLab and add them like the below image and click on add variable.
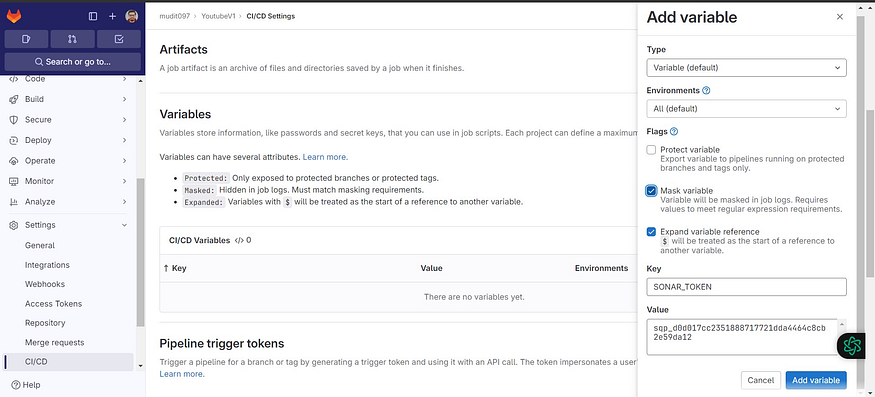
Sonar token is added
Now go to the Sonarqube Dashboard again
Let’s add another variable, copy them
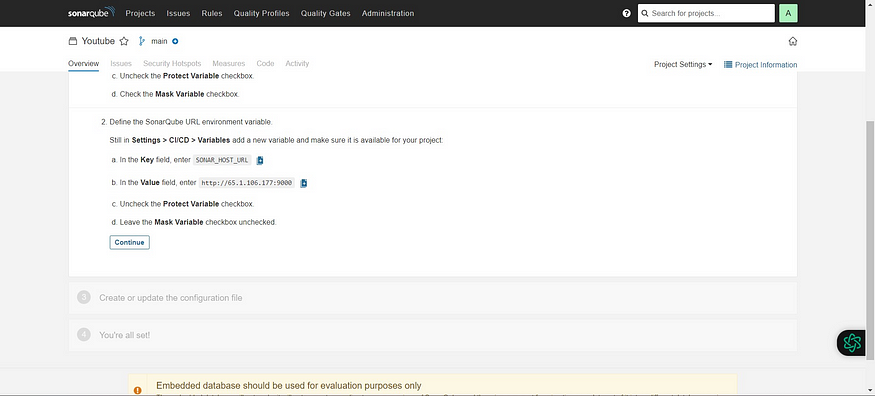
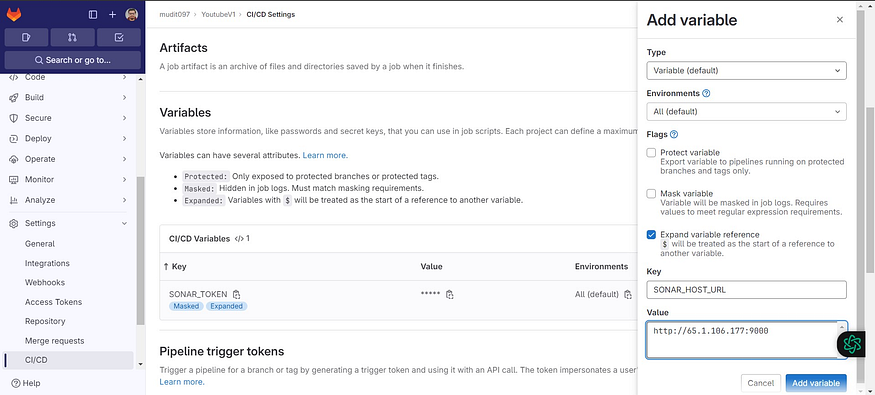
Now go to GitLab and click on Add variable
Add the copied values like the below image
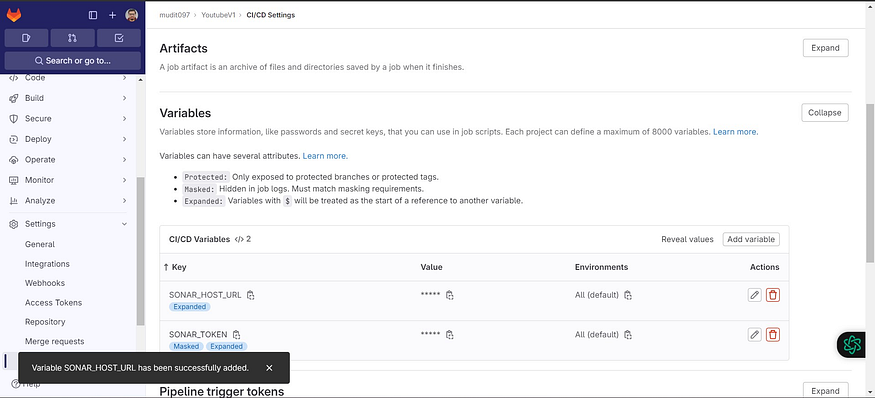
Two variables were added.
Now go back to the Sonarqube Dashboard
Click on continue
It will provide and CI configuration file copy it and use it inside our .gitlab-ci.yml file
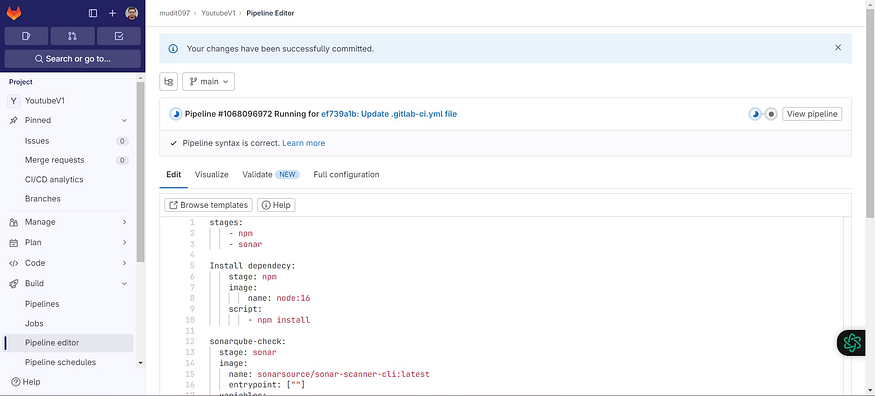
Now go back to GitLab and edit the .gitlab-ci.yml file
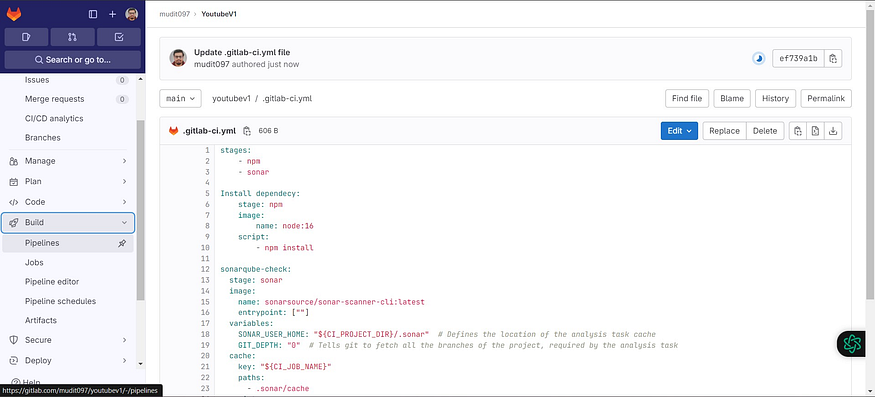
Full file (update with your content)
stages:
- npm
- sonar
Install dependecy:
stage: npm
image:
name: node:16
script:
- npm install
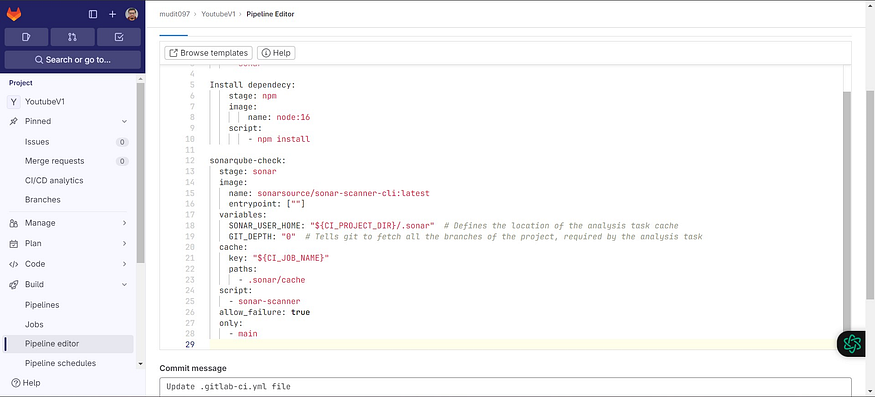
sonarqube-check:
stage: sonar
image:
name: sonarsource/sonar-scanner-cli:latest
entrypoint: [""]
variables:
SONAR_USER_HOME: "${CI_PROJECT_DIR}/.sonar" # Defines the location of the analysis task cache
GIT_DEPTH: "0" # Tells git to fetch all the branches of the project, required by the analysis task
cache:
key: "${CI_JOB_NAME}"
paths:
- .sonar/cache
script:
- sonar-scanner
allow_failure: true
only:
- main
Commit changes and it will automatically start the build.
Click on Build → Pipelines
Click on Running
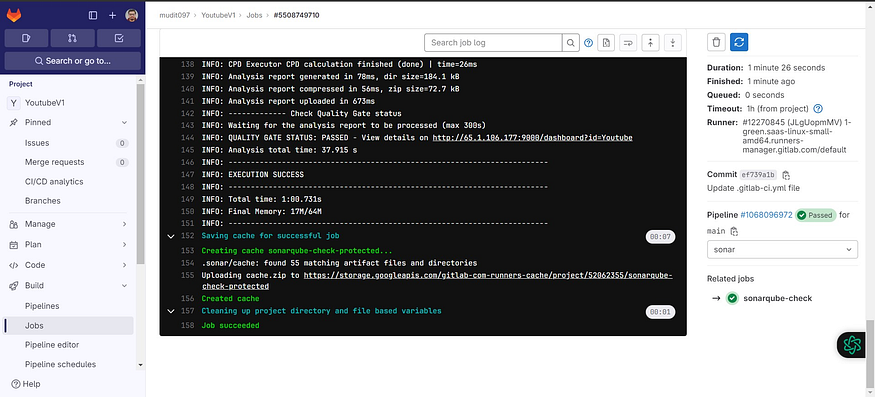
Now click on Sonarqube-check
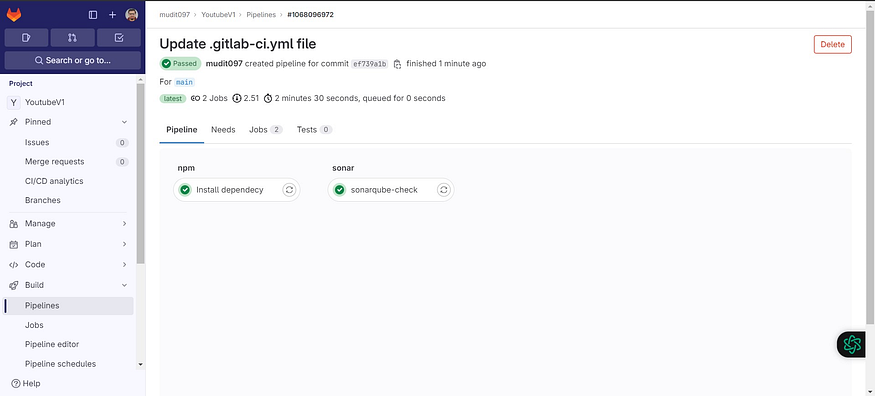
Build output
Now add the next stage of the Trivy file scan
Update the .gitlab-ci.yml file
stages:
    - npm
    - sonar
    - trivy file scan

Install dependecy:
    stage: npm
    image:
        name: node:16
    script:
        - npm install

sonarqube-check:
  stage: sonar
  image:
    name: sonarsource/sonar-scanner-cli:latest
    entrypoint: [""]
  variables:
    SONAR_USER_HOME: "${CI_PROJECT_DIR}/.sonar"  # Defines the location of the analysis task cache
    GIT_DEPTH: "0"  # Tells git to fetch all the branches of the project, required by the analysis task
  cache:
    key: "${CI_JOB_NAME}"
    paths:
      - .sonar/cache
  script:
    - sonar-scanner
  allow_failure: true
  only:
    - main

Trivy file scan:
  stage: trivy file scan
  image:
    name: aquasec/trivy:latest
    entrypoint: [""]
  script:
    - trivy fs .
Commit changes and go to pipeline stages
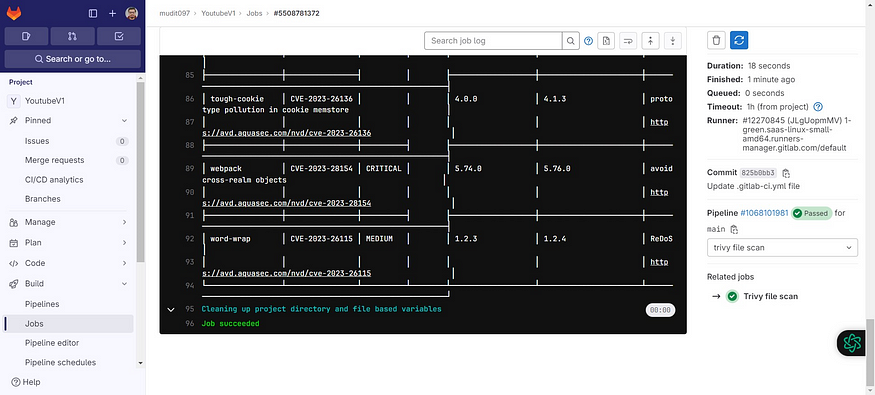
Click on the Trivy file scan
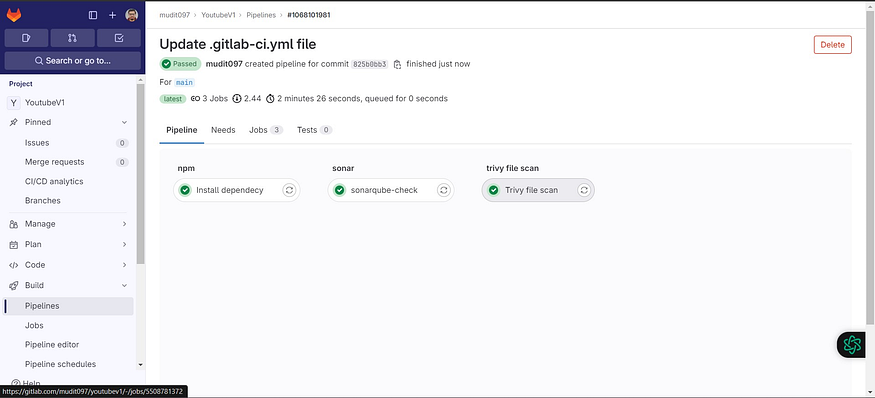
Build Output
Add the Docker build and push stage
Before that Add docker credentials to GitLab Variables as secrets.
Go to the docker hub and create a Personal Access token
Click on your profile name and Account Settings
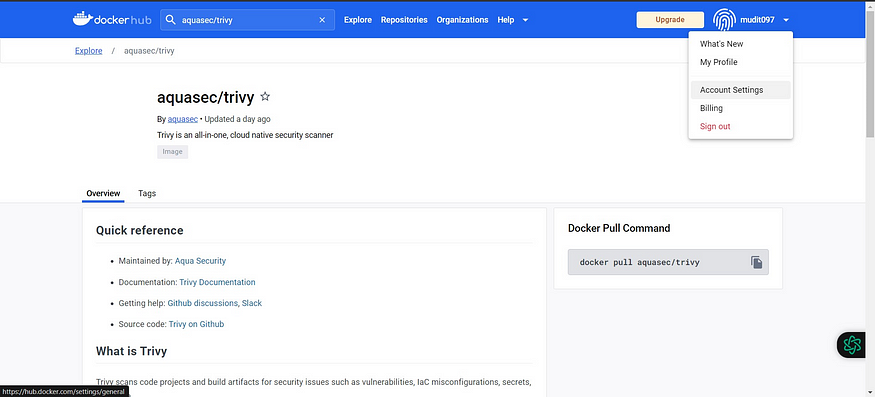
Now click on Security → New Access Token
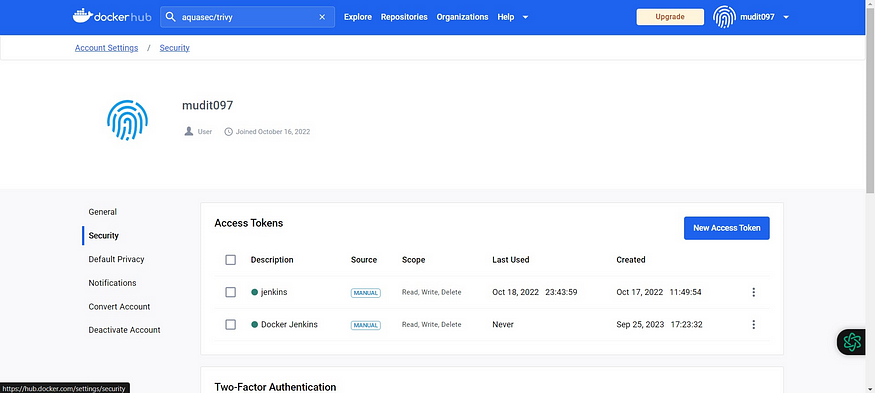
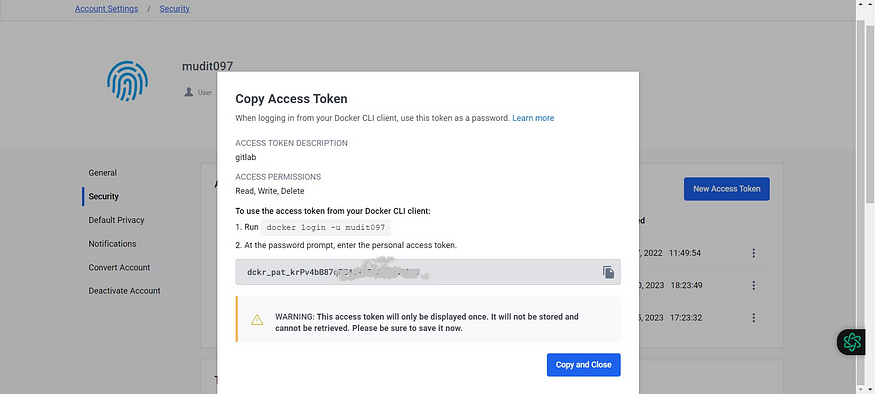
Provide a name → Generate
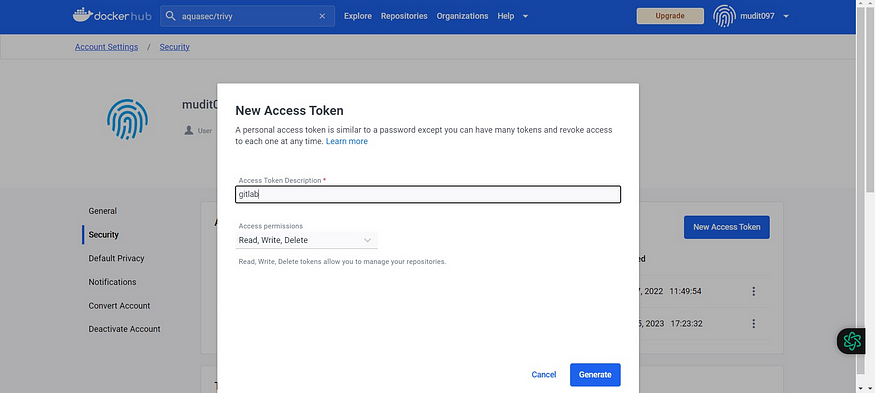
Now copy the token and keep it safe
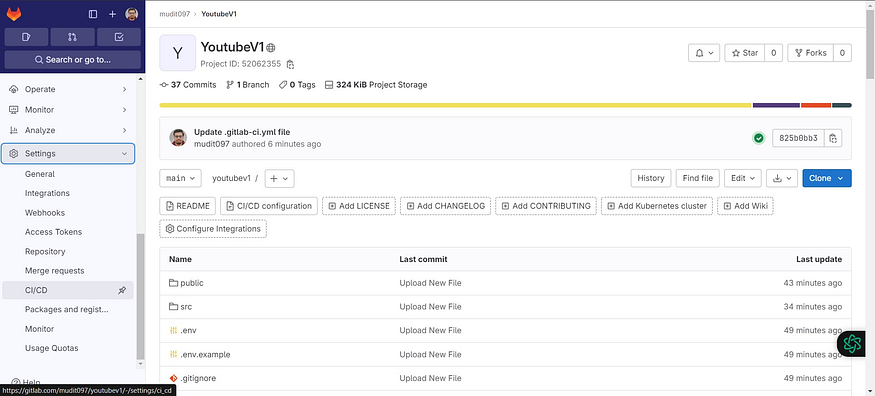
Now go back to Gitlab
Click on settings and CI/CD
Click on Expand in variables
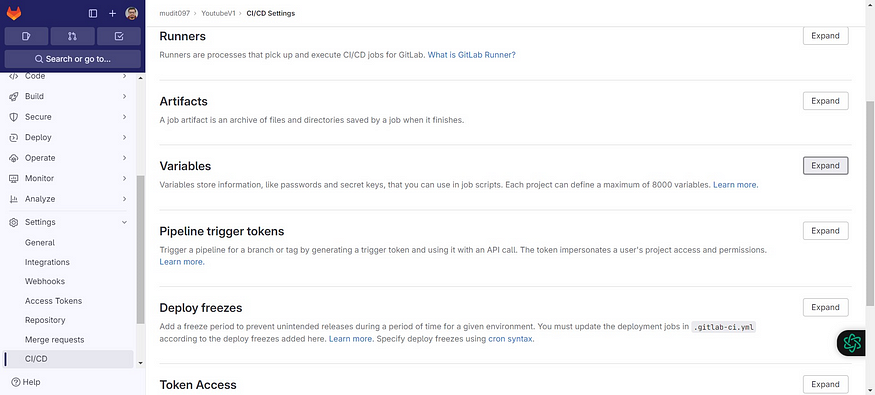
Click on Add variable
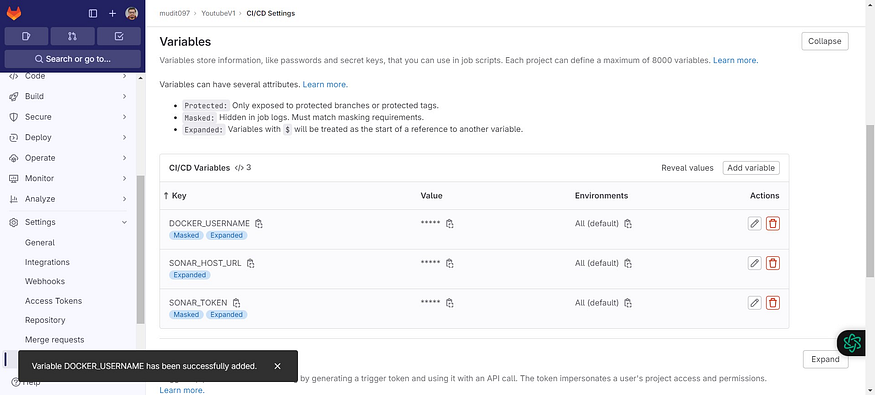
Use your DockerHub username in value and Add variable
Key DOCKER_USERNAME
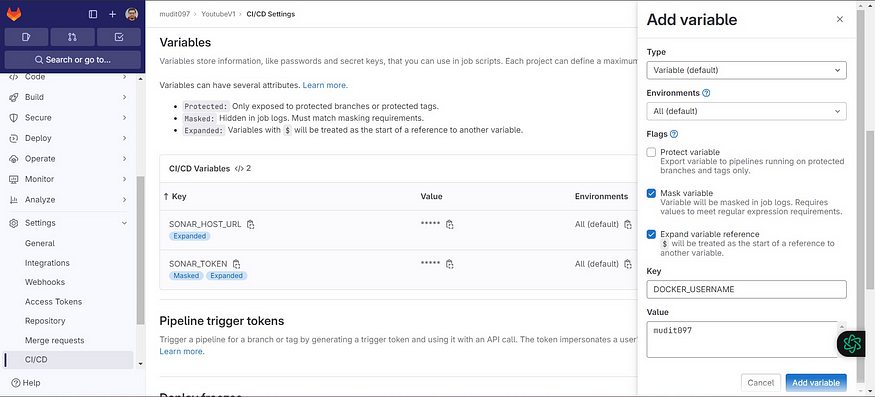
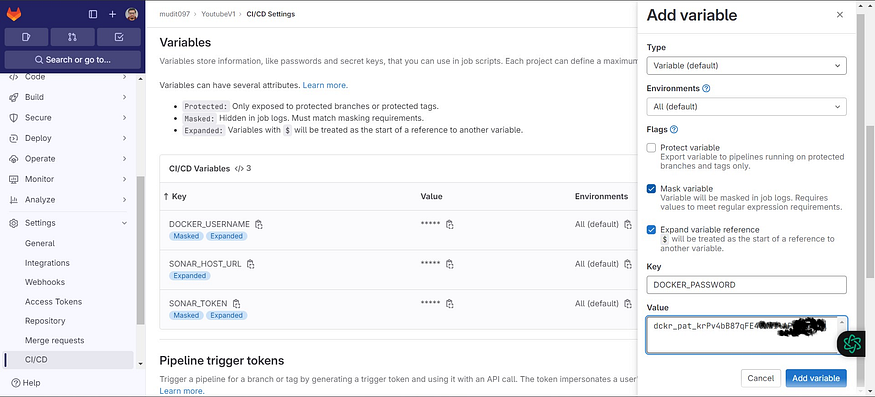
Click on Add variable again
Key DOCKER_PASSWORD
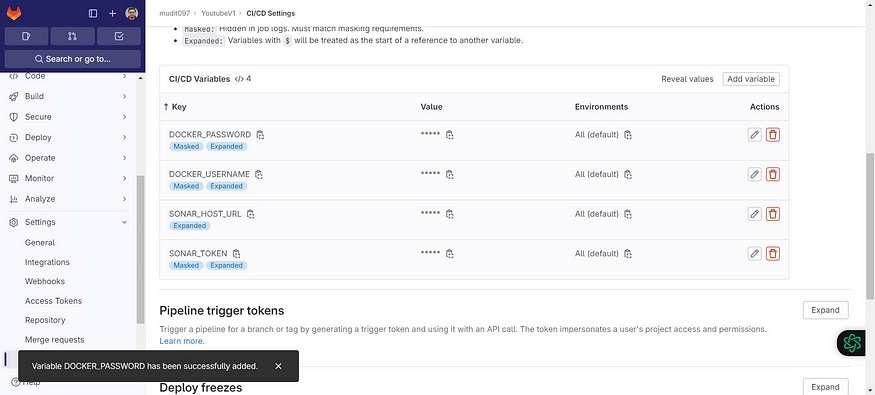
For value use the Generated Personal Access token and add a variable.
Variables added.
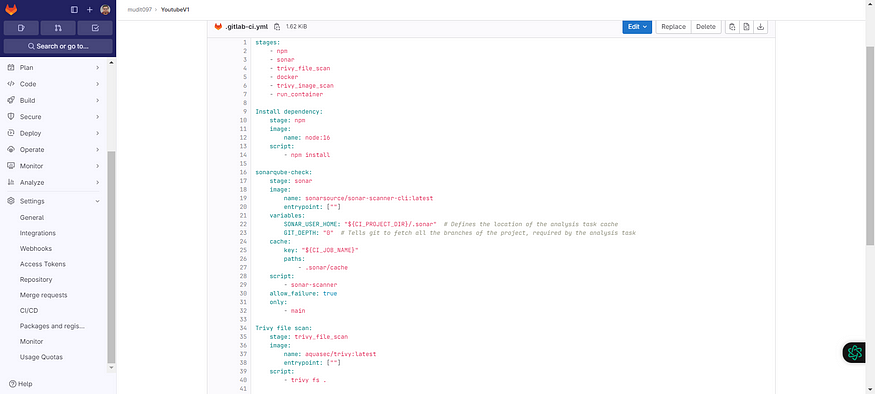
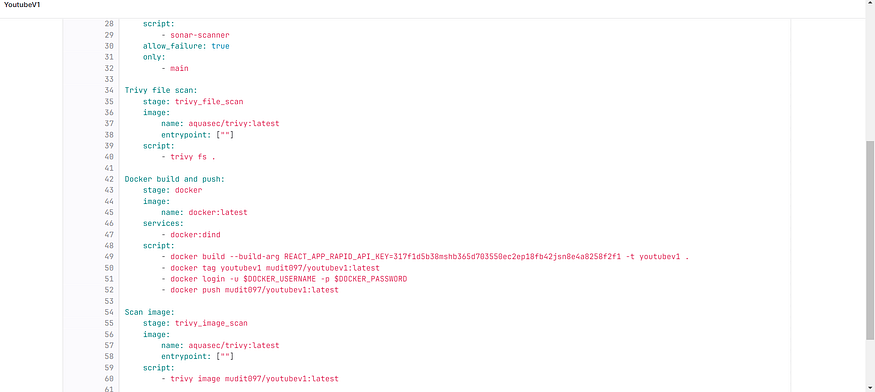
Now add the below stage to the Configuration .gitlab-ci.yml file
Added Docker and Trivy image scan stages
stages:
    - npm
    - sonar
    - trivy_file_scan
    - docker
    - trivy_image_scan
    - run_container

Install dependency:
    stage: npm
    image:
        name: node:16
    script:
        - npm install

sonarqube-check:
    stage: sonar
    image:
        name: sonarsource/sonar-scanner-cli:latest
        entrypoint: [""]
    variables:
        SONAR_USER_HOME: "${CI_PROJECT_DIR}/.sonar"  # Defines the location of the analysis task cache
        GIT_DEPTH: "0"  # Tells git to fetch all the branches of the project, required by the analysis task
    cache:
        key: "${CI_JOB_NAME}"
        paths:
            - .sonar/cache
    script:
        - sonar-scanner
    allow_failure: true
    only:
        - main

Trivy file scan:
    stage: trivy_file_scan
    image:
        name: aquasec/trivy:latest
        entrypoint: [""]
    script:
        - trivy fs .

Docker build and push:
    stage: docker
    image:
        name: docker:latest
    services:
        - docker:dind
    script:
        - docker build --build-arg REACT_APP_RAPID_API_KEY=317f1d5b38mshb365d703550ec2ep18fb42jsn8e4a8258f2f1 -t youtubev1 .
        - docker tag youtubev1 mudit097/youtubev1:latest
        - docker login -u $DOCKER_USERNAME -p $DOCKER_PASSWORD
        - docker push mudit097/youtubev1:latest

Scan image:
    stage: trivy_image_scan
    image:
        name: aquasec/trivy:latest
        entrypoint: [""]
    script:
        - trivy image mudit097/youtubev1:latest
Added stages
Commit changes and it will automatically start building.
Go to Pipelines view
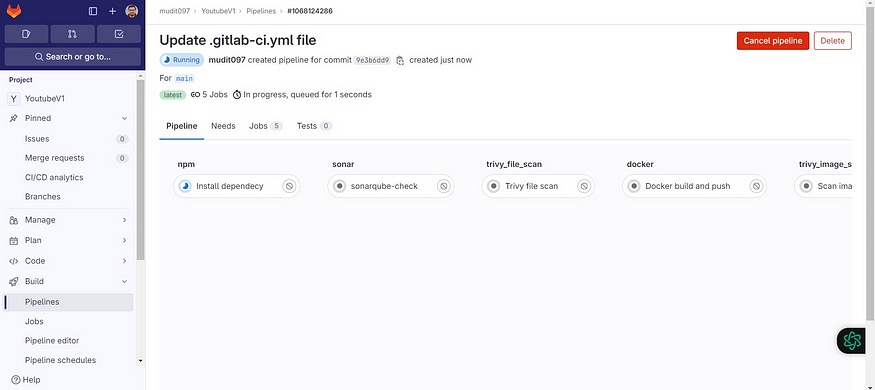
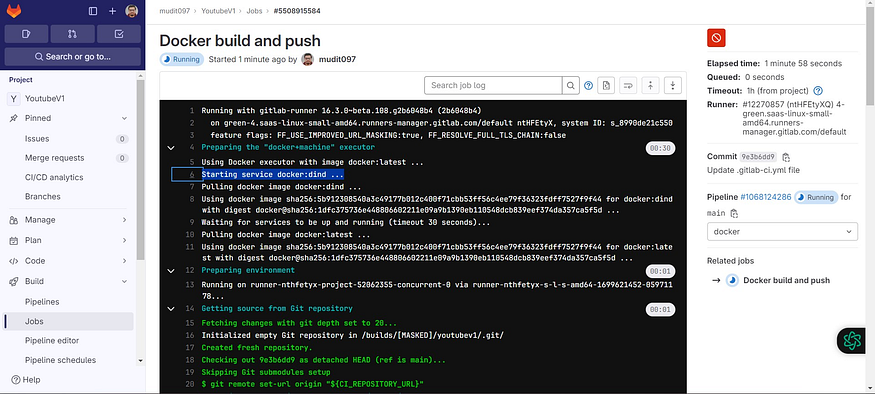
Now click on Docker build and push
Build view

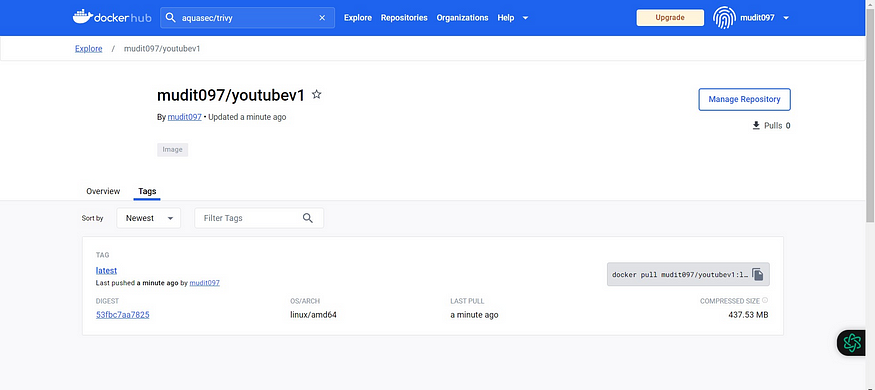
Go to Dockerhub and see the image
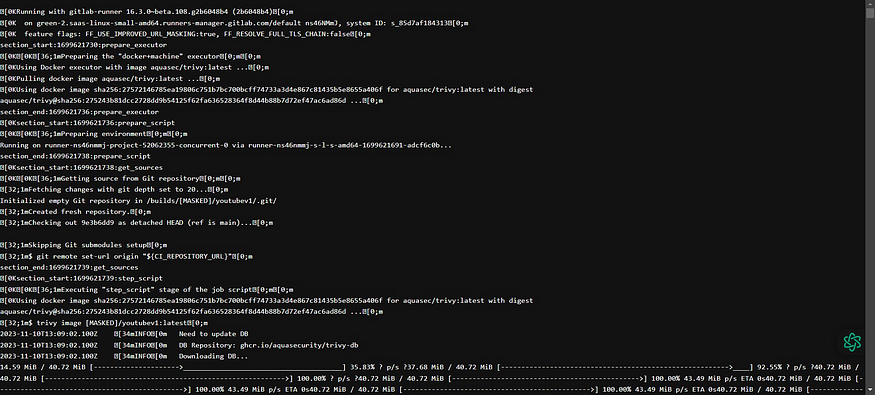
Now come back to GitLab and click on Trivy image scan

Output raw
6. Step 5: Install GitLab Runner on EC2 🏃♂️
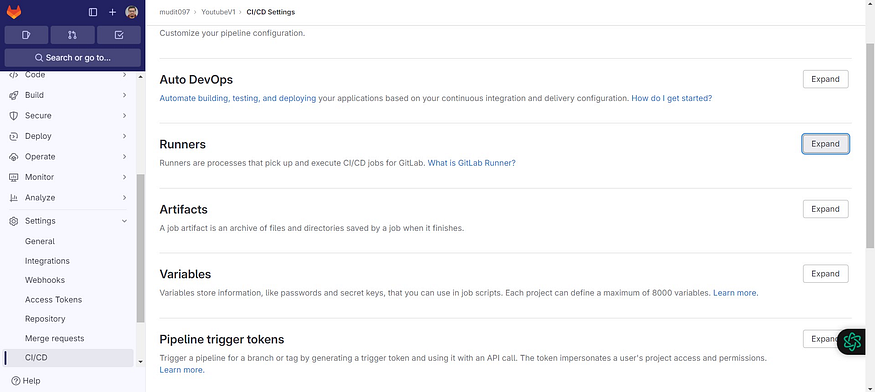
Go to GitLab and Click on Settings and CI/CD
Click on Expand at Runners
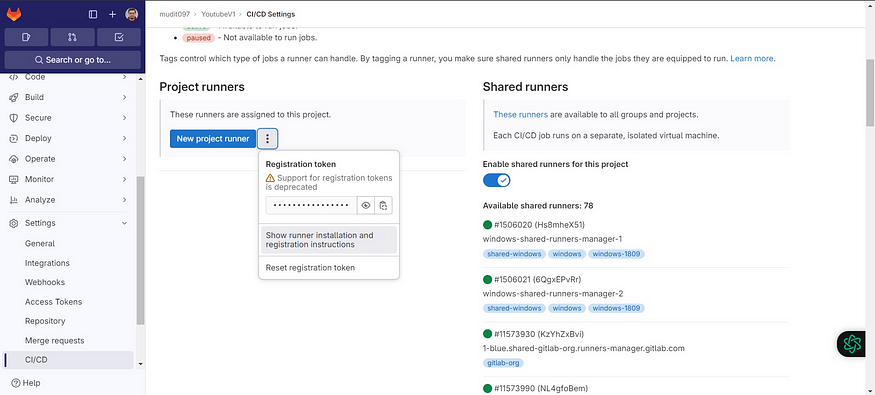
Click on Three dots and then click on Show Runner installation

Click on Linux and amd64 and copy the commands

Now come back to Putty or Mobaxtreme
Create a new file
sudo vim gitlab-runner-installation

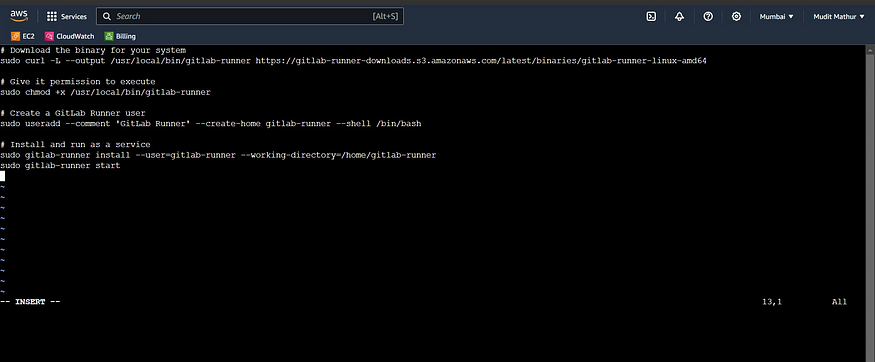
Paste the below commands into it
# Download the binary for your system
sudo curl -L --output /usr/local/bin/gitlab-runner https://gitlab-runner-downloads.s3.amazonaws.com/latest/binaries/gitlab-runner-linux-amd64

# Give it permission to execute
sudo chmod +x /usr/local/bin/gitlab-runner

# Create a GitLab Runner user
sudo useradd --comment 'GitLab Runner' --create-home gitlab-runner --shell /bin/bash

# Install and run as a service
sudo gitlab-runner install --user=gitlab-runner --working-directory=/home/gitlab-runner
sudo gitlab-runner start
Provide executable permissions and run the script
sudo chmod +x <file-name>
./<file-name>
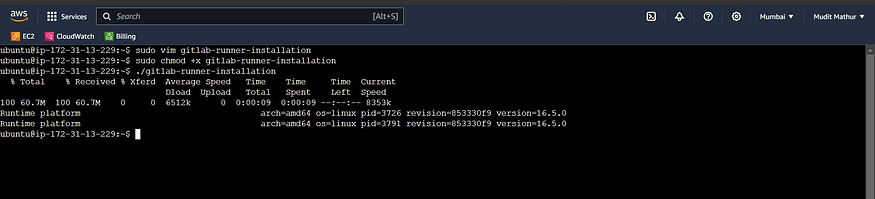
Installation completed
Start the GitLab runner
sudo gitlab-runner start

Now run the below command or your command to register the runner
Update the token is enough

sudo gitlab-runner register --url https://gitlab.com/ --registration-token <token>
Provide the details for registering the runner
Provide Enter for GitLab.com
For token we already added with token, so click on Enter again
Description as your wish
Tags also and you can use multiple tags by providing a comma after each tga
Maintenance note is just optional
For executors use Shell
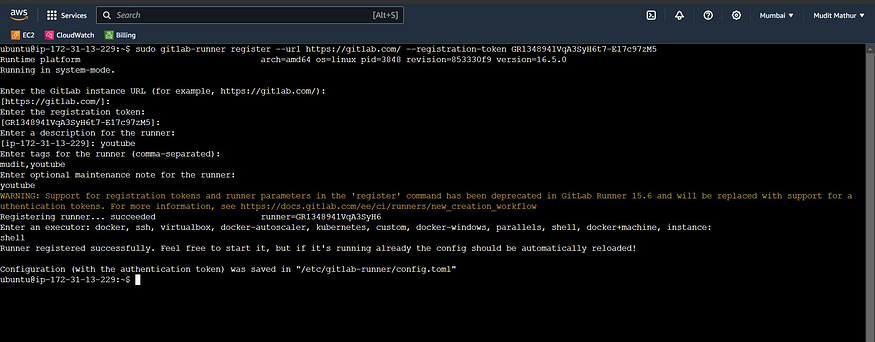
Runner added successfully.
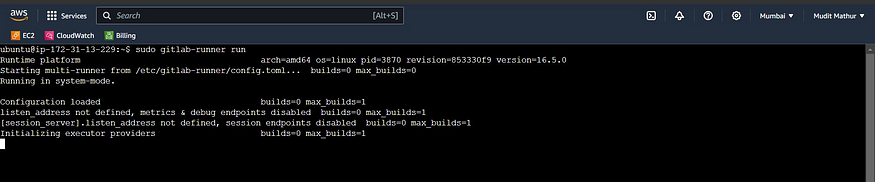
Start the GitLab runner
sudo gitlab-runner start

Run the GitLab runner
sudo gitlab-runner run
Go to GitLab and refresh the page once or click on Enable for this project
Now the runner is active and waiting for jobs
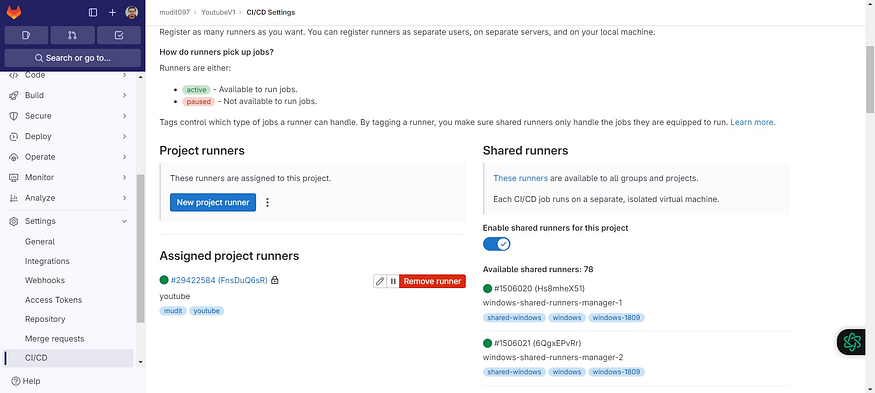
Click on the Pencil mark to edit
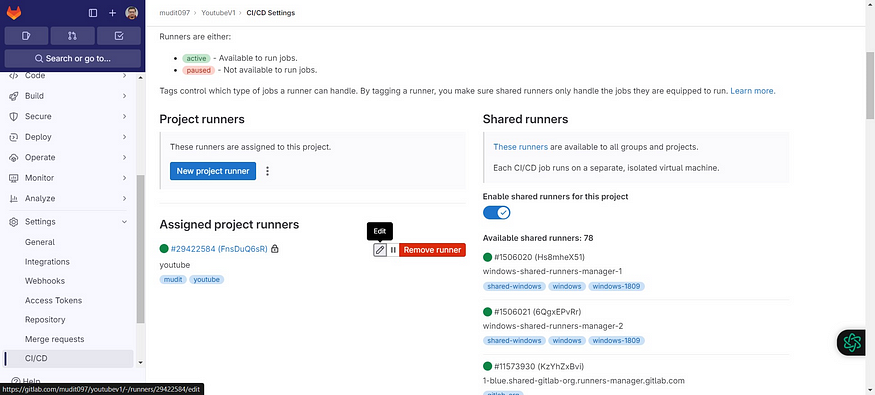
Click on the Check box to indicate whether this runner can pick jobs without tags.
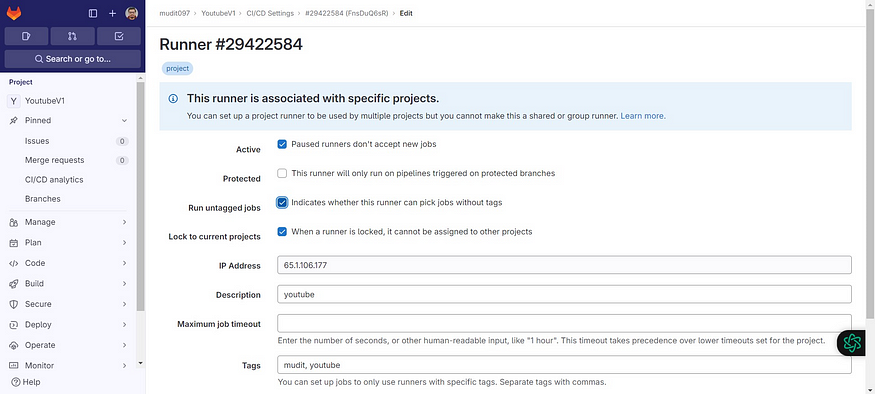
Click on save changes.
7. Step 6: Run the Application on the Docker container 🐳
Now edit the .gitlab-ci.yml file for the deploy stage
The complete file
stages:
    - npm
    - sonar
    - trivy_file_scan
    - docker
    - trivy_image_scan
    - run_container

Install dependency:
    stage: npm
    image:
        name: node:16
    script:
        - npm install

sonarqube-check:
    stage: sonar
    image:
        name: sonarsource/sonar-scanner-cli:latest
        entrypoint: [""]
    variables:
        SONAR_USER_HOME: "${CI_PROJECT_DIR}/.sonar"  # Defines the location of the analysis task cache
        GIT_DEPTH: "0"  # Tells git to fetch all the branches of the project, required by the analysis task
    cache:
        key: "${CI_JOB_NAME}"
        paths:
            - .sonar/cache
    script:
        - sonar-scanner
    allow_failure: true
    only:
        - main

Trivy file scan:
    stage: trivy_file_scan
    image:
        name: aquasec/trivy:latest
        entrypoint: [""]
    script:
        - trivy fs .

Docker build and push:
    stage: docker
    image:
        name: docker:latest
    services:
        - docker:dind
    script:
        - docker build --build-arg REACT_APP_RAPID_API_KEY=317f1d5b38mshb365d703550ec2ep18fb42jsn8e4a8258f2f1 -t youtubev1 .
        - docker tag youtubev1 mudit097/youtubev1:latest
        - docker login -u $DOCKER_USERNAME -p $DOCKER_PASSWORD
        - docker push mudit097/youtubev1:latest

Scan image:
    stage: trivy_image_scan
    image:
        name: aquasec/trivy:latest
        entrypoint: [""]
    script:
        - trivy image mudit097/youtubev1:latest

deploy:
    stage: run_container
    tags:
        - youtube  # use your own tags
    script:
        - docker run -d --name youtube -p 3000:3000 mudit097/youtubev1:latest

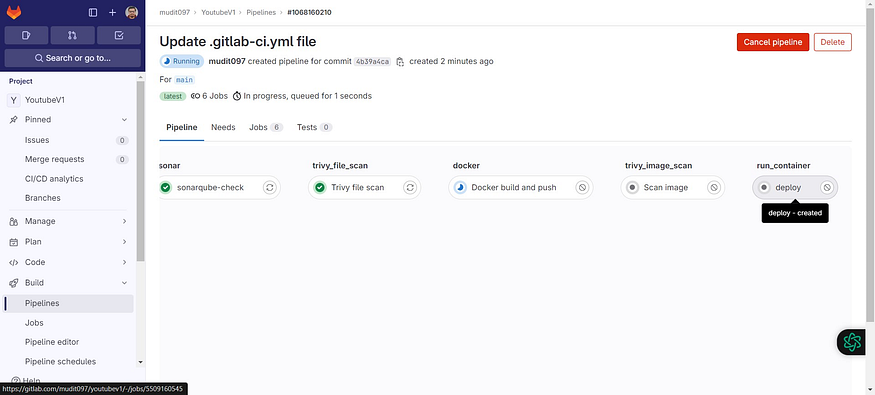
Commit changes, it will automatically start to build
Click on Build → Pipelines
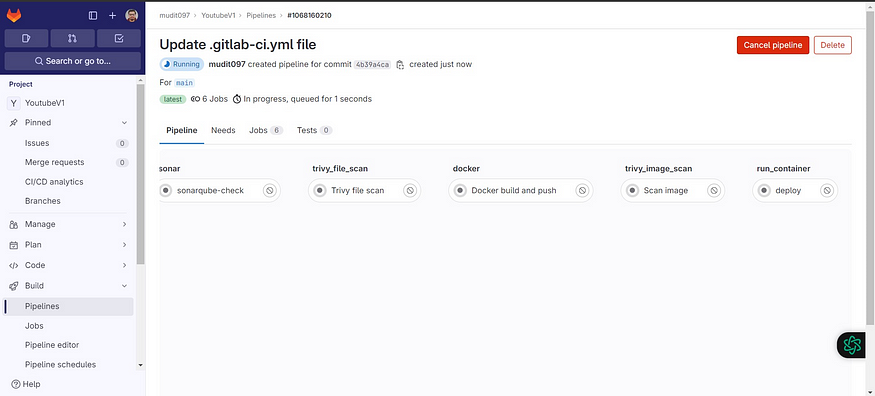
Click on Running
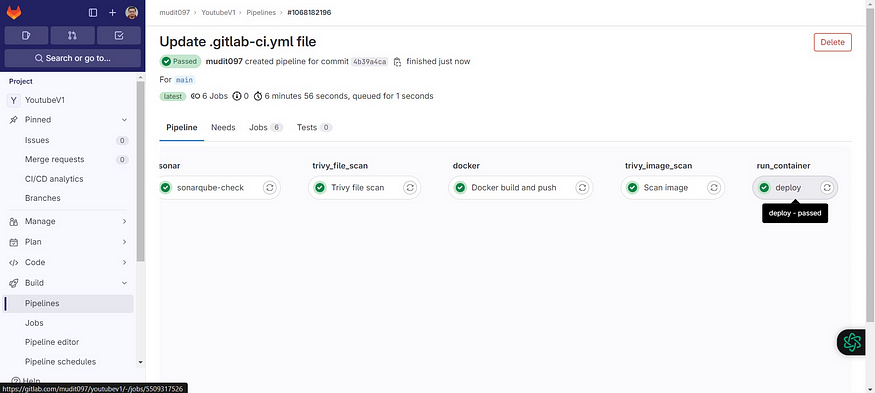
The last stage is added to the Pipeline
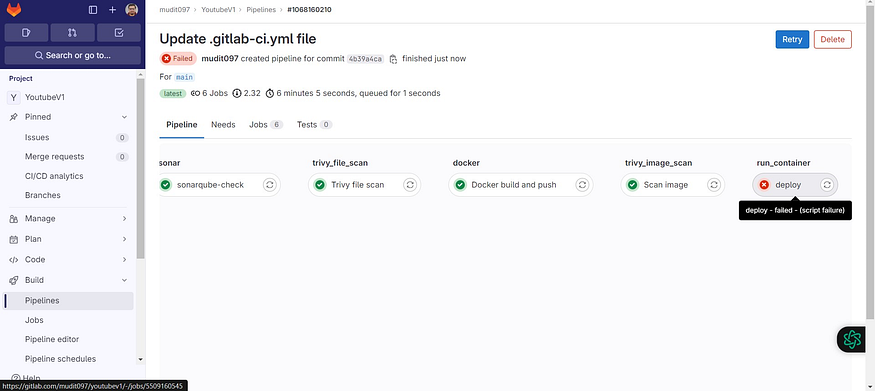
If you get an error like this
Go to GitLab and click on deploy job
Let’s see what is the error
If you get an error like this, click on that link
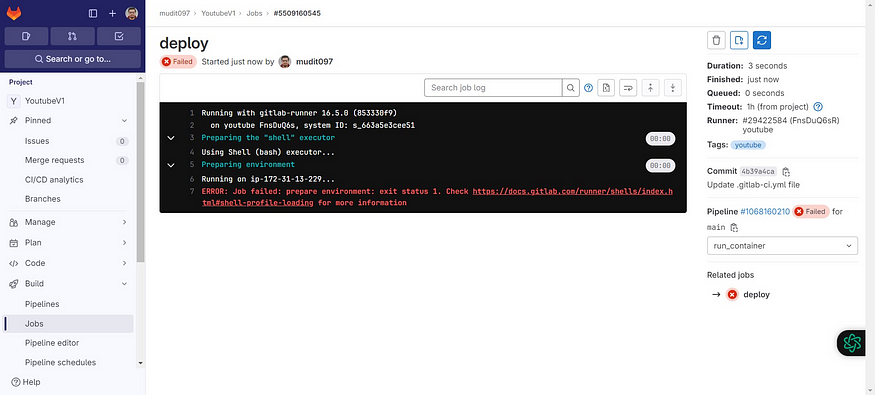
It will open a new tab and provide a solution for that
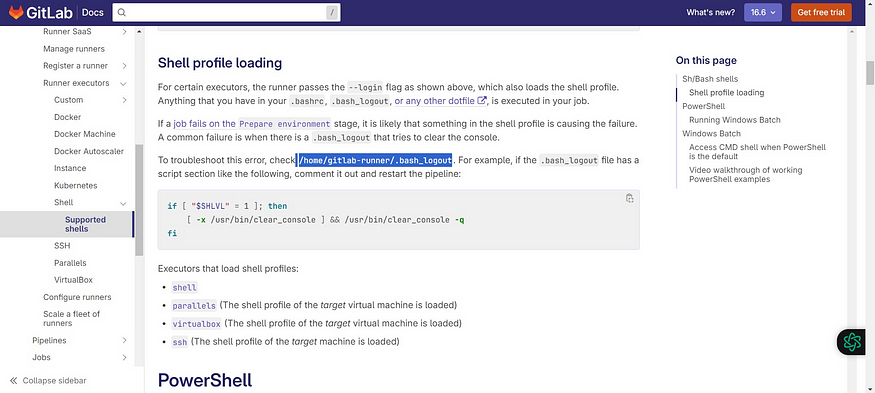
Now go to Mobaxtreme and stop the Runner
Go to root and use the below commands
sudo su
sudo vim /home/gitlab-runner/.bash_logout
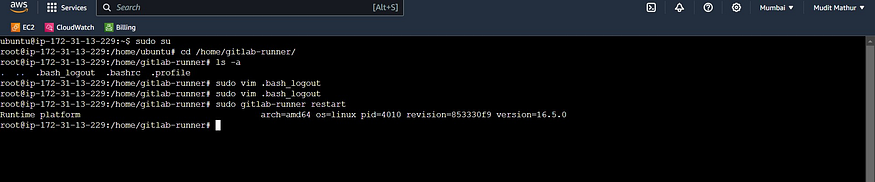
You will see file like this
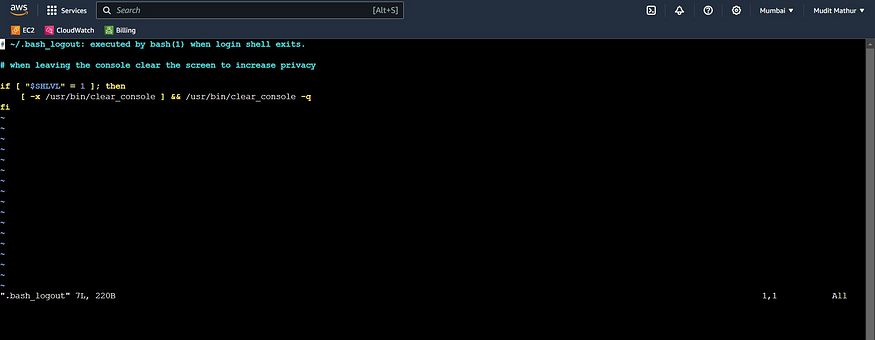
Comment them
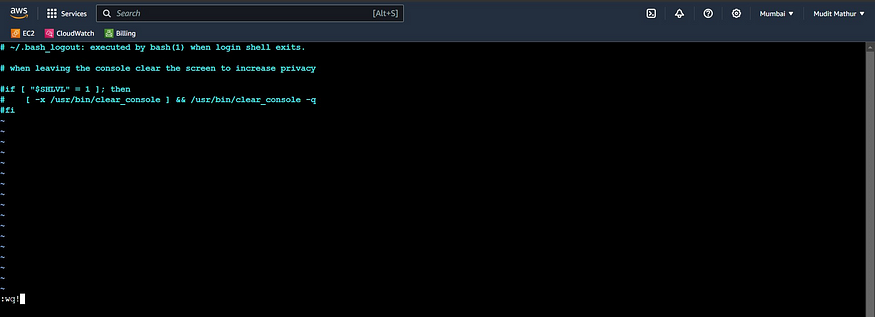
Save and exit from that file and restart GitLab runner
sudo gitlab-runner restart
exit #from root

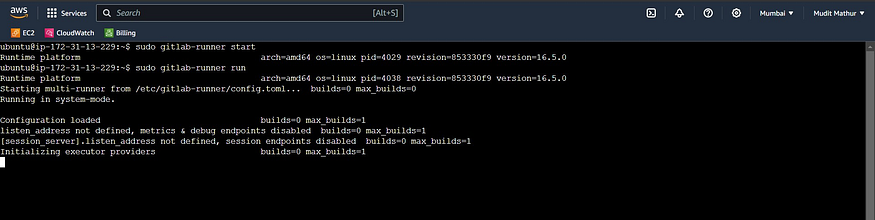
Now start and Run the GitLab runner
sudo gitlab-runner start
sudo gitlab-runner run
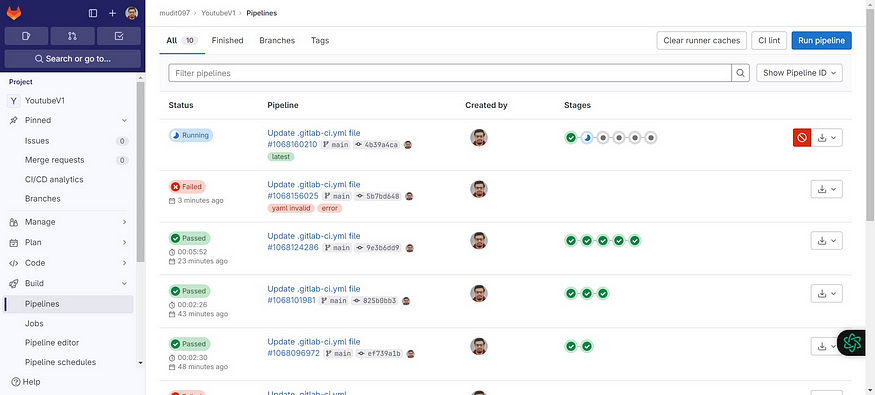
Now go to GitLab → Build → Pipelines
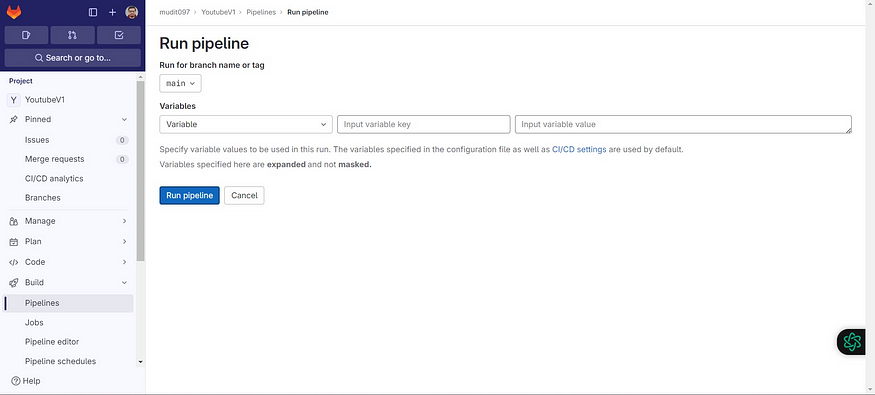
Click on Run Pipeline

Again Click on Run Pipeline
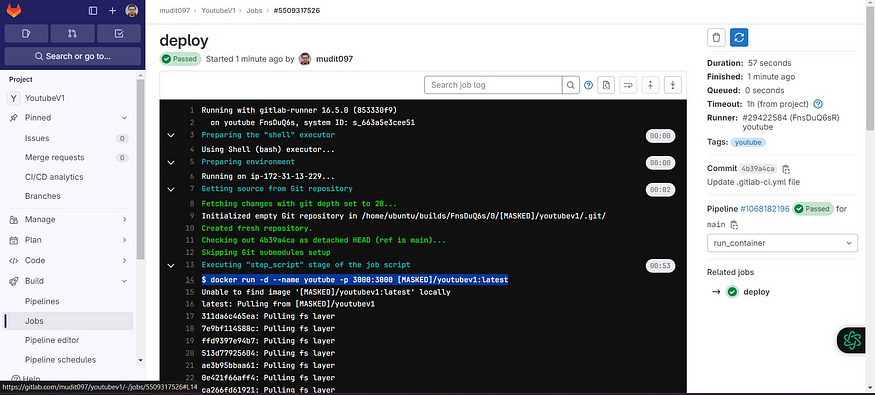
Build completed and click on Deploy job
See the output it ran a container on ec2

Now go to MobaXtreme or Putty and Provide the below command to see running containers.
docker ps

Container running.
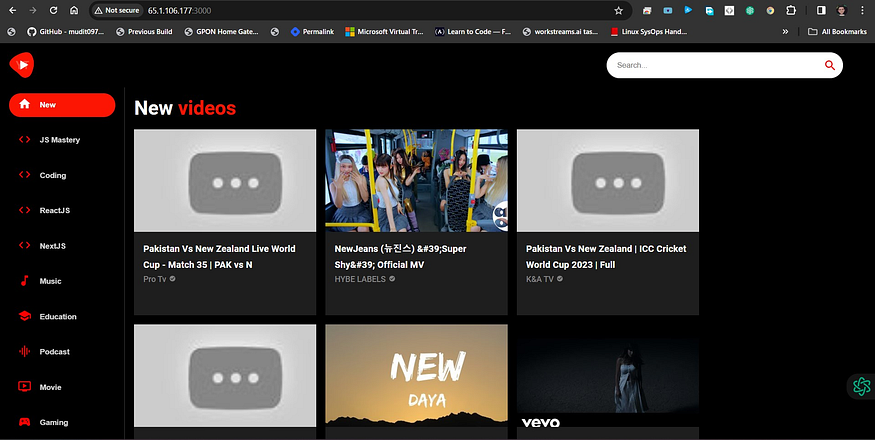
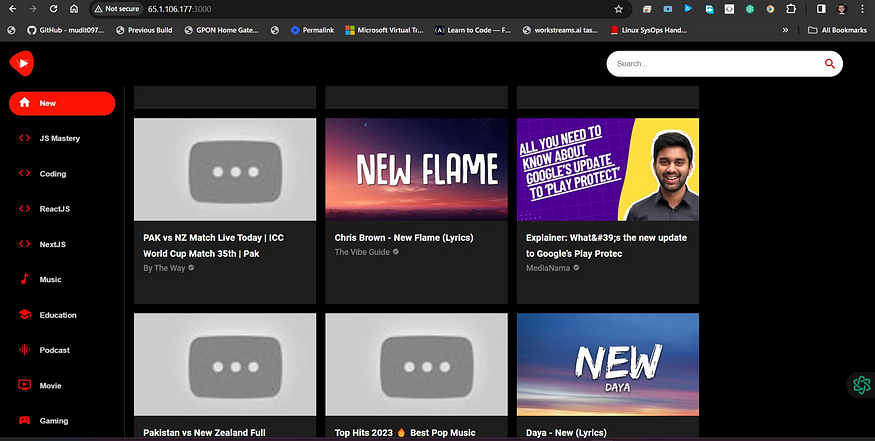
8. Step 7: Access the Application on Browser 🌐
Copy the Public IP of the ec2 instance and paste it into the Browser.
Don’t forget to open the 3000 port in the Security Group
<Public-ip:3000>
Output
Termination
Delete the personal Access token of the docker.
Delete the containers.
 docker stop <container name>
 docker rm <container name>
3. Delete the Ec2 instance.
And there it is, fellow tech enthusiasts! You’ve just become the orchestrator of your YouTube app deployment symphony. We’ve navigated the realms of code mastery, quality assurance, security protocols, containerized wonders, and the magic of automation — all guided by the ever-reliable companion, Jenkins. Now, it’s your moment to command the forces of DevOps and elevate your YouTube app to unparalleled heights!
So, what’s the next chapter in your development saga? Whether you’re embarking on uncharted coding territories, delving into cutting-edge technologies, or simply savoring a well-earned break with a cup of coffee, always remember that DevOps is the art of simplifying your journey and refining your code. Revel in the thrill of flawless deployments, stay hungry for knowledge, and find joy in the perpetual adventure of software development. 🚀😎
If this journey resonated with you, don’t forget to hit that thumbs up, share the excitement with your tech-savvy comrades, and subscribe for a cascade of thrilling DevOps escapades. And, as the perpetual student of innovation, stay curious, stay imaginative, and keep coding with a grin! 😄✨


