Amazon AppOpsForge: Orchestrating Secure Deployments with Terraform and Jenkins CI/CD

Mudit Mathur is an experienced DevOps Engineer with expertise in AWS, CI/CD, and automation. He delivers tangible results by streamlining processes and fostering collaboration. Reach out to him at linkedin.com/in/mudit-mathur-535786146 or muditmathur121@gmail.com for efficient DevOps solutions.
Explore the World of Secure Amazon App Deployment with DevSecOps Excellence! Welcome to our comprehensive guide dedicated to deploying Amazon applications with an unwavering focus on top-notch security using the DevSecOps methodology.
In the dynamic realm of digital advancements, the imperative for swift application development and deployment is met with an equally critical need for robust security measures. Enter DevSecOps — an amalgamation of development, security, and operations, creating a unified and fortified approach.
This guide takes you on a transformative journey, harnessing the power of Terraform, Jenkins CI/CD, SonarQube, and Trivy to craft a resilient and secure pipeline for deploying applications seamlessly on Amazon Web Services (AWS).
Whether you’re a seasoned developer looking to elevate your DevSecOps expertise or a newcomer excited to delve into the captivating fusion of software development and security, this guide promises invaluable insights.
Join us as we delve into the steps to fortify your Amazon app, ensuring a smooth and efficient deployment experience.
🎥 Watch the Video:
Complete Project Deployment with Terraform and AWS CLI
📄 Blog Reference: Step-by-Step Guide — Install Terraform and AWS CLI
🔗 GitHub Repository: Amazon-FE
Step 1: IAM User Creation
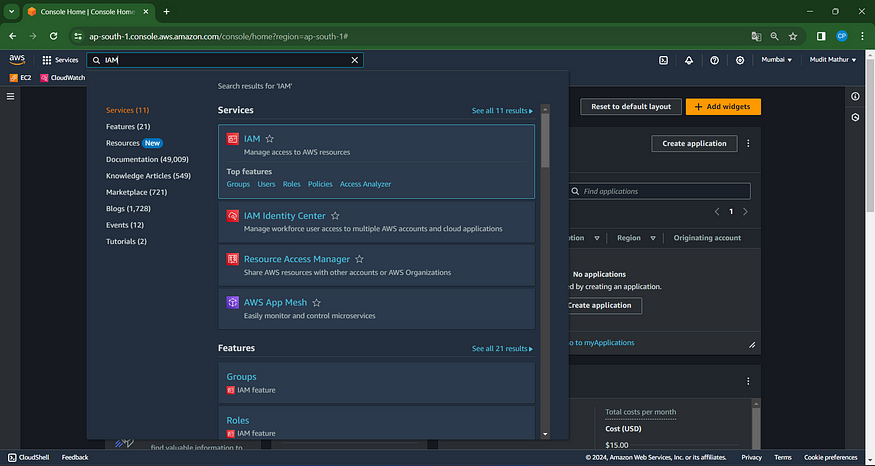
Access the AWS Console
Locate and select the “Search” field.
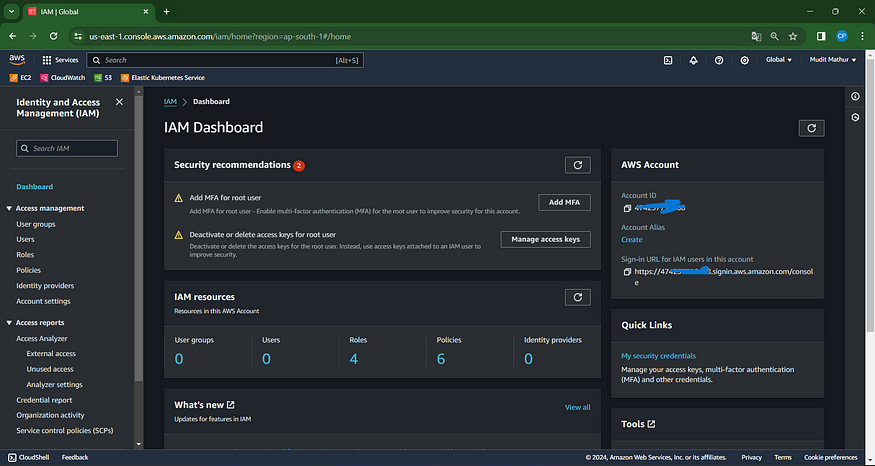
Navigate IAM Options
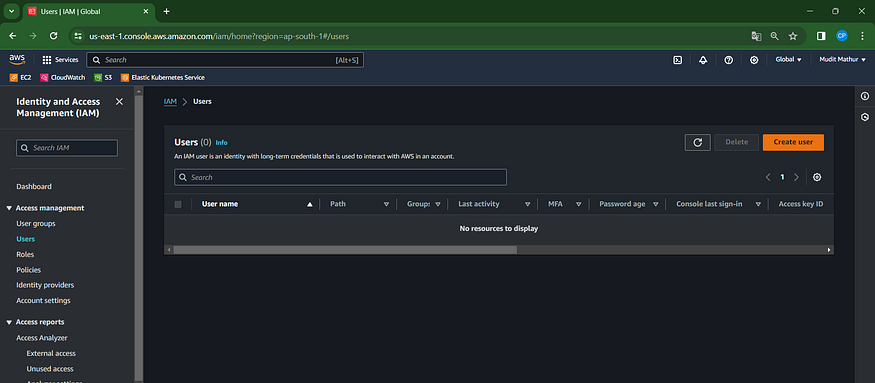
Click on “Users”
Click ‘Create Users’
Click the “User name” field.
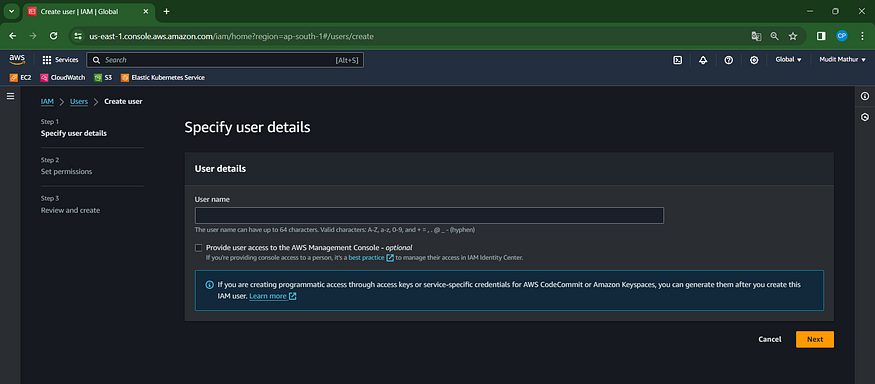
Enter the name you’d like to send warm wishes to or express your thoughts about.
Click Next to spread joy and positivity!
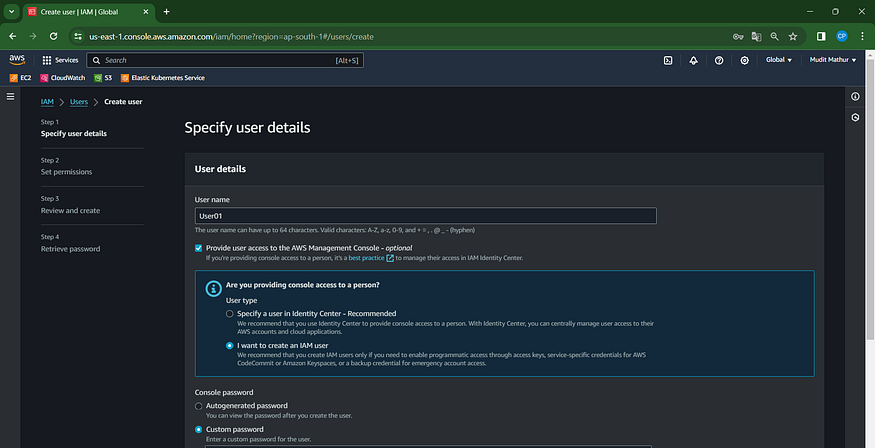
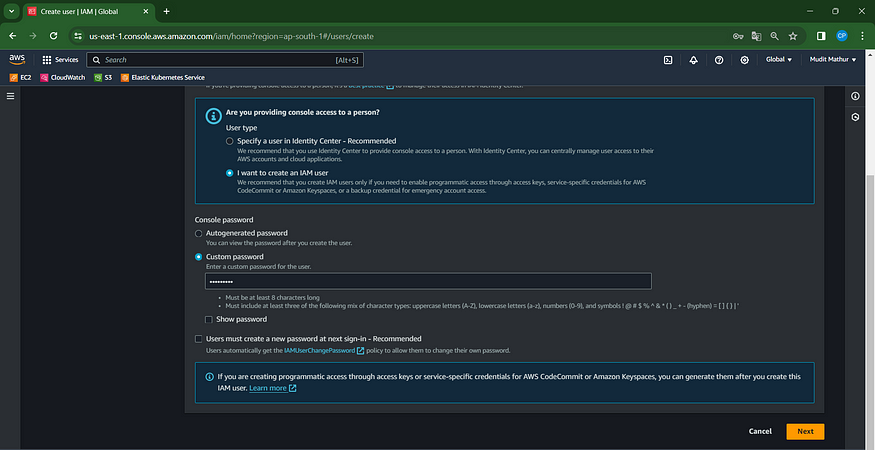
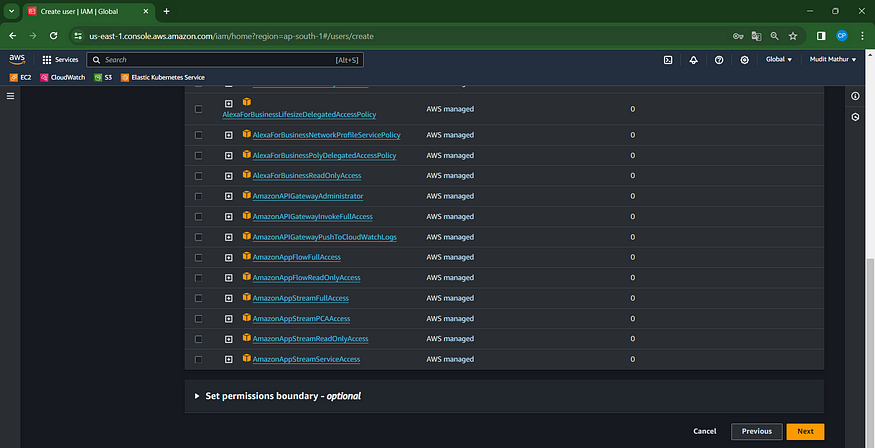
Access the “Attach policies directly” feature by clicking.
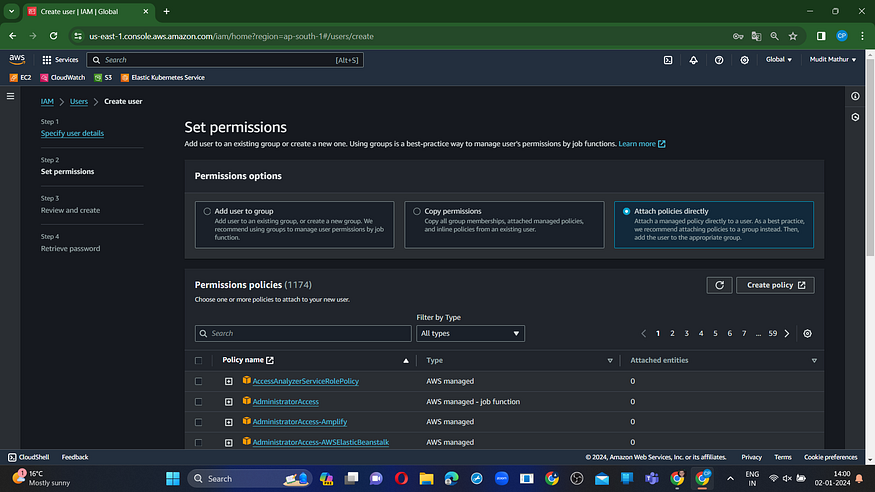
Check this box with administrator privileges.
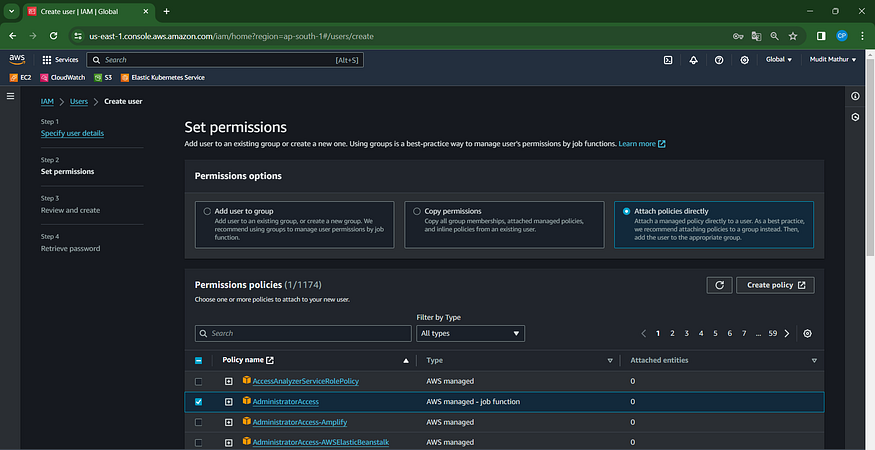
Click “Next”
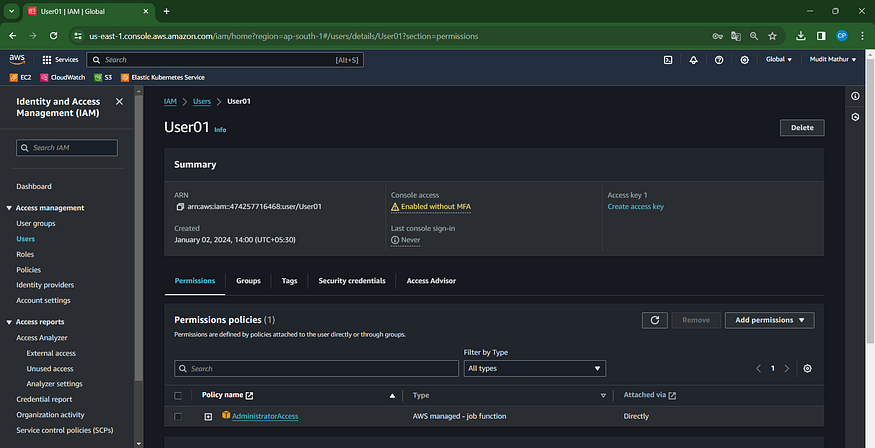
Click “Create User”

Select the recently generated user, in this instance, User01.
Open the “Security credentials” tab and click.
Generate Access Key

Select this radio button using the Command Line Interface (CLI)
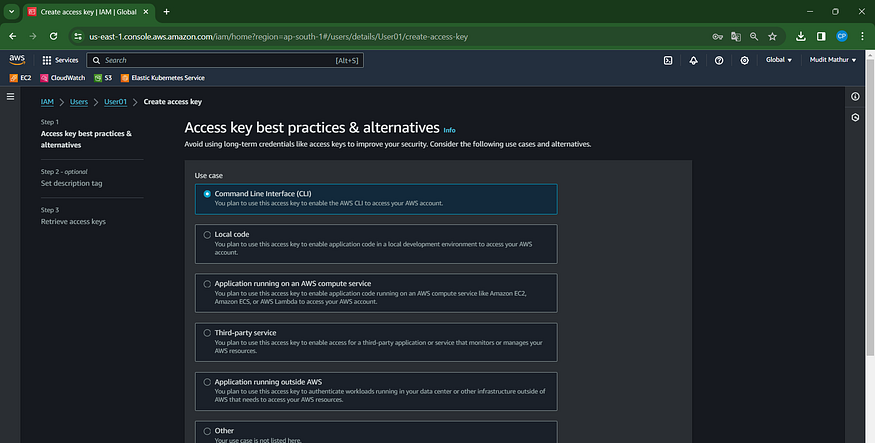
Agree to terms
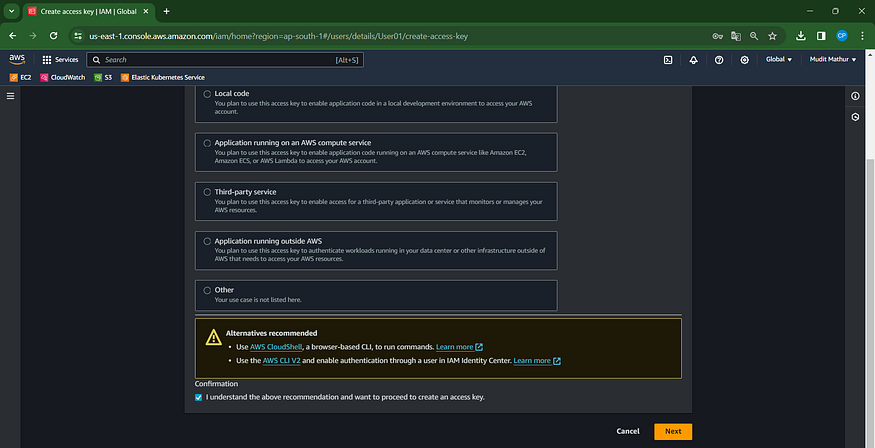
Click Next
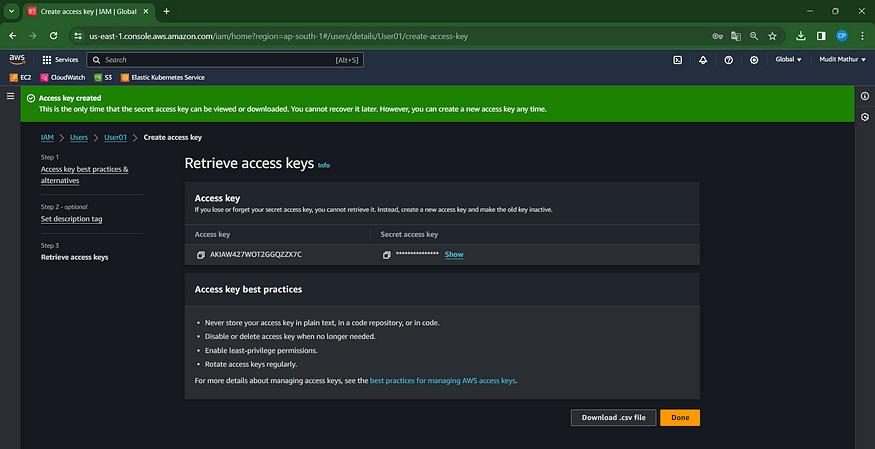
Click on the ‘Create Access Key’ button.

Download your data in .csv format
Step 2: Configure AWS in VS Code or CMD
Navigate to either VS Code or CMD based on your preference.
aws configure
Provide your Aws Access key and Secret Access key

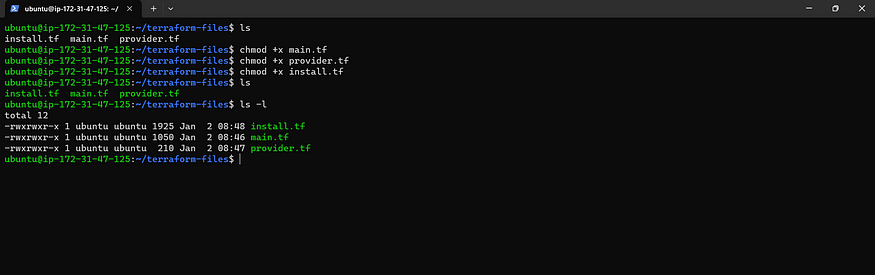
Step 3: Implement Terraform Configuration for Jenkins and SonarQube Provisioning
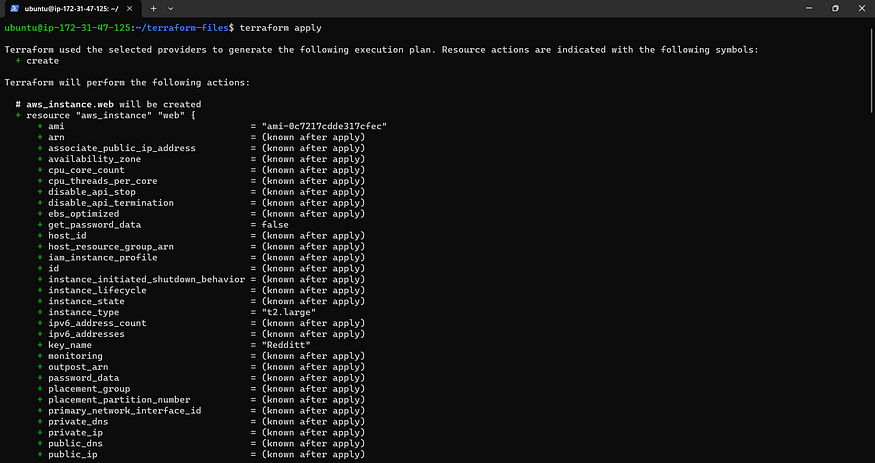
resource "aws_instance" "web" {
ami = "ami-0f5ee92e2d63afc18" #change ami id for different region
instance_type = "t2.large"
key_name = "Mumbai"
vpc_security_group_ids = [aws_security_group.Jenkins-sg.id]
user_data = templatefile("./install.sh", {})
tags = {
Name = "Jenkins-sonarqube"
}
root_block_device {
volume_size = 30
}
}
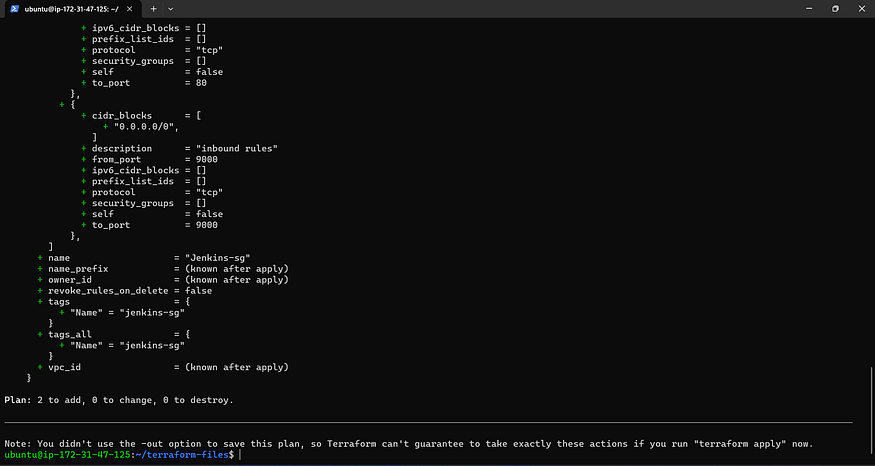
resource "aws_security_group" "Jenkins-sg" {
name = "Jenkins-sg"
description = "Allow TLS inbound traffic"
ingress = [
for port in [22, 80, 443, 8080, 9000, 3000] : {
description = "inbound rules"
from_port = port
to_port = port
protocol = "tcp"
cidr_blocks = ["0.0.0.0/0"]
ipv6_cidr_blocks = []
prefix_list_ids = []
security_groups = []
self = false
}
]
egress {
from_port = 0
to_port = 0
protocol = "-1"
cidr_blocks = ["0.0.0.0/0"]
}
tags = {
Name = "jenkins-sg"
}
}
terraform {
  required_providers {
    aws = {
      source  = "hashicorp/aws"
      version = "~> 5.0"
    }
  }
}

# Configure the AWS Provider
provider "aws" {
  region = "ap-south-1"  #change your region
}
This command will deploy Jenkins, Docker, Sonarqube, and Trivy.
#!/bin/bash
sudo apt update -y
wget -O - https://packages.adoptium.net/artifactory/api/gpg/key/public | tee /etc/apt/keyrings/adoptium.asc
echo "deb [signed-by=/etc/apt/keyrings/adoptium.asc] https://packages.adoptium.net/artifactory/deb $(awk -F= '/^VERSION_CODENAME/{print$2}' /etc/os-release) main" | tee /etc/apt/sources.list.d/adoptium.list
sudo apt update -y
sudo apt install temurin-17-jdk -y
/usr/bin/java --version
curl -fsSL https://pkg.jenkins.io/debian-stable/jenkins.io-2023.key | sudo tee /usr/share/keyrings/jenkins-keyring.asc > /dev/null
echo deb [signed-by=/usr/share/keyrings/jenkins-keyring.asc] https://pkg.jenkins.io/debian-stable binary/ | sudo tee /etc/apt/sources.list.d/jenkins.list > /dev/null
sudo apt-get update -y
sudo apt-get install jenkins -y
sudo systemctl start jenkins
sudo systemctl status jenkins

#install docker
sudo apt-get update
sudo apt-get install docker.io -y
sudo usermod -aG docker ubuntu
newgrp docker
sudo chmod 777 /var/run/docker.sock
docker run -d --name sonar -p 9000:9000 sonarqube:lts-community

#install trivy
sudo apt-get install wget apt-transport-https gnupg lsb-release -y
wget -qO - https://aquasecurity.github.io/trivy-repo/deb/public.key | gpg --dearmor | sudo tee /usr/share/keyrings/trivy.gpg > /dev/null
echo "deb [signed-by=/usr/share/keyrings/trivy.gpg] https://aquasecurity.github.io/trivy-repo/deb $(lsb_release -sc) main" | sudo tee -a /etc/apt/sources.list.d/trivy.list
sudo apt-get update
sudo apt-get install trivy -y
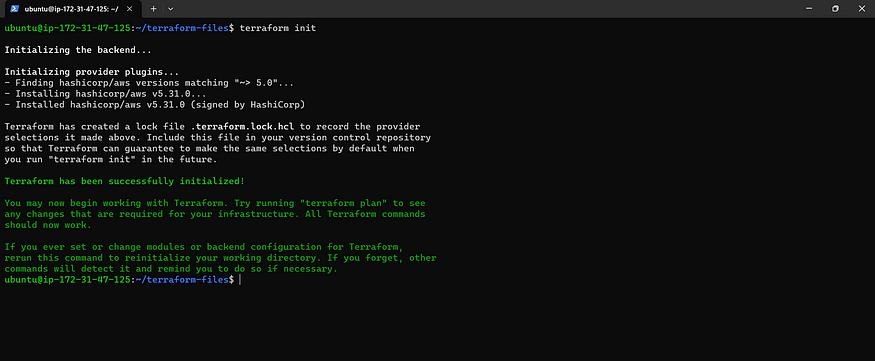
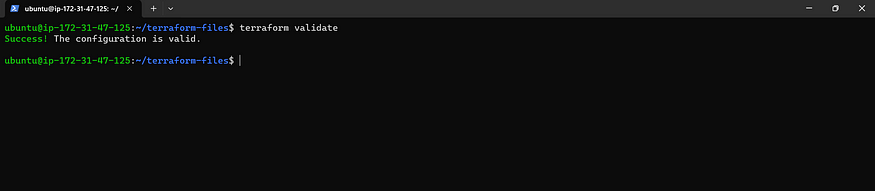
Terraform commands to provision
terraform init
terraform validate
terraform plan
terraform apply
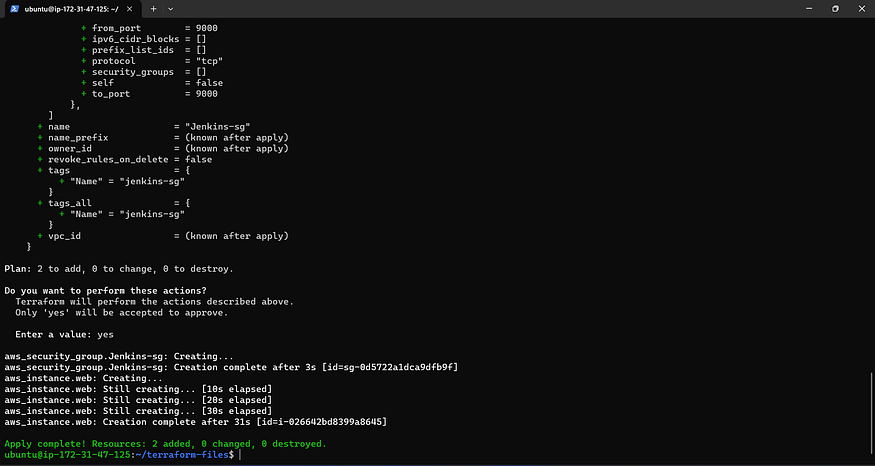
output
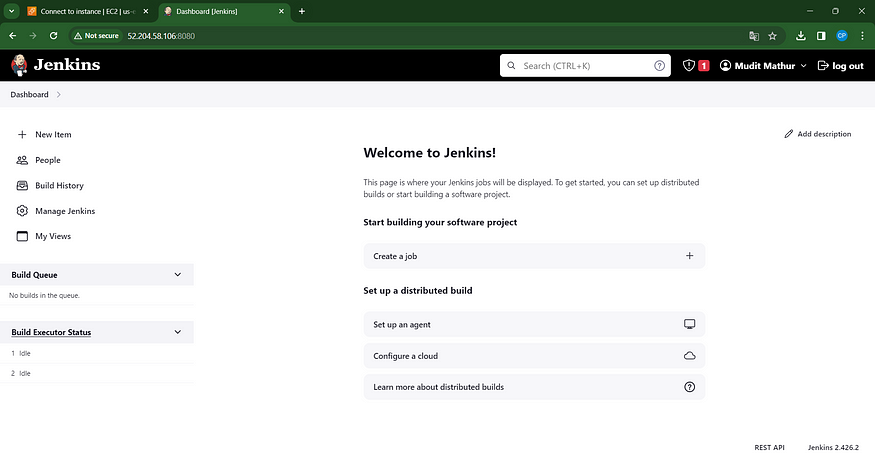
<instance-ip:8080> #jenkins
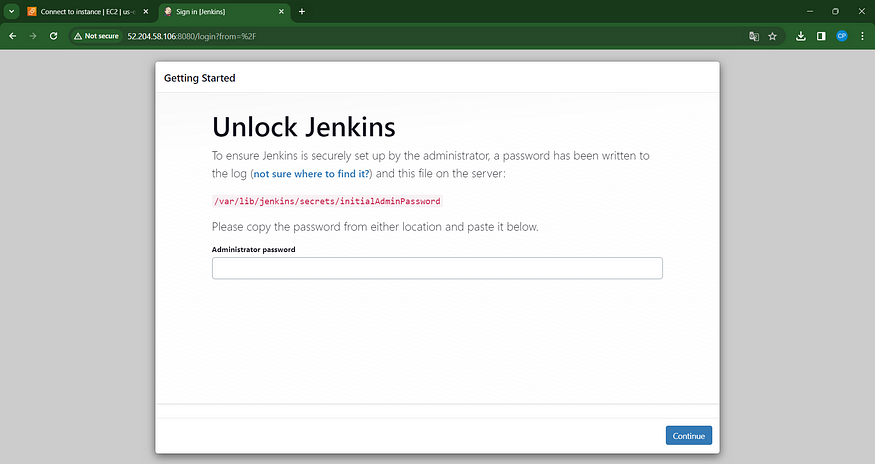
sudo cat /var/lib/jenkins/secrets/initialAdminPassword
Unlock Jenkins by utilizing an administrative password and proceed to install the recommended plugins.
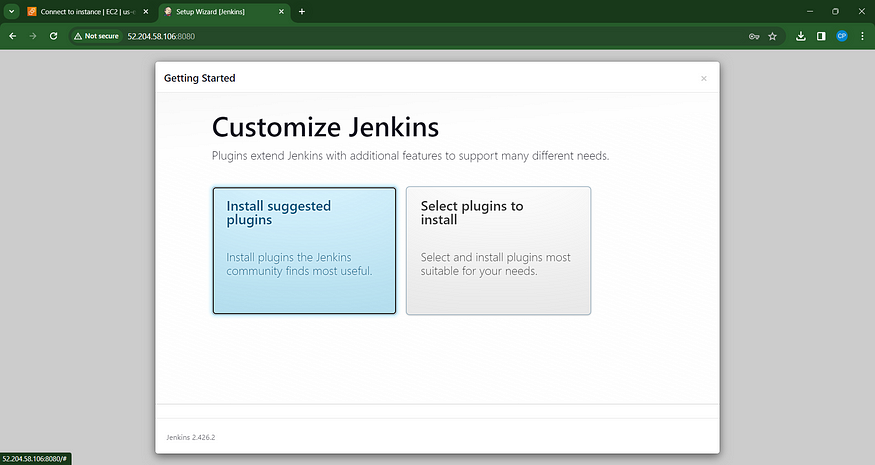
Now, Jenkins will be installed, and it will proceed to install all the required libraries.
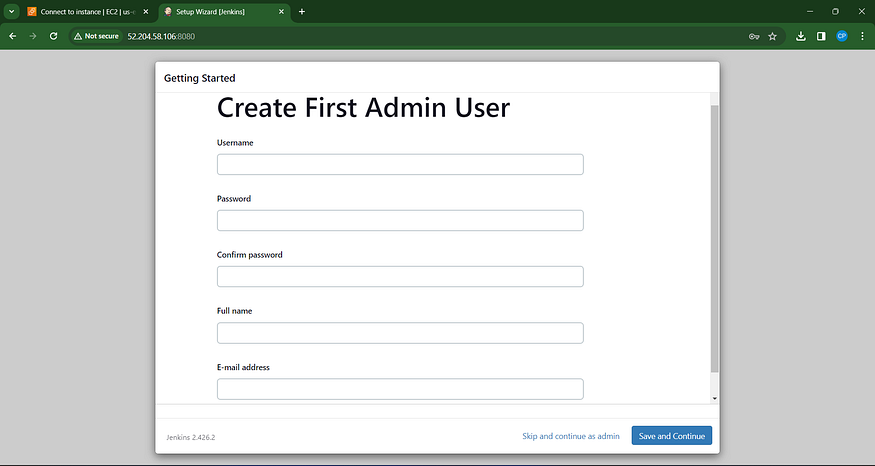
Prompt the user to click on ‘Save and Continue’ on the Jenkins Getting Started Screen.
Retrieve your public key once more and insert it into a fresh browser tab.
<instance-public-ip:9000>
Our SonarQube instance is now operational and running smoothly.
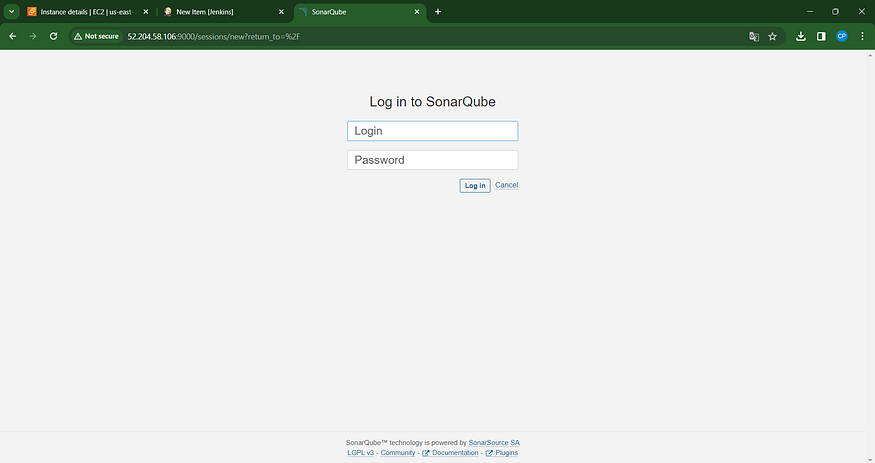
Please provide your username and password, then click on the ‘Login’ button. If needed, you can also use the ‘Change Password’ option after logging in.
username admin
password admin
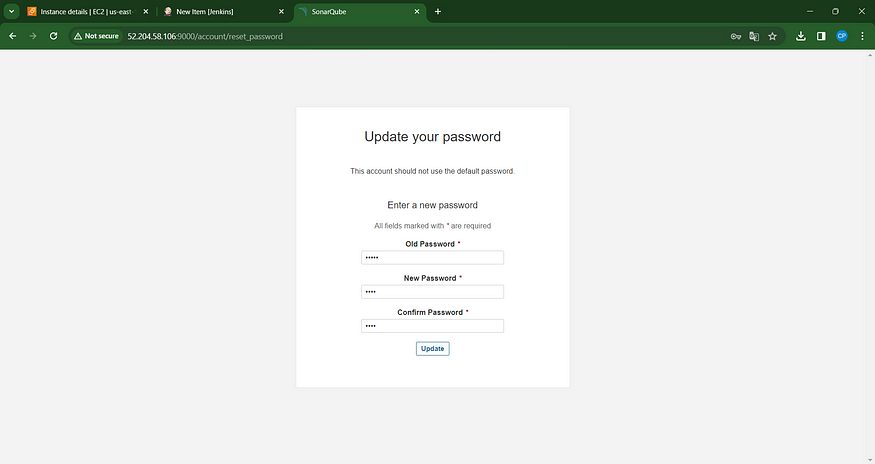
New Password Update: Access the Sonar Dashboard with this latest password.

Check trivy version
trivy --version

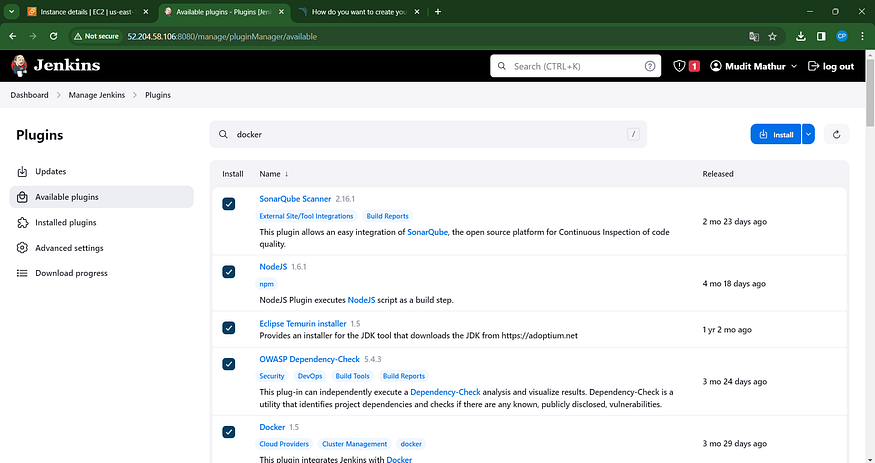
Step 4 — Set up Essential Plugins: JDK, Sonarqube Scanner, NodeJs, and OWASP Dependency Check
4A — Plugin Installation Process
Navigate to Manage Jenkins → Plugins → Available Plugins →
Proceed with the installation of the following plugins:
1. Eclipse Temurin Installer (Install without restarting)
2. SonarQube Scanner (Install without restarting)
3. NodeJs Plugin (Install without restarting)
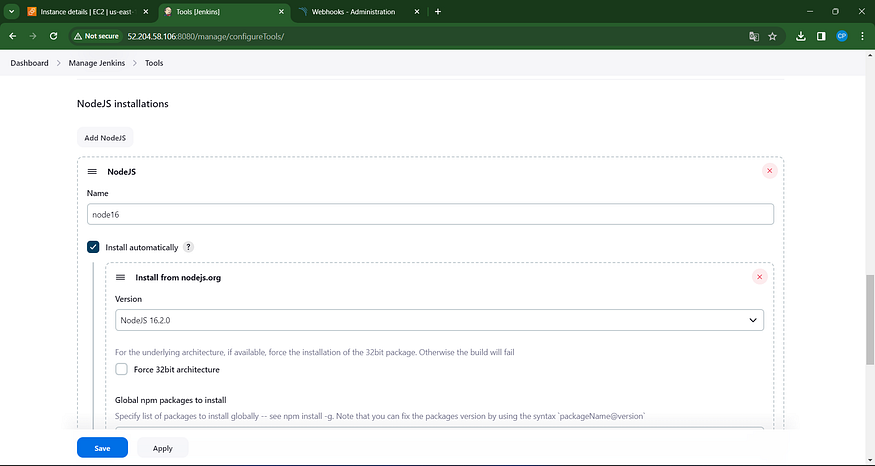
4B — Set Up Java and Node.js in Global Tool Configuration
Navigate to Manage Jenkins → Tools → Install JDK 17 and Node.js 16 → Press Apply and Save to confirm changes.

Step 5 — Setting Up Sonar Server Configuration in Jenkins
Retrieve the Public IP Address of your EC2 Instance. As Sonarqube operates on Port 9000, access it using <Public IP>:9000. Navigate to your Sonarqube Server and follow these steps:
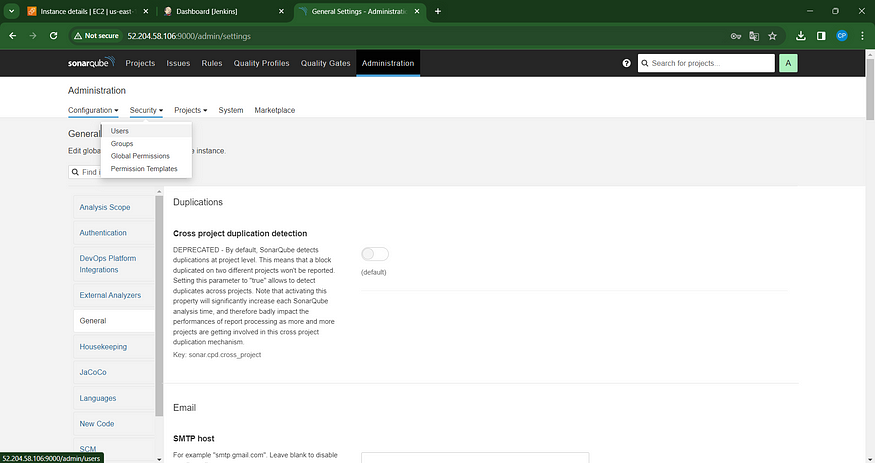
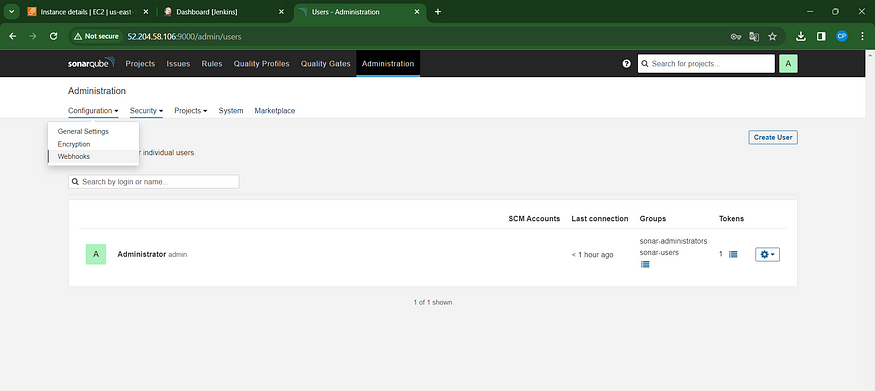
Click on “Administration” in the top menu.
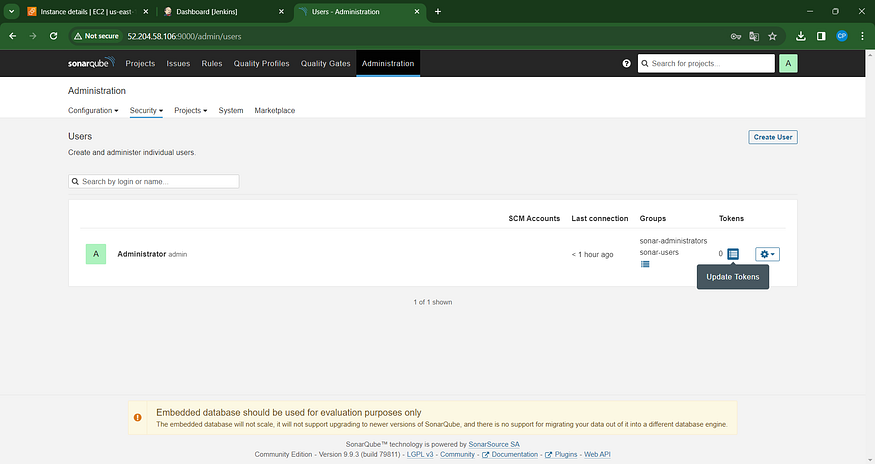
Navigate to “Security” and click on “Users.”
Inside the “Users” section, select “Tokens.”
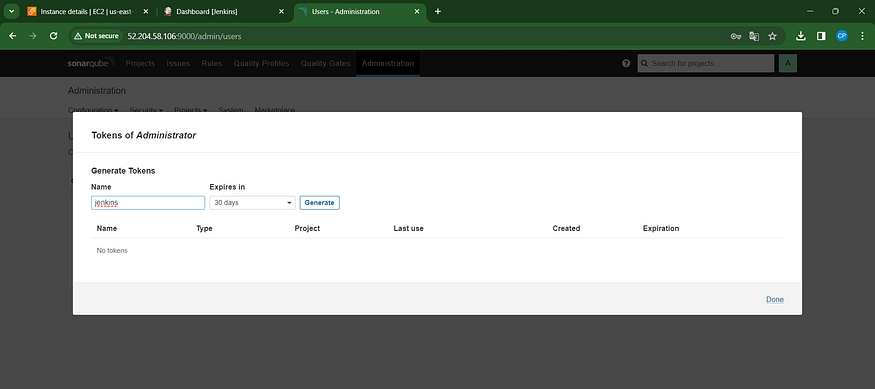
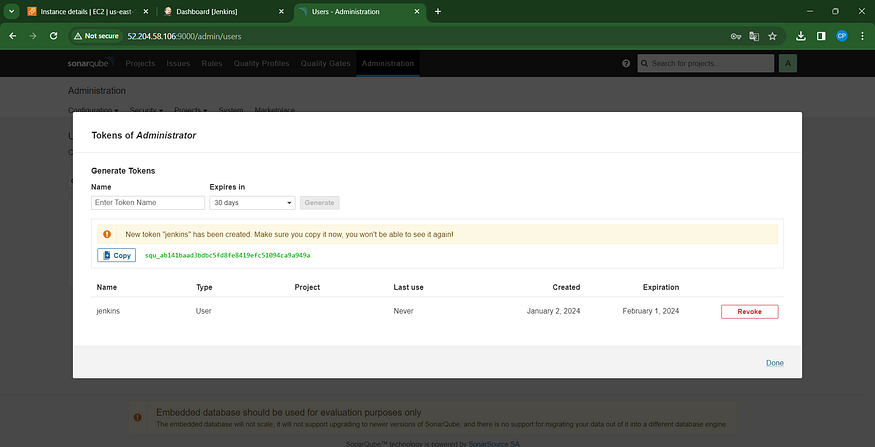
Click on “Update Token” to modify or create a new token.
Provide a meaningful name for the token.
Click on “Generate Token” to create the token.
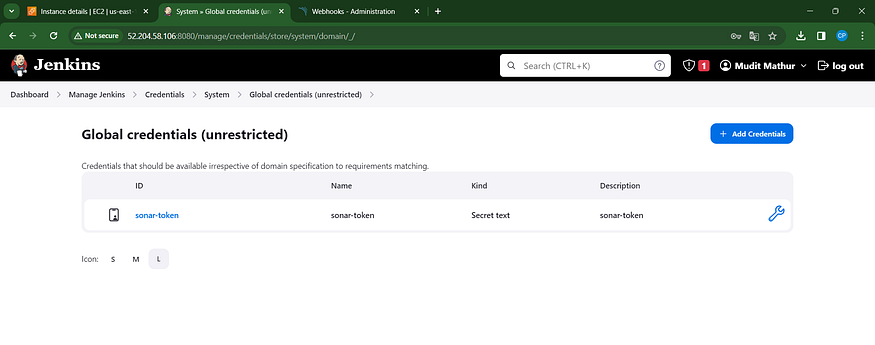
Navigate to the Jenkins Dashboard → Access “Manage Jenkins” → Choose “Credentials” → Select “Add Secret Text.” The configuration should resemble the following:
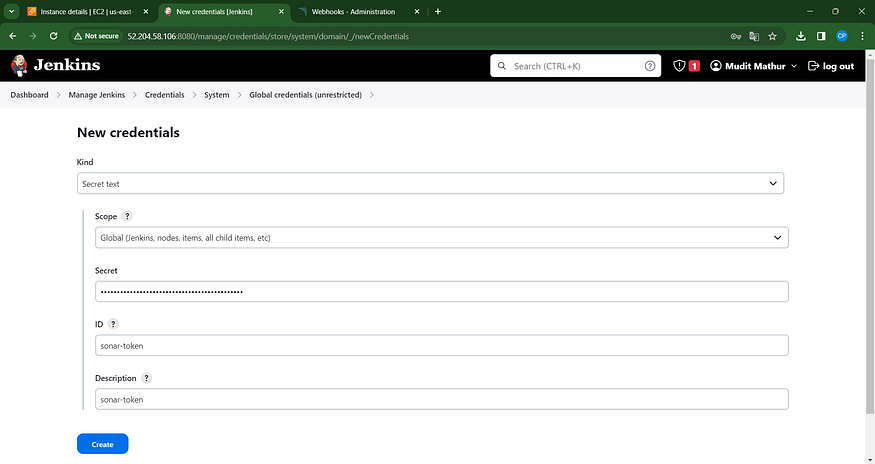
You will this page once you click on create
Now, navigate to the Dashboard, then proceed to Manage Jenkins and select System. Add the necessary configurations as depicted in the image below.

Click ‘Apply’ and ‘Save’ to finalize your changes.
Utilize the ‘Configure System’ option within Jenkins to customize various server settings.
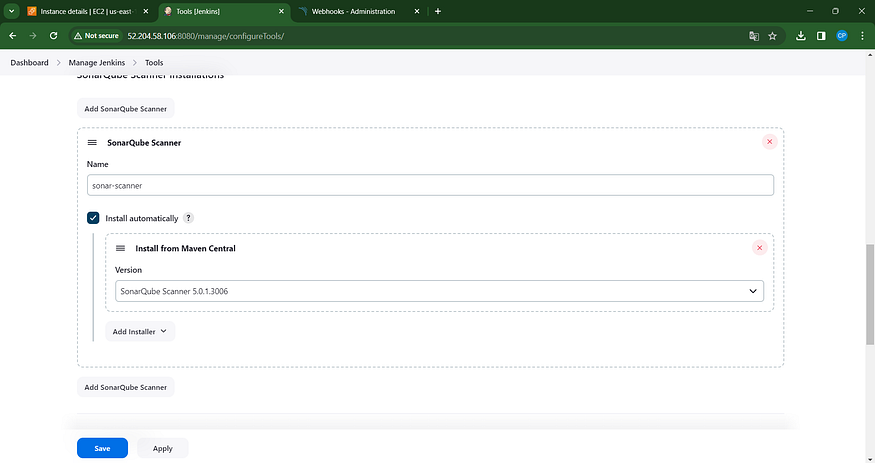
Employ the ‘Global Tool Configuration’ to fine-tune settings for various tools installed through plugins.
Specifically, we are incorporating a Sonar Scanner as part of the installed tools.
Incorporate a quality gate into the Sonarqube Dashboard, and additionally, navigate to Administration -> Configuration -> Webhooks.
Click on Create
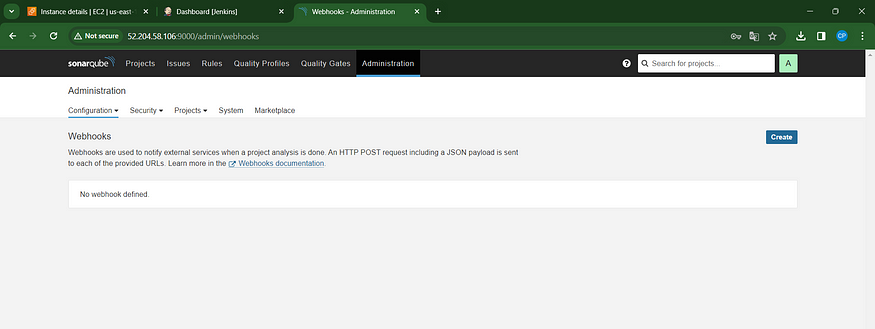
Add details
#in url section of quality gate
<http://jenkins-public-ip:8080>/sonarqube-webhook/

Let’s navigate to our Pipeline and incorporate the script into our Pipeline Script.
pipeline{
    agent any
    tools{
        jdk 'jdk17'
        nodejs 'node16'
    }
    environment {
        SCANNER_HOME=tool 'sonar-scanner'
    }
    stages {
        stage('clean workspace'){
            steps{
                cleanWs()
            }
        }
        stage('Checkout from Git'){
            steps{
                git branch: 'main', url: 'https://github.com/mudit097/Amazon-FE.git'
            }
        }
        stage("Sonarqube Analysis "){
            steps{
                withSonarQubeEnv('sonar-server') {
                    sh ''' $SCANNER_HOME/bin/sonar-scanner -Dsonar.projectName=Amazon \
                    -Dsonar.projectKey=Amazon '''
                }
            }
        }
        stage("quality gate"){
           steps {
                script {
                    waitForQualityGate abortPipeline: false, credentialsId: 'Sonar-token'
                }
            }
        }
        stage('Install Dependencies') {
            steps {
                sh "npm install"
            }
        }
    }
}
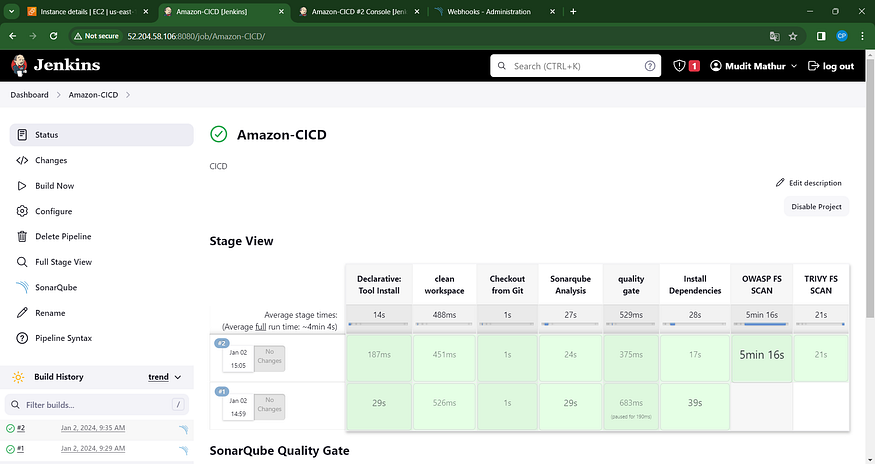
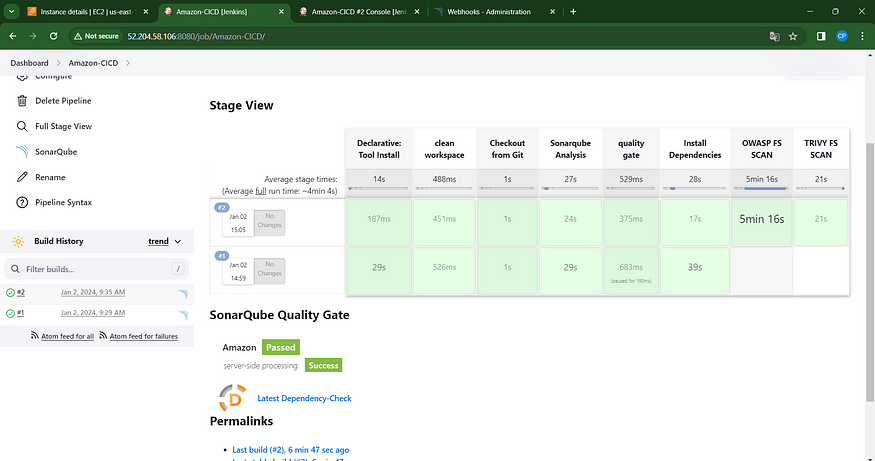
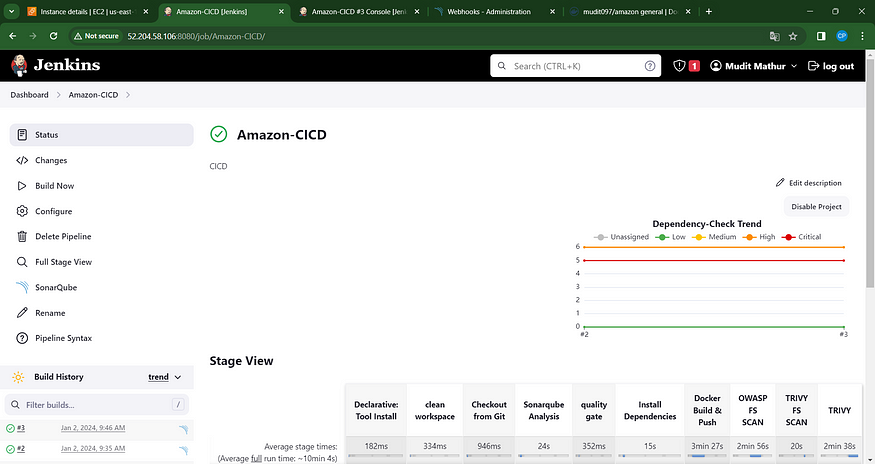
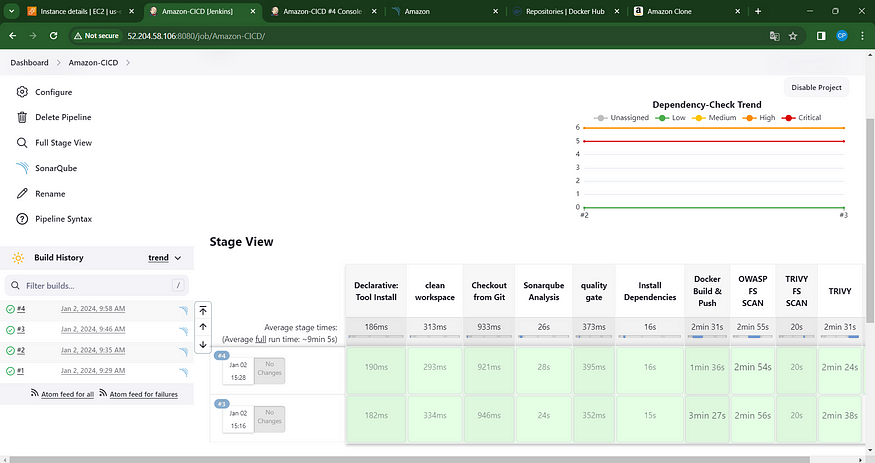
Click the ‘Build Now’ button, and you’ll be directed to the stage view, presenting a layout similar to this.

To access the report, navigate to the Sonarqube Server and locate the “Projects” section.
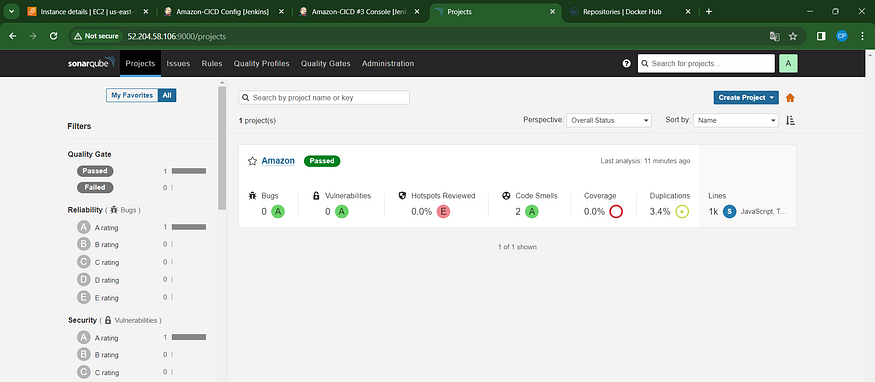
The report has been successfully generated, and the status indicates a successful pass. It has scanned a total of 1,000 lines. For a more comprehensive view of the findings, you are encouraged to access the detailed report by navigating to the ‘Issues’ section.
Step 6 — Integrate OWASP Dependency Check Plugins
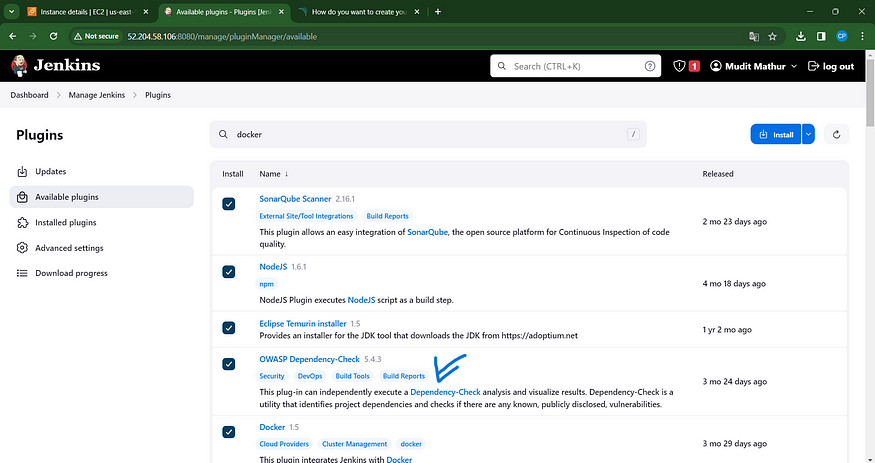
Navigate to the Dashboard, then proceed to Manage Jenkins. From there, head to the Plugins section, and locate OWASP Dependency-Check. Click on the plugin, and proceed to install it seamlessly, avoiding the need for a system restart.
Initially, we set up the Plugin, and subsequently, we proceeded to configure the Tool.
Navigate to the Dashboard → Access Jenkins → Tools →

Select “Apply and Save” to proceed.
Next, navigate to the “Configure” section and access the “Pipeline” settings. Integrate the newly added stage into your existing pipeline and initiate the build process.
stage('OWASP FS SCAN') {
            steps {
                dependencyCheck additionalArguments: '--scan ./ --disableYarnAudit --disableNodeAudit', odcInstallation: 'DP-Check'
                dependencyCheckPublisher pattern: '**/dependency-check-report.xml'
            }
        }
        stage('TRIVY FS SCAN') {
            steps {
                sh "trivy fs . > trivyfs.txt"
            }
        }
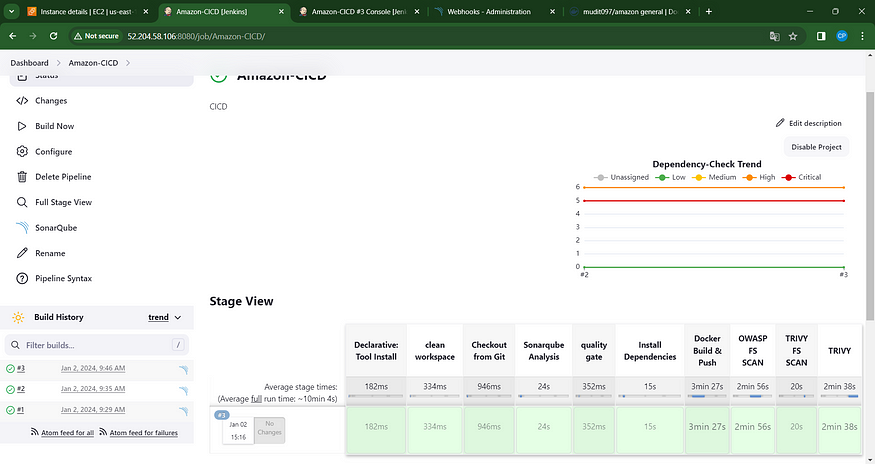
The stage perspective will appear as follows,
In the status, you will observe the generation of a graph alongside vulnerabilities.

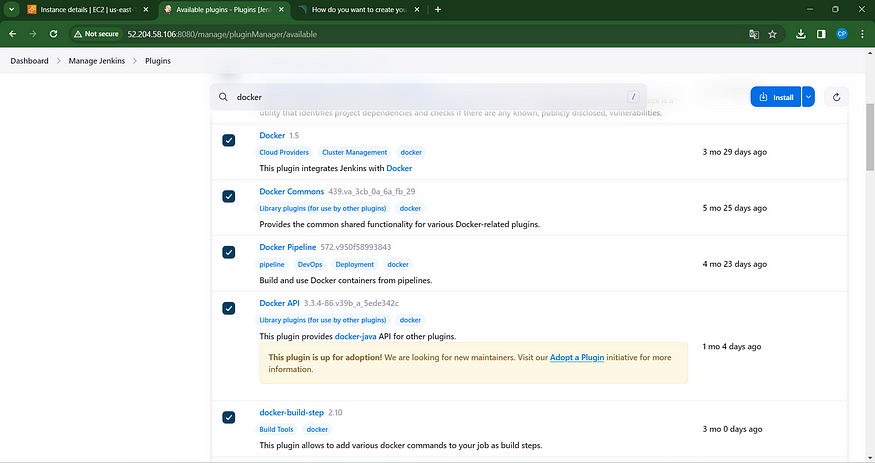
Step 7: Build and push your Docker image for seamless deployment.
To set up Docker in our system, follow these steps:
1. Open the Dashboard and navigate to “Manage Plugins.”
2. In the “Available plugins” section, search for Docker.
3. Install the following plugins:
- Docker
— Docker Commons
— Docker Pipeline
— Docker API
— docker-build-step
4. Click on the “Install” button for each plugin.
5. Ensure that you install the plugins without restarting the system.
This will enable Docker and its associated components on your system, allowing you to seamlessly integrate Docker into your development environment.
Now, navigate to Dashboard → Access Jenkins → Configure → Utilities →
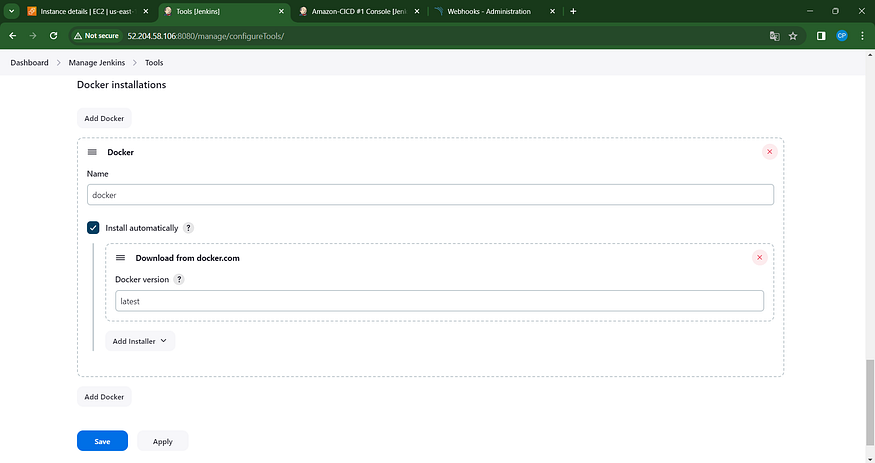
Include DockerHub credentials in the Global Credentials section.
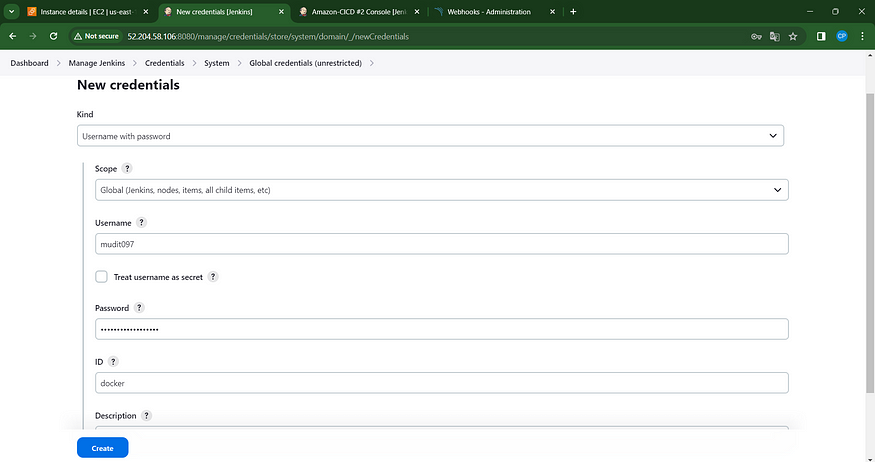
Integrate the following stage into the Pipeline Script.
stage("Docker Build & Push"){
            steps{
                script{
                   withDockerRegistry(credentialsId: 'docker', toolName: 'docker'){
                       sh "docker build -t amazon ."
                       sh "docker tag amazon mudit097/amazon:latest "
                       sh "docker push mudit097/amazon:latest "
                    }
                }
            }
        }
        stage("TRIVY"){
            steps{
                sh "trivy image mudit097/amazon:latest > trivyimage.txt"
            }
        }
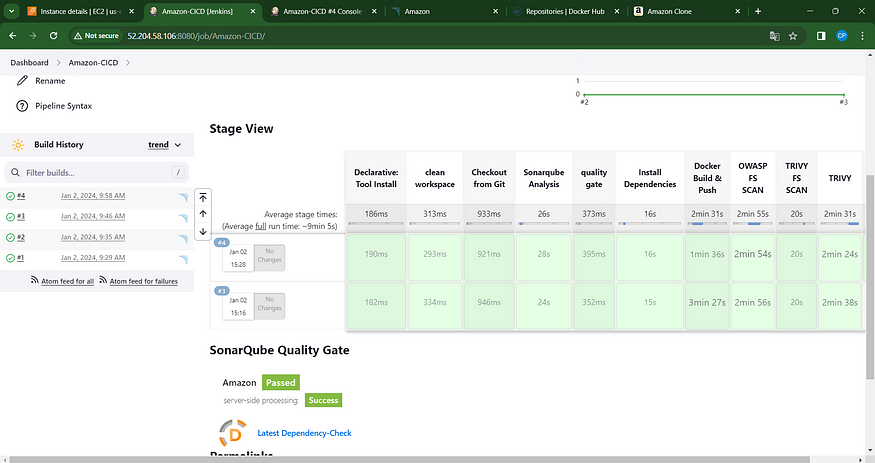
You’ll observe the results displayed beneath, accompanied by a trend analysis.
When accessing Dockerhub, a new image is automatically generated upon logging in.

Execute the container to verify the successful launch of the game by incorporating the following stage:
stage('Deploy to container'){
            steps{
                sh 'docker run -d --name amazon -p 3000:3000 mudit097/amazon:latest'
            }
        }
stage view
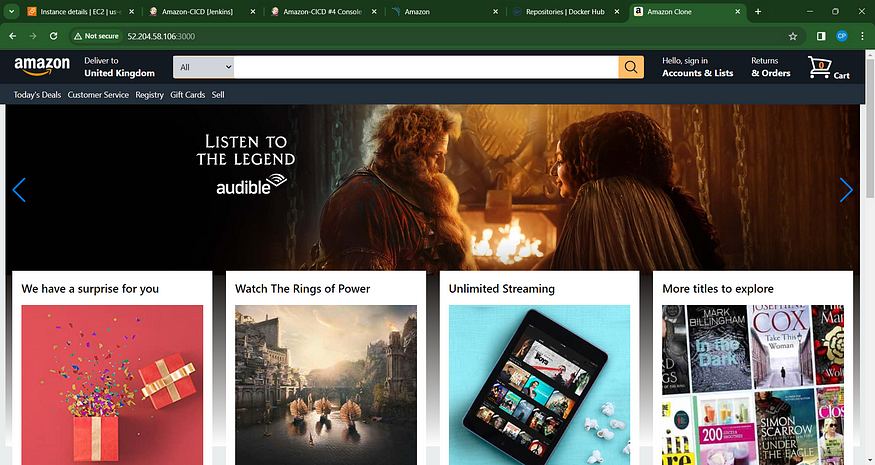
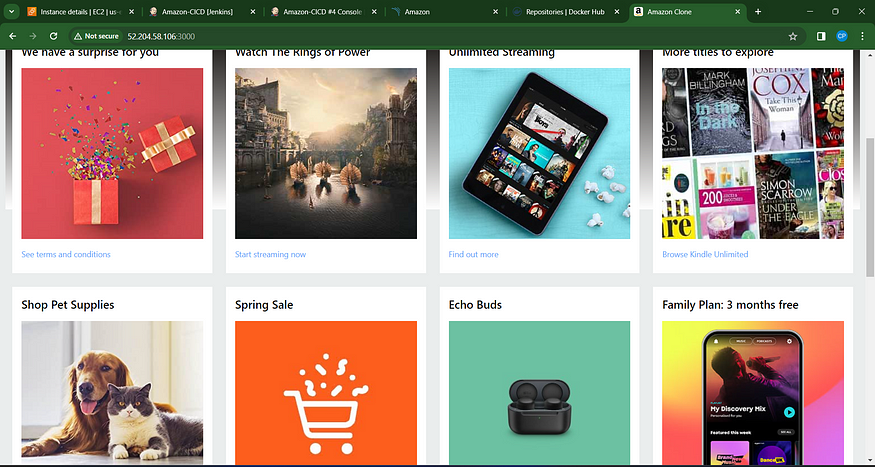
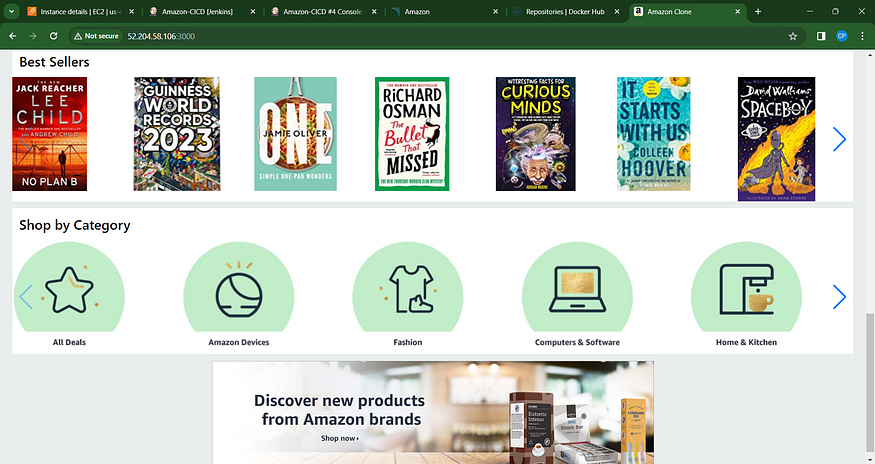
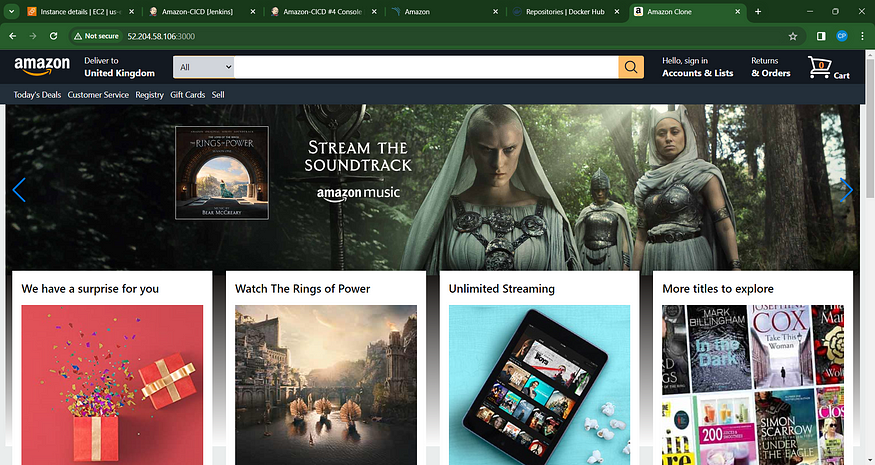
Access the output by navigating to the following address in your web browser: Jenkins-public-ip:3000

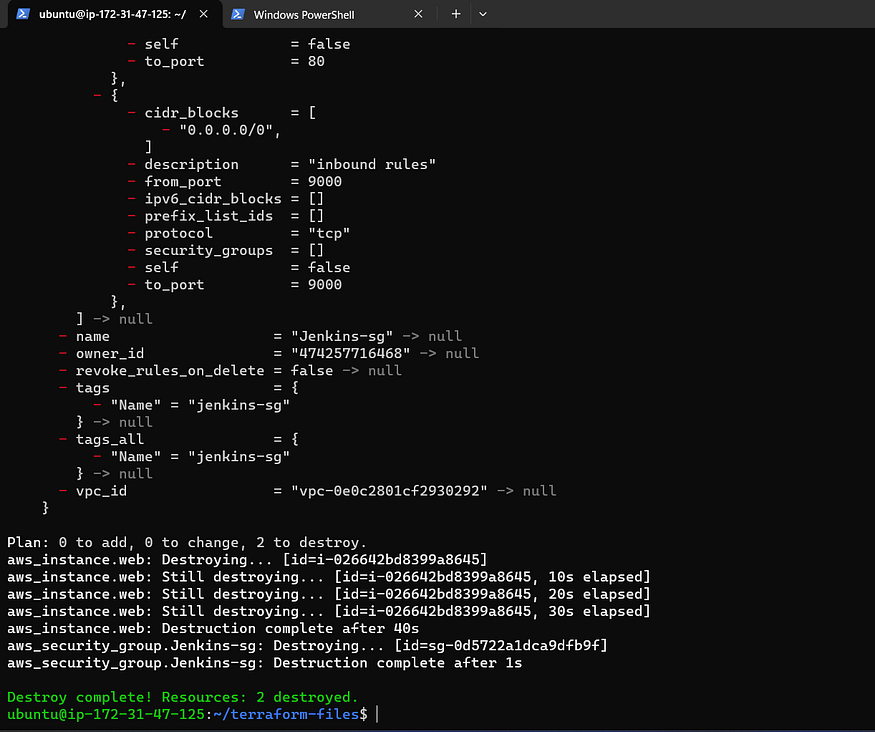
Let’s initiate a comprehensive cleanup.
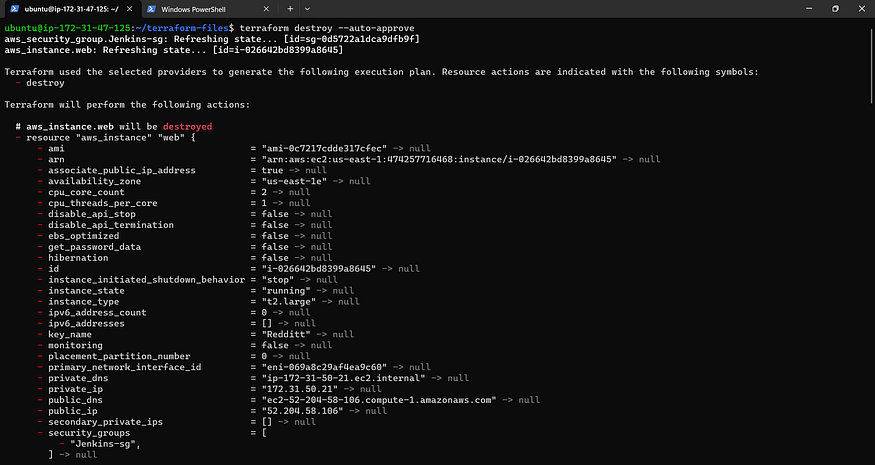
Navigate to VS Code’s PowerShell command line and execute the following command, or alternatively, access the directory where you have provisioned the EC2 instance.
terraform destroy --auto-approve
In the era of digital transformation, ensuring the security of your applications has transitioned from being a choice to an absolute necessity. The collaborative integration of Terraform, Jenkins, SonarQube, and Trivy not only enables the rapid and efficient deployment of applications but also emphasizes an unwavering commitment to security. This guide aims to be a valuable asset in your journey toward adopting DevSecOps principles and fortifying the security of your Amazon app deployments on AWS.
It’s crucial to bear in mind that the field of technology is in a constant state of evolution, accompanied by ever-evolving threats. To navigate this landscape successfully, remain vigilant, stay informed, and consistently adapt your DevSecOps practices to stay at the forefront of secure and efficient application development.
We appreciate your presence in this endeavor and wish you continued success in your DevSecOps initiatives. For further insights and discussions, feel free to connect with me on various platforms:
Hashnode: (](https://hashnode.com/@MuditM12)https://hashnode.com/@MuditM12)
Medium: (](https://medium.com/@muditmathur121)https://medium.com/@muditmathur121)
LinkedIn: (](https://www.linkedin.com/in/mudit--mathur/)https://www.linkedin.com/in/mudit--mathur/)
GitHub: (](https://github.com/mudit097)https://github.com/mudit097)](https://github.com/mudit097)


