In the dynamic universe of cloud computing and container orchestration, Amazon Web Services (AWS) Elastic Kubernetes Service (EKS) shines as a favorite choice for overseeing and scaling containerized applications. But here's where it gets fascinating – when you fuse the capabilities of EKS with the artistry of Infrastructure as Code (IaC) using Terraform, you set the stage for an infrastructure management spectacle that's not just efficient, but also wildly predictable. In this meticulously crafted guide, we'll take you on a journey through the steps of provisioning an AWS EKS cluster using Terraform.
But before we dive headfirst into this adventure, it's crucial to ensure you're well-prepared with the following prerequisites in your toolkit:
AWS Account: Consider this your entry ticket to the AWS realm. You'll need an AWS account to create and oversee the resources we're about to conjure.
AWS CLI: Think of this as your trusty sidekick. You'll want to install the AWS Command Line Interface and outfit it with your AWS credentials to ensure smooth sailing.
Terraform: This is your enchanted wand, enabling you to mold infrastructure with a wave. Securely download and install Terraform on your local machine; it's about to become your closest companion on this remarkable journey.
Step 1: How to install and setup Terraform on Windows
Download Terraform:
Visit the official Terraform website: terraform.io/downloads.html


Extract the ZIP Archive:
Once the download is complete, extract the contents of the ZIP archive to a directory on your computer. You can use a tool like 7-Zip or the built-in Windows extraction tool. Ensure that you extract it to a directory that's part of your system's PATH.

Remember that I created a Terraform Directory in C drive
Extracted to C drive

Copy the path

Add Terraform to Your System's PATH:
To make Terraform easily accessible from the command prompt, add the directory where Terraform is extracted to your system's PATH environment variable. Follow these steps:
Search for "Environment Variables" in your Windows search bar and click "Edit the system environment variables."

In the "System Properties" window, click the "Environment Variables" button.

Under "User variables for Admin," find the "Path" variable and click "Edit."

Click "New" and add the path to the directory where you extracted Terraform (e.g., C:\path\to\terraform).

Click "OK" to close the Environment Variables windows.
Click "OK" again to close the System Properties window.
Verify the Installation:
Open a new Command Prompt or PowerShell window.
Type terraform --version and press Enter. This command should display the Terraform version, confirming that Terraform is installed and in your PATH.

Your Terraform installation is now complete, and you can start using Terraform to manage your infrastructure as code.
Step 2: Download the AWS CLI Installer:
Visit the AWS CLI Downloads page: aws.amazon.com/cli
Under "Install the AWS CLI," click on the "64-bit" link to download the AWS CLI installer for Windows.

Run the Installer:
Locate the downloaded installer executable (e.g., AWSCLIV2.exe) and double-click it to run the installer.

Click on Next

Agree to the terms and click on Next

Click Next

Click on install

Click Finish Aws cli is installed

Verify the Installation:
Open a Command Prompt or PowerShell window.
Type aws --version and press Enter. This command should display the AWS CLI version, confirming that the installation was successful.

Step 3: create an IAM user
Navigate to the AWS console
Click the "Search" field.

Search for IAM

Click "Users"

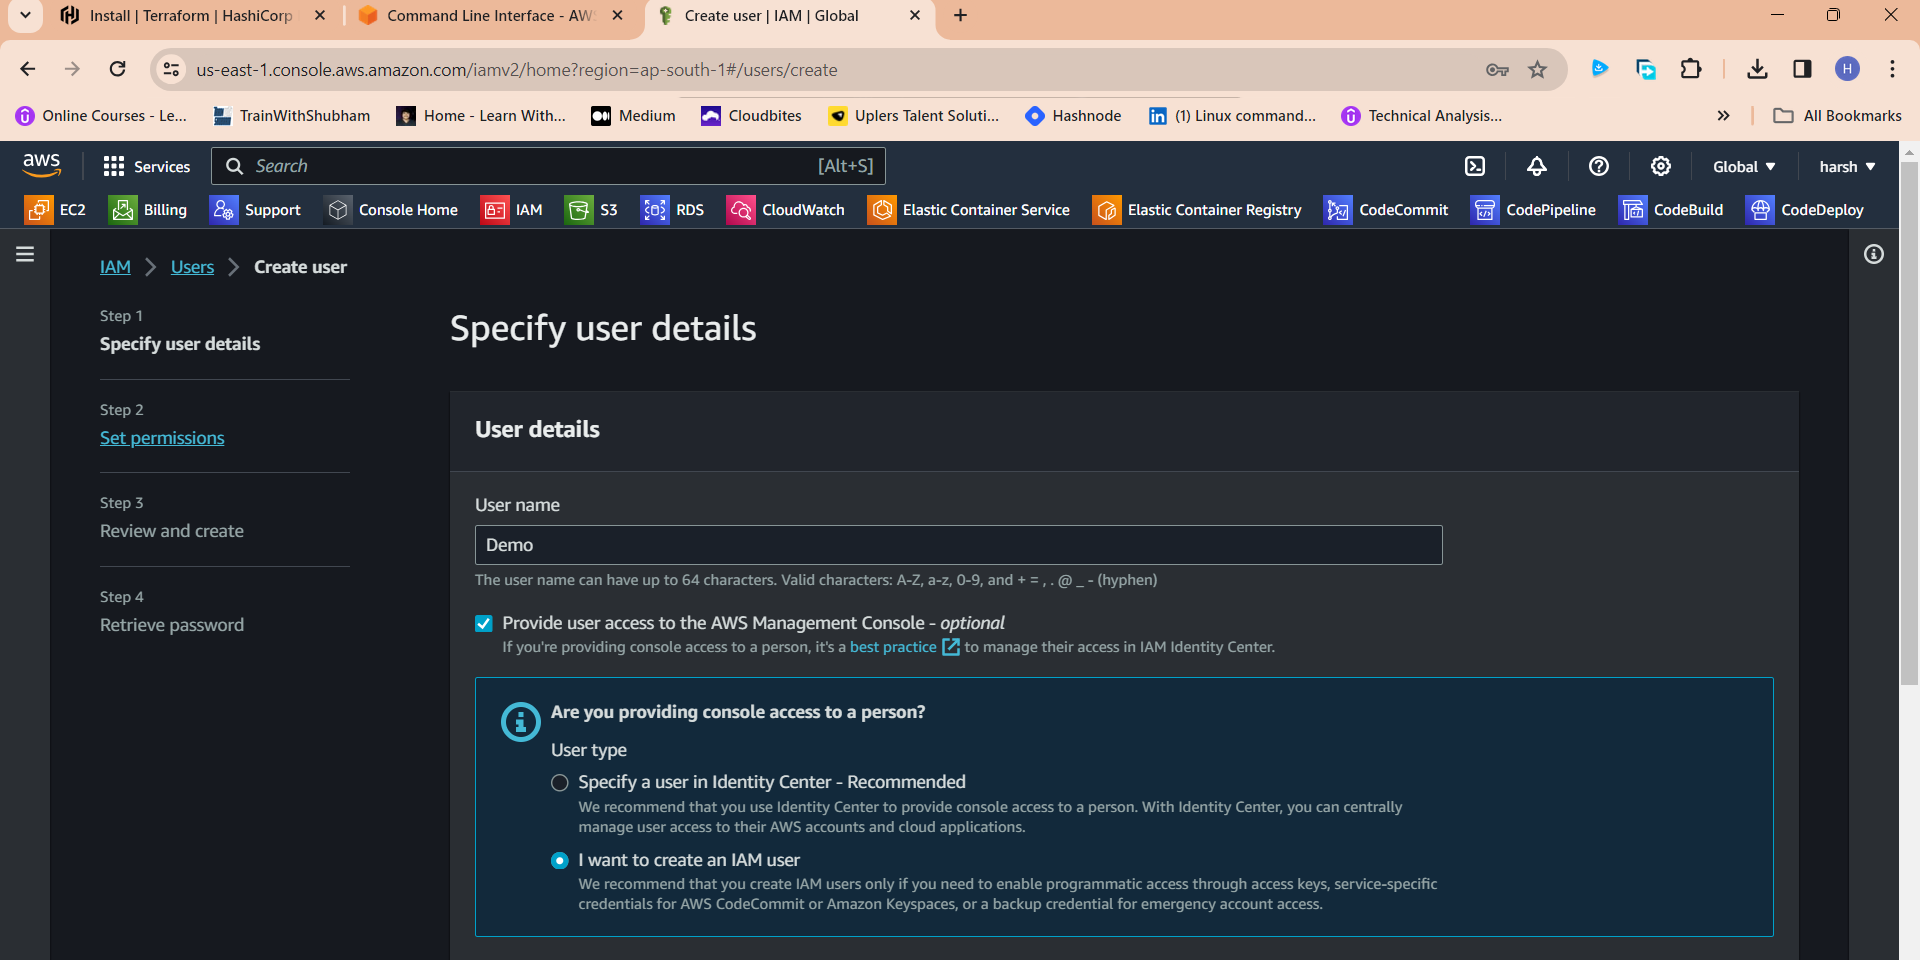
Click "Add users"

Click the "User name" field.

Type "Demo" or as you wish about the name
Click Next

Click "Attach policies directly"

Click this checkbox with Administrator access

Click "Next"
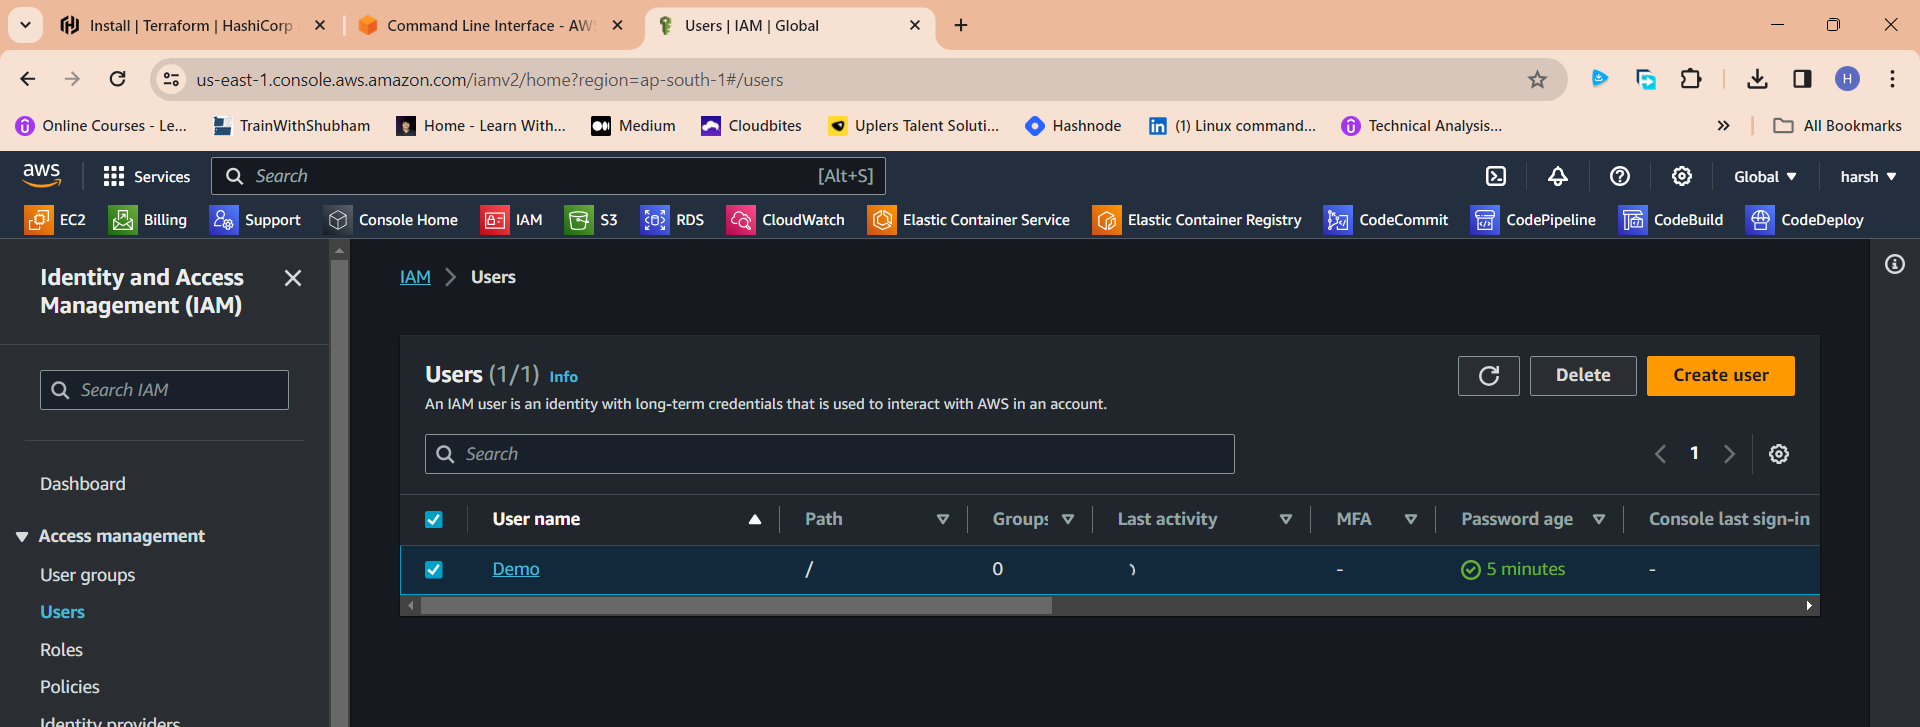
Click "Create user"

Click newly created user in my case "Demo"

Click "Security credentials"


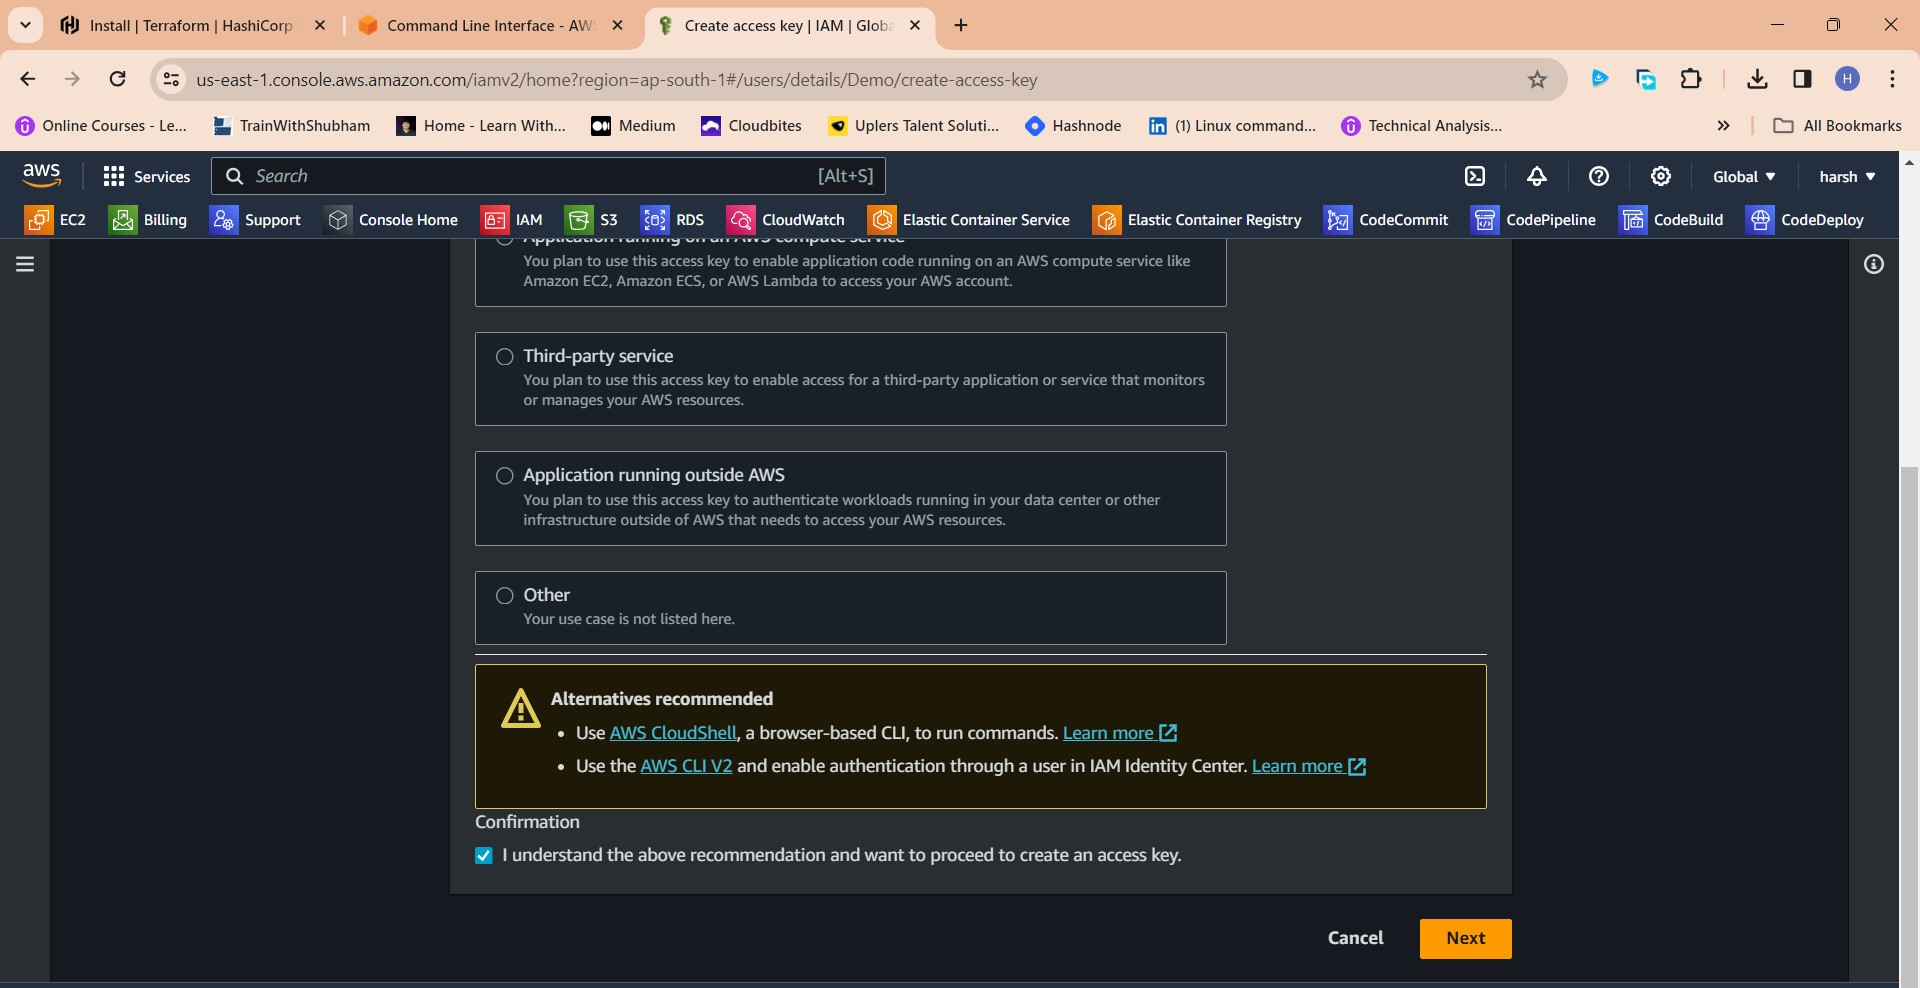
Click "Create access key"

Click this radio button with the CLI

Agree to terms

Click Next

Click "Create access key"

Download .csv file

Step 4: Aws Configure
Go to vs code or Cmd your wish
COPY
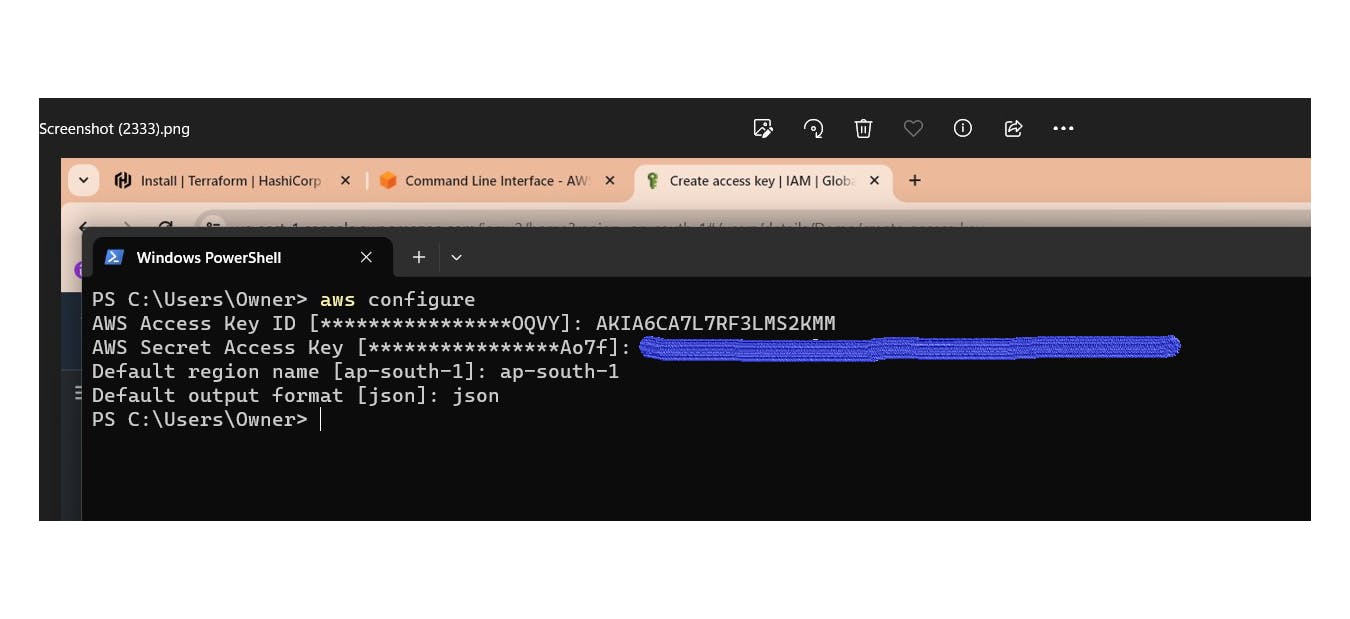
aws configure
Provide your Aws Access key and Secret Access key

Step 5: Terraform files and Provision
terraform {
  required_providers {
    aws = {
      source  = "hashicorp/aws"
      version = "~> 5.0"
    }
  }
}

# Configure the AWS Provider
provider "aws" {
  region = "ap-south-1"  #change your region
}
resource "aws_iam_role" "eks_cluster" {
  name = "eks-cluster-role"

  assume_role_policy = jsonencode({
    Version = "2012-10-17"
    Statement = [
      {
        Action = "sts:AssumeRole"
        Effect = "Allow"
        Principal = {
          Service = "eks.amazonaws.com"
        }
      }
    ]
  })
}

resource "aws_iam_policy_attachment" "eks_cluster_policy" {
  name       = "eks-cluster-policy"
  roles      = [aws_iam_role.eks_cluster.name]
  policy_arn = "arn:aws:iam::aws:policy/AmazonEKSClusterPolicy"
}

# Get default VPC id
data "aws_vpc" "default" {
  default = true
}

# Get public subnets in VPC
data "aws_subnets" "public" {
  filter {
    name   = "vpc-id"
    values = [data.aws_vpc.default.id]
  }
}

resource "aws_eks_cluster" "eks" {
  name     = "my-eks-cluster"
  role_arn = aws_iam_role.eks_cluster.arn

  vpc_config {
    subnet_ids = data.aws_subnets.public.ids
  }
}

resource "aws_iam_role" "example" {
  name = "eks-node-group-example"

  assume_role_policy = jsonencode({
    Statement = [{
      Action = "sts:AssumeRole"
      Effect = "Allow"
      Principal = {
        Service = "ec2.amazonaws.com"
      }
    }]
    Version = "2012-10-17"
  })
}

resource "aws_iam_role_policy_attachment" "example-AmazonEKSWorkerNodePolicy" {
  policy_arn = "arn:aws:iam::aws:policy/AmazonEKSWorkerNodePolicy"
  role       = aws_iam_role.example.name
}

resource "aws_iam_role_policy_attachment" "example-AmazonEKS_CNI_Policy" {
  policy_arn = "arn:aws:iam::aws:policy/AmazonEKS_CNI_Policy"
  role       = aws_iam_role.example.name
}

resource "aws_iam_role_policy_attachment" "example-AmazonEC2ContainerRegistryReadOnly" {
  policy_arn = "arn:aws:iam::aws:policy/AmazonEC2ContainerRegistryReadOnly"
  role       = aws_iam_role.example.name
}

# Create managed node group
resource "aws_eks_node_group" "example" {
  cluster_name    = aws_eks_cluster.eks.name
  node_group_name = "managed-nodes"
  node_role_arn   = aws_iam_role.example.arn

  subnet_ids = data.aws_subnets.public.ids
  scaling_config {
    desired_size = 1
    max_size     = 2
    min_size     = 1
  }
  instance_types = ["t2.micro"]

  depends_on = [
    aws_iam_role_policy_attachment.example-AmazonEKSWorkerNodePolicy,
    aws_iam_role_policy_attachment.example-AmazonEKS_CNI_Policy,
    aws_iam_role_policy_attachment.example-AmazonEC2ContainerRegistryReadOnly,
    aws_eks_cluster.eks
  ]
}
Let's break down the Terraform configuration code into simpler terms:
Let's break down the Terraform configuration code into simpler terms:
- AWS IAM Role for EKS Cluster:
This section creates an IAM (Identity and Access Management) role for your EKS cluster.
The role allows the EKS service to assume it, which means EKS can perform certain actions using this role.
The role is attached to a policy named "AmazonEKSClusterPolicy."
- Default VPC and Public Subnets:
Here, we retrieve information about the default VPC and its public subnets.
The default VPC is where your EKS cluster will be deployed.
We identify the public subnets within the VPC.
- AWS EKS Cluster:
This part creates the EKS cluster itself.
It uses the IAM role created earlier and deploys the cluster in the default VPC's public subnets.
- IAM Role for EKS Node Group:
Another IAM role is created, which is meant for the worker nodes in your EKS cluster.
This role allows EC2 instances (worker nodes) to communicate with the EKS cluster.
- Attachment of Policies:
Various policies, such as "AmazonEKSWorkerNodePolicy," "AmazonEKS_CNI_Policy," and "AmazonEC2ContainerRegistryReadOnly," are attached to the worker node role.
These policies grant permissions to the worker nodes for necessary actions.
- Managed Node Group:
The EKS node group represents the worker nodes in your cluster.
It specifies the desired number of nodes, instance types, and other configurations.
The group is associated with the EKS cluster, the role of worker nodes, and the public subnets.
In vs code use the below commands to provision
terraform init
terraform validate
terraform plan
terraform apply
Once this is done you will see EKS cluster is created in the Aws console
In the cluster, click on Cloud shell

Now it will open a cloud shell to run commands and update Kubernetes configuration

Run this command
aws eks update-kubeconfig --name <cluster-name> --region <cluster-region>
Now add your IAM credentials that were created. Not to get an error like this

Now provide
aws configure #add your credentials

If you provide this command now you can see your nodes
kubectl get nodes

To Destroy
terraform destroy
In a Nutshell:
The Terraform code we've shared serves as your magic wand for orchestrating the creation of an AWS EKS cluster. It's a one-stop solution, crafting the essential IAM roles, policies, and configurations like a well-conducted symphony. This Infrastructure as Code (IaC) approach offers you the ability to efficiently manage and scale your containerized applications in an organized, secure, and automated manner.
Why Terraform Matters:
Using Terraform to provision your EKS cluster isn't just about convenience; it's a game-changer. It simplifies the setup process, guarantees consistency, and ensures your infrastructure is reproducible and adaptable to your evolving needs. The IAM roles and policies meticulously set up in this code give your EKS cluster an impenetrable fortress, bolstering its security.
Endless Possibilities:
Keep in mind that what we've presented here is just the tip of the iceberg. EKS and Terraform offer a treasure trove of configuration options to tailor your cluster to any requirement. Whether you're crafting a development playground or preparing for a production-ready spectacle, the principles outlined here serve as the cornerstone for your EKS adventure.
Keep Exploring:
If you've found this tutorial to be a helpful overture, consider it an invitation to dive deeper. Experiment with diverse configurations, keep your finger on the pulse of the latest AWS and Terraform developments. Building containerized applications on AWS EKS with Terraform is a dynamic symphony, and your continuous learning is the conductor's baton to harness its full potential for your projects.
Happy Orchestrating! 🎶
